
Textured and Layered Pansy Cards With The Crafters Workshop Stencil
This stunning die from Paper Rose needed an equally stunning background.

Pansies are one of my favorite flowers. My Opa (grandfather) used to grow them all the time. And because of that, each spring I plant pansies in his honor. And when I saw this pansy die from Paper Rose, I squealed with delight over it and clicked the "Add to Cart" button so fast!

I purchased these dies a while back but needed a background just as stunning as this die. And when The Crafters Workshop sent me a bunch of their stencil butters and stencils, I knew I had the perfect textured background that I could create! You can watch my process video on my Instagram below.
Besides this tutorial, I hope the biggest takeaway you have from this project is that it's okay to buy a die that you really love but don't know what to do with yet. It's okay to have it sit there for a bit and when inspiration strikes, you'll be ready with that die at the hand! And dies are something that you can use over and over again, so you should never feel guilty about buying a die you love!

I started out by placing the Slimline Circular Rings stencil over a piece of solar white slimline card front and held it in place with some mint tape. To create the soft purple butter, I actually mixed together two of TCW's lovely stencil butters- denim and pearl white. I grabbed about equal parts to create the mix. I applied the custom butter through the stencil with their palette knife. I had some custom butter left over so I decided to make another card. I needed just a little bit more stencil butter so I this time, I just added the pearl white to my already custom mix for a slightly lighter shade.

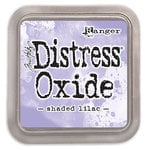
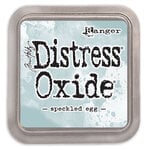
As the backgrounds dried, I got to work on the die cuts. I blended Distress Oxide Ink onto a piece of solar white cardstock, keeping the Speckled Egg and Shaded Lilac separate from one another. I splattered them with a tiny bit of water and dried the ink. I then cut out the petals of the pansy (the flower centers are part of the main die so those get cut out at the same time). I cut out two each from the purple and the blue.

To add a little bit of dimension to these petals, I start by inking the edges of the flower petals with Distress Oxide in Faded Jeans. I set these aside to continue inking and die cutting some leaves, but when I come back to these, I use a shaping kit to add even more dimension to the flower petals.

For some leaves, I inked some more white cardstock with the Faded Jeans. I splatter and dry it then cut out eight of one of the Delicate Leaves dies, so that I can have four of these die cuts per card. I end up creating some more leaves later on when I realize I need a bit of green, but more on that in a minute.

Next I die cut out two sets of nested circles that fit perfectly in the center of this stencil. This is where I decide I needed a little bit of green to add a pop of color to this otherwise monochromatic project. With the white cardstock that is left, I spread a thin layer of the Mint Pops of Color and set it aside to dry.

While the Pops of Color is drying so I move on to assembling the pansies. I add dimension with the shaping tools then glue the smaller petals to the larger petal die using Collage Medium. I pair opposite colors with one another like you see in so many pansy varieties.

Once those were assembled, I popped a piece of foam adhesive onto the back of each pansy and then added the flower centers, selecting the opposite color for the larger petal die cut. The foam adhesive grips these little die cut pieces right in place.

I decided that I needed just little more dimension and texture so I mist the two larger circles with water and emboss them with the Engraved 3D embossing folder from Tim Holtz. Once this was done, the Pops was done drying and I die cut out four pansy leaves and four leaves from another die in the Delicate Leaves set.

To assemble, I placed two blue leaves in the center, with one pointing up and the other pointing down. I then added the embossed circles over them right in the center with foam adhesive. This adheres the leaf dies in place as well. I then layered on two green and two blue leaves on top of the embossed circle. I added foam adhesive to smooth circles and popped them over this second layer of leaves. I peeled the backing off the foam on the pansies and glued them down. To add the green pansy leaves, I glued them down with a little bit of Collage Medium.

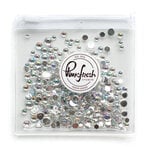
I needed some sentiments for these cards so I stamped out two small sentiments using the Wordfetti Best Day Ever stamp set the Faded Jeans Distress Oxide. I cut the sentiments out by hand and distressed the edges with a metal ruler. I added both with a little bit of 1/8 inch foam adhesive. To finish off the card, I added some iridescent gems from Pinkfresh. Hope you enjoyed this tutorial and until next time, Happy Crafting!
Shop the Supplies:
Scrapbook.com
I am an affiliate with Scrapbook.com. When you shop the links below, I receive a small commission from the affiliate, at no additional cost to you. This helps me balance the costs of the time and love I put into my projects and blog so I can continue to share my ideas with you for FREE. If you shop the links, thank you! I greatly appreciate it.
Below are products that I used or similar products.


2 comments
Those turned out beautifully!!
ReplyDeleteThank you so much!
DeleteI'd love to hear your thoughts!