
Velveteen Rabbit Inspired Tag with Tim Holtz Sizzix Bunny Stitch & Mini Brushstroke Flowers Die Sets
There is nothing quite like a sweet bunny tag to adorn an Easter or Spring present.

Happy Tim Holtz Sizzix release day! I want to give a big shoutout to Scrapbook.com for sending me some of the dies in this release to make some projects to help inspire all of you! I used two of the new dies, Bunny Stitch and Mini Brushstroke Flowers, to make this sweet little tag.

When I saw the sweet little stitched bunnies, it reminded me of the classic children's story, the Velveteen Rabbit. There were a few things that I knew this project needed. The first was that the bunny needed to be soft and velvety. The second was that this tag had to have some pretty flowers on it so my rabbit could be sitting a spring garden in full bloom.

Let's hop right into my tutorial (pun intended)! I knew I wanted to have a patterned paper as the background of the tag, but I wasn't sure which one I wanted when I started on this project. So I started by making my bunny. I cut the shadow layer and stitches from black cardstock. Then I chose the white velvet paper from Doodlebug to cut the top layer of the bunny from. I also cut out the two heart layers from some pink cardstock.

I added some dimension and well-worn love to the white velvet layer of the rabbit using Distress Ink in tea dye. I loaded up my Tim Holtz blending brush and gently swirled it over the edges of the velvet die cut. I glued all of the layers of the bunny and heart together using Distress Collage Medium. This adhesive is great for all kinds of things, from metal to velvet paper, so don't worry about those little X stitches--they'll stay stuck down even on the velvet cardstock! What I love about these little stitches is that they are separate and can be layered on top of the die any where you like--or you can skip these little stitches for a less vintage look. But I think they add character to this little guy.

Once the bunny was cut and assembled, I was able to hold him up over various patterned papers to see what I liked best. I had the Sherbet patterned paper pad in mind because of it's sweet pastel spring color palette. I ended up choosing this heart patterned paper as it wasn't too busy and matched the little heart my rabbit is holding. I used the Nested Tags die set to cut my tag out.

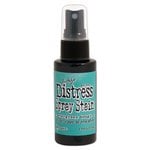
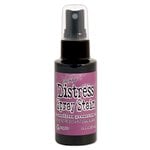
I then went on a Distress background making spree. I created one background for every hue of the rainbow, from pink to purple! I combined Distress Spray Stains, Distress Oxide Sprays and Distress Mica Stains for a wonderfully vintaged look on each background (I used mixed media heavystock to make my backgrounds on). For this project, I used the pink, coral, orange, yellow, green, teal and purple backgrounds.
I shared how I organize my backgrounds on Instagram. I first flatten my backgrounds by running them through my Minc machine. Then I write down all of the sprays I used for a particular background onto a piece of Mint Tape and stick that tape to the back of the background. Whenever I go to use that background for a project, I'll be able to see what sprays I used without having to commit it to memory! Here are the sprays I used for this project:

Pink Background: Kitsch Flamingo stain, Kitsch Flamingo oxide, Cocktail Party
Coral Background: Saltwater Taffy stain, Saltwater Taffy oxide, Cocktail Party, Jack-o-lantern
Yellow Background: Fossilized Amber stain, Fossilized Amber oxide, Harvest Moon, Jack-o-lantern
Orange Background: Crackling Campfire stain, Crackling Campfire oxide, Jack-o-lantern, Tart Cranberry
Teal Background: Salvaged Patina stain, Salvaged Patina oxide, Shiny Bauble, Merry Mint
Purple Background: Seedless Preserves stain, Seedless Preserves oxide, Fortune Teller, Cocktail Party

Once all of my backgrounds were dry and flattened out, I cut a ton of flowers from the Mini Brushstroke Flowers die set. The greens are separate from the flowers in this set, so you get to make your own little bouquets! I cut more flowers and greens than I ended up using, but that just means I'll have some flowers ready for the next project! I used Distress Collage Medium to adhere all the little layers of the flowers and greens together.

I assembled my tag by adding the bunny on first, adhering him with foam adhesive. I then layered on the flowers and greens, using a mix of Distress Collage Medium and foam adhesive to create layers and dimension.

I stamped out a sentiment on a scrap of the same patterned paper used to make the tag using Distress Oxide in kitsch flamingo. I cut it into a little banner and distressed the edges. I then cut a small butterfly from the pink background, bent the wings and added the tag to the butterfly. I punched a small hole in one of the top wings and then tied it on with some twine and ribbon. For a finishing touch, I added some pink gems for a little bit more sparkle. Until next time, happy crafting!
Adrienne
Shop the Supplies:
Scrapbook.com
I am an affiliate with Scrapbook.com. When you shop the links below, I receive a small commission from the affiliate, at no additional cost to you. This helps me balance the costs of the time and love I put into my projects and blog so I can continue to share my ideas with you for FREE. If you shop the links, thank you! I greatly appreciate it.
Below are products that I used for this project.


0 comments
I'd love to hear your thoughts!