
Simple Spooky Bat + Potion Halloween Banner Tutorial
Spooky Season deserves a fun piece of decor that you can hang up!

In the past, I’ve made some pretty complicated banners, with lots of layered dies, textiles and more. But this banner is really simple and came together pretty quickly. The Halloween Bats die and the new Magic Potion stencil are the perfect combination for a Spooky Season banner!

I selected two sizes from the Nested Triangle Banner die set. Cut the larger one from black cardstock and the smaller one from white cardstock. Lay the stencil over your white banner pieces, holding it in place with mint tape.

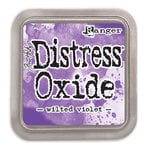
Blend the Distress Oxide of your choice through your stencil. I chose villainous potion and wilted violet to create an ombré effect. Once all of your banners are inked, give them a quick shot with your heat tool to set your ink.

Adhere your white layer onto your black layer then punch holes and set some eyelets into each banner. Cut out some bats from black cardstock, one for each banner. Choose a heart from the Nested Hearts die set that fits nicely over the size of bat you chose and cut it out from orange cardstock, again, one for each banner.

Cut out the word Spooky using the Basic Bold Alpha die set from some black glitter paper. Then cut out the same word from black cardstock two more times. Using Smart Glue, adhere your layers of letters together. Then glue each letter to an orange heart.

To assemble the banners, adhere each heart to a bat with foam adhesive and then each bat to the center of a banner with the same foam adhesive.

Glue on a few gems to each banner and then string your pennants onto some ribbon! I just love how fun this banner turned out and that little bit of sparkle just adds that touch of glam. Until next time, happy crafting!
Adrienne
Shop the Supplies:
Scrapbook.com
I am an affiliate with Scrapbook.com. When you shop the links below, I receive a small commission from the affiliate, at no additional cost to you. This helps me balance the costs of the time and love I put into my projects and blog so I can continue to share my ideas with you for FREE. If you shop the links, thank you! I greatly appreciate it.
Below are products that I used for this project.


0 comments
I'd love to hear your thoughts!