
A Different Way to Use Your Stencils
I’m always trying to find new and different ways to use supplies. For this project, I’ve got a fun way to use your stencils that perhaps you haven’t thought about yet—or at least in a while.

Last time I traced a stencil I must have been in grade school. And this single layer stencil I received from Scrapbook.com has lots of detail, deserved to have more than just an ombré wash of ink go over it. But I didn’t want to have to mask off lots of things for each color. So instead, I decided to trace my stencil!

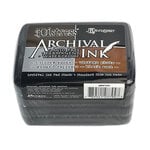
Tracing your stencil also gives you a good opportunity to stamp out an image in the center along with a sentiment. I selected this sweet little mummy from the Boo-tiful stamp set. In order to give your stamped images a dose of watercolor, you want to either emboss it or stamp in archival ink. I chose to keep the traced look by stamping her in Distress Archival Ink in black soot.

Place your image stamp in the center of your card front and give a good impression. I like to use a stamping platform, just in case my first impression doesn’t come out perfect. Then stamp your sentiment. I chose the Happy Halloween from the Celebrate Expressions stamp set. I also embossed this in Distress Archival Ink but used villainous potion for a dose of color.

Next, place your stencil over your card front, getting it lined up how you like and holding it in place with some mint tape. Using a journaling pen, trace the stencil around your stamped image and sentiment. I used the Scrapbook.com journaling pen, and while it was pretty color fast with a little setting time, I decided to keep my watercolor away from the black lines of my traced stencil. It also meant that I didn’t have to be super careful and perfect in my coloring.

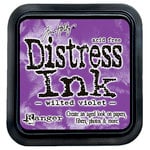
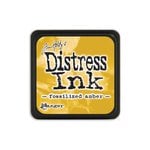
Press the Distress Inks of your choice onto your glass media mat. (You can also use a small drop of reinker instead if you want.) I used fossilized amber, crackling campfire, twisted citron, wilted violet and hickory smoke. Color the inside of an element with your water brush marker or a wet paintbrush first to get a thin wash of color like I made. Then add a bit of color to your brush and paint it on. I worked one color at a time.

To help the cute mummy stand out, add some color to her bow and then a bit to her other bandages, letting the color run out as you go to create an ombré effect. You can layer with more ink to add more shadows to her bow. Once the card is dry, add a small gem to the center of her bow. I used a bit of 2 inch foam adhesive to adhere the card front onto a card base. You can directly work on a card base if you want, but I prefer the dimension the foam adhesive gives. I hope this inspires you to use your stencils in new ways; until next time, happy crafting!
Adrienne
Shop the Supplies:
Scrapbook.com
I am an affiliate with Scrapbook.com. When you shop the links below, I receive a small commission from the affiliate, at no additional cost to you. This helps me balance the costs of the time and love I put into my projects and blog so I can continue to share my ideas with you for FREE. If you shop the links, thank you! I greatly appreciate it.
Below are products that I used or similar products.


2 comments
I have stamped for 40yrs then I had hand surgery & I thought I would never stamp again. So I gave everything away including my cabinets full of stamps, others were full supplies, my dream box I just got. Then I healed I can stamp. Now rebuying everything. Sorry, I love ❤️ your card. I am going to do it.
ReplyDeleteSo happy to be able to re-inspire you and that you are doing well!
DeleteI'd love to hear your thoughts!