
Quick and Easy Trick or Treat Tag
Halloween treats pair well with a handmade gift tag for that special little trick or treater.

I've always dreamed of hosting a Halloween party but just haven't had a good excuse to throw one yet. For years I've been pinning food ideas, decor ideas and more for years now. And even though I'm not throwing a party this year, I do have a little niece who is much deserving of a cute treat tin with a tag--plus it gives me a chance to test out adorable ideas for a future party. (Don't tell my niece she's my guinea pig, lol!)

And luck would have it that I recently received a package of goodies from Scrapbook.com full of a bunch of new stencils, including this fun Pumpkin Patch stencil with some cute jack-o-lanterns. Armed with the stencil and some other Scrapbook.com supplies, along with a treat tin from the dollar store, I got started on my project.

Normally when most of us think about using a stencil, we think abut using the whole thing to create a background. But I wanted to try something different. This time, I used one element from the stencil, and this particular stencil is the perfect candidate because the elements are larger and “self contained.” In other words, it’s easy to section off a single jack-o-lantern.

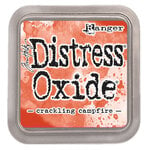
To start, cut out a tag from some white cardstock using the Nested Tags die set. I chose the one that is around 5 and a half inches long. Choose a jack-o-lantern from the stencil and place the orange layer in the bottom corner, adhering the tag to the stencil with some mint tape to keep it in place and to mask off the areas you don’t want ink in. Using a domed foam blender or blending brush of your choice, apply Distress Oxide in crackling campfire through the stencil. Remove the stencil and give your pumpkin a blast of air with your heat tool to set the Distress Oxide Ink.

I wanted a little bit of the stars and circles from the layering stencil in purple on the tag. Simply place your stencil over, lining the elements up where you want them and ink. Mask off with mint tape if needed. I moved my stencil around to get the elements at the top of the tag exactly where I wanted them.

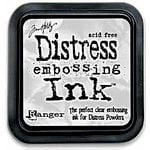
Next, use a little bit of a static pad on your pumpkin then take the layering stencil again and line it up, attaching again with mint tape and masking off areas you don’t want ink getting in. Using the Distress Embossing Ink Dabber, I dabbed on embossing ink through the stencil for the jack-o-lantern’s face. Peel off the stencil (I like to put ones with embossing ink or paint in water right away) and then sprinkle on black embossing powder and heat it to create magic! To add the sentiment, use embossing ink and the same black embossing powder that you used for the jack-o-lantern’s face. I used the trick or treat sentiment from the Slimline Spiderweb stamp set.

For a simple mixed media effect, I water down a drop of Pops of Color and splatter it over my projects with a paintbrush. I chose the Gloss Black and the Deep Orchid, working with one at a time. Simply squeeze a small drop into a palette then add a drop or two of water. Load up your paintbrush and hold it over your project then gently tap the paintbrush. If you’ve never done this before, try it out on a scrap piece of paper and experiment with holding the brush closer and further away from the paper to see the different sized drops it creates!

It doesn’t take long for thinned out Pops of Color to dry, but once it does, you can add a few gems to your project for a sparkly touch. Because I was gluing some of the gems onto a glossy surface (the embossing), I used Ranger’s Glossy Accents to glue the gems in place. It dries glossy so if there was any squish out, you won’t ruin the effect of the embossing powder.

I cut a few trims, including some Tim Holtz orange velvet trim and looped it through the top of the tag. I then made a nice little gingham bow. To get the perfect bow on a project like this, I make the bow off the project and then stitch it on with a few hand stitches. This allows me to get the bow to display nice and get it on exactly where I want it. Trim the ends of your bow to prevent fraying.

I wanted to add a little fun center to the bow. Cut out a small bat from the Halloween Bats die set from some black cardstock. Then, punch three holes down the center of the bat with your needle and sew him on with a few quick stitches.

Fill up your treat tin with your favorite seasonal treats. I filled up my treat tin with some candies, caramel corn and of course, some candy corn! They are all super sweet, just like my niece loves. And then clip your tag on to your tin!
If you are making for a crowd, section out each step and do each tag with that step, rather than completing one tag from start to finish. It will make the process much more streamlined and go a lot faster. Let me know what your favorite Halloween treats are (I love anything chocolate) in the comments below! Until next time, happy crafting!
Adrienne
Shop the Supplies:
Scrapbook.com
I am an affiliate with Scrapbook.com. When you shop the links below, I receive a small commission from the affiliate, at no additional cost to you. This helps me balance the costs of the time and love I put into my projects and blog so I can continue to share my ideas with you for FREE. If you shop the links, thank you! I greatly appreciate it.
Below are products that I used for this project.


0 comments
I'd love to hear your thoughts!