
The Cottage Witch: A Tim Holtz Vignette
Spooky Season just isn't complete without at least one Tim Holtz Halloween vignette!

Last year I absolutely adored how my Devious Botanist project came out last year and wanted to make another project with the second coffin I purchased (you can still pick these coffins up on Amazon white quite a few other things from last year's release--be sure to check out the list of products at the bottom). I realized that if I turned it the other way and stuck the two side by side, it would sort of look like bat wings. I still need to dig my previous project out of storage so I can photograph them together, but that may be another week or two yet, so I'm sharing just the new project on its own in photos for now.

Last year's project had a story behind it--all the best projects do, and so I wanted another story for this year's project. This is The Cottage Witch. She lives deep in the same forest as The Devious Botanist. In front of her cottage is a mysterious graveyard-turned-garden where she grows her pumpkins, flowers and herbs. Paired with her magical incantations, she creates spells in her cauldron that bubbles and froths. She casts spells for bountiful harvests and spiritual peace.

She is a collector of bones and crystals and keeps detailed notes in her grimoire. She doesn't have many visitors and keeps her gate locked. Only the ravens and other forest creatures can get past her barrier spells to visit her. Why does she choose to live alone? She was shunned by a local village. Her cottage is her refuge. She has spied The Devious Botanist through the forest and keeps her distance. But he is quite mysterious indeed...

I wanted to keep some of the same elements for this project as I did with the last, such as the hardware heads and the backdrops around the outside and inside of the coffin. And I also wanted to use up some of my Halloween stash from previous years and this was a good excuse to do just that. So let's get into this walkthrough tutorial! I started by cutting all of my backdrops to fit around the outside and the backs of the inside. For the inside, this is a bit of trial and error and required trimming edges down a little at a time. I did multiple dry fits to check, trimming until it was just right.

Once the dry fit was good, I distressed the edges of the papers and then sewed along all of the edges. To glue them down, I used Distress Collage Medium. As this dried, I pulled out a couple of pumpkins and painted them with a mixture of Distress Paint in speckled egg and salvaged patina. this mix creates the perfect color of blue-green heirloom pumpkin! I gave each a little spritz and then set them aside to dry.

I pulled out two tombstones, one from last year and one of the older ones from years past (my last one of this kind), adding some remnant rubs to the fronts, Distress Grit Paste in crypt, and dry brushing just a bit of white paint on them to highlight the details and edges. Once the pumpkins where dry, I dry brushed them with the same white paint.

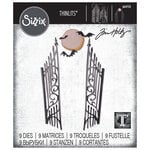
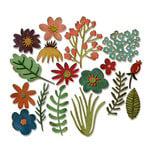
Next I pulled out a metal gate and a lock. I applied crypt paste to them to grunge them up. While that dried, I pulled out some leftover yellow inked cardstock from my Ukraine Sunflower card to cut out a full moon from the Gate Keeper die. I also cut the bats from black kraftstock. While I was die cutting, I cut a few Funky Florals to create a bunch of drying flowers and herbs. I tied a little twine around the stems and set these aside. I also cut out a tiny raven from the Regions Beyond die set.

Next I glued a candle onto a candle stand and one onto a skull. I added some Reneabouquets fairy opal Beautiful Beads to the skull's eye sockets. I then glued a cauldron onto one of the candlesticks after adding a bit of crypt paste to the cauldron. I sort of liked the pedestaled look of it. I then hot glued some bubbles and a few iridescent Reneabouquets moonstone Beautiful Beads into the cauldron.

I then selected a baseboard piece that looked a bit like a piece of artwork a witch might have in her home. I also pulled out book ephemera piece and created a grimoire for the witch, adding a remnant rub of a moth to the center page and stamping some script from the Entomology stamp set. The way I glued it in you ended up not being able to see the cover, but that's okay!

Once everything was dried, it was time to assemble everything in my coffin vignette. I created the cemetery scene on the smaller side, stacking the pumpkins and another skull in front of one of the tombstones. I glued in the moon and bats to the sky behind then added the raven with a dab of hot glue to one of the pumpkins. I then glued in moss on the ground with hot glue and added a few bones here and there. I snapped a few in half by scoring them with my scissors and then breaking them the rest of the way.

On the other side is the inside of the cottage. I placed in the candle on the candlestick, then glued down the chipboard "artwork." I then added the skull with the candle and the bubbling cauldron. I glued down the grimoire and the drying bunch of flowers and herbs. Next I tucked in a bone and a tiny amethyst crystal.

The Devious Botanist had some stickers on the main back wall and I wanted to do the same for this one to tie them together. I chose a few lines from the Halloween Sticker Book that were from Shakespeare's McBeth, the famous chant from the three witches. To create the wavy effect with the stickers, I stuck them to white cardstock and then cut them out. I rolled them into waves on a round tool handle and then adhered them into my project with foam strips.

The finishing touch was trimming my threads, adding the gate and the lock with a chain of jump rings, and then adding on hardware heads to the front edges with a bit of Collage Medium.
Shop the Supplies:
Reneabouquets
Scrapbook.com
I am an affiliate with Scrapbook.com and Amazon. When you shop the links below, I receive a small commission from the affiliate, at no additional cost to you. This helps me balance the costs of the time and love I put into my projects and blog so I can continue to share my ideas with you for FREE. If you shop the links, thank you! I greatly appreciate it.
Below are some of the products that I used or similar products.


0 comments
I'd love to hear your thoughts!