
Christmas in July: Standout Simple Gold and Black Christmas Card
Sometimes you just need a quick and simple card, especially during the holidays!


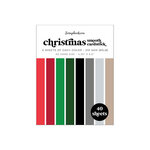
Start by trimming down a piece of black cardstock to 4 x 5.25 inches to fit on the front of an A2 card base. I like to use the black from the A2 Christmas pad from Scrapbook.com because you trim just a little bit off and the smooth texture is great for ink splattering.

Next, squire a small amount of metallic gold ink from the Scrapbook.com re-inker into a palette and add a couple of drops of water. Give it a swirl with a paintbrush and then splatter your black card front by tapping your paintbrush until you are happy with the amount of ink splatters. (Tip: for bigger splatters, place your paintbrush closer to the cardstock, for smaller splatters, place your paintbrush further away).
Once the ink is dry, tape your card front down to your work surface with a little mint tape. This will help you keep your cardstock still when it comes time to place the stickers on.Then cut out the word Merry from some red cardstock. (You can add a double sided adhesive sheet to the back before cutting to turn your die cut into a sticker if you want.) Hang onto this die cut--we'll need it for planning the spacing the gold letters nicely.

For the word Christmas, I used some gold foil stickers from Scrapbook.com. To help me get them aligned and straight as possible I stuck them onto a ruler first. This helps me get the letters spaced evenly without worrying about placing the first one in just the right spot on the cardstock. (Be sure to use a plastic ruler instead of a wooden ruler.) Use your Merry die cut to make sure that the word Christmas is spaced out as much as you want. Above you can see how I tested it all out over the top of the card front to see how it would fit.

Then place your ruler over your black card front and line up your gold foil sticker letters so they are centered on the card front. Press down on the top of the stickers to adhere them partially to the cardstock. To help me pop the stickers off of the ruler, I used my die pick, but a pair of needle tweezers or a pin will also do the trick. Once they are all unstuck from the ruler, remove the ruler and finish sticking your letters down to the front of the card.

I then used some Smart Glue to adhere the word Merry over the gold foil stickers. To finish this off, I used some adhesive foam, 1 and 2 inches wide, to adhere the black card front to the white card base and then added 3 gold glitter enamel dots that I had tucked away in my stash.

This black and gold card will definitely stand out among the rest of the Christmas cards! (I don't even mind a few of the ink smudges that happened.) Until next time, happy crafting!
Adrienne
Shop the Supplies:
Scrapbook.com
I am an affiliate with Scrapbook.com. When you shop the links below, I receive a small commission from the affiliate, at no additional cost to you. This helps me balance the costs of the time and love I put into my projects and blog so I can continue to share my ideas with you for FREE. If you shop the links, thank you! I greatly appreciate it.
Below are products that I used or similar products.


0 comments
I'd love to hear your thoughts!