
Christmas in July: Gold, Red & Green Poinsettia Tag
As a classical musician, Christmas can be overwhelming. You start rehearsing music in early October, sometimes even in September. Holiday music becomes inescapable at stores. You start humming Sleigh Ride absentmindedly. And Christmas in July just piles on. But this year, it's different for me.

My music groups are just now getting back to playing together after 15 months of the pandemic keeping us apart. And I cannot tell you just how excited I am to actually play Christmas music this year! In fact, I'm downright thrilled! And Scrapbook.com's Christmas in July sale is getting me even more excited for the upcoming holiday season!

And speaking of Scrapbook.com, a ton of different supplies are currently on sale and they have this amazing little Freebie right now (while supplies last) [UPDATE: this die is now Out of Stock]. Isn't this poinsettia from Creative Expressions just the cutest thing?! (You know I love flowers, so I couldn't resist this die!) What I love about this particular die is that it stamps and cuts all in one pass in your die cut machine! So cool!

Now let's get to my tutorial using this adorable die! I started by cutting out a stitched tag from a sheet of olive toned cardstock. I then used Distress Ink in Rustic Wilderness around the edges to highlight the embossed stitches.

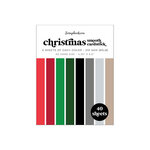
Next I got my die cut machine ready to run the poinsettia through. The key is to get your cutting plates and cardstock ready so that you can cut the die before the ink dries. So I got my plates set up in my machine and then placed a piece of dark red cardstock on my Magic Mat.
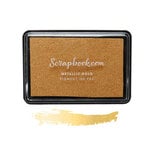
I then used the Scrapbook.com metallic gold ink and patted it onto the poinsettia die. Then I quickly set it on top of my red cardstock, stuck another cutting pad on top and ran it through my Vagabond. I really love how the gold stands out on the deep red cardstock!

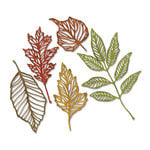
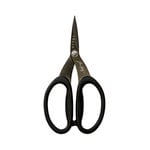
Next I cut some Tim Holtz skeleton leaves from a dark green cardstock. I didn't worry about popping all of the offcuts out because I like the way it looks, but you can certainly do what looks best to you! I Then I used some paper shaping tools to add a little dimension to the poinsettia die (make sure the ink is dry before you do this or you might accidentally smudge it) and to the leaves.

I snipped the skeleton leaves apart and glued them on using a little Distress Collage Medium. I then glued down a bit of lace using heavy body gel. I put some foam adhesive on the back of the poinsettia and then added a small dollop of heavy body gel to the foam (this will help pop the poinsettia up more but still give you the grip you need to adhere it over the lace). Before placing the poinsettia on the tag, I added a nest of gold thread underneath.

To finish off the tag, I added some gems to the center of the poinsettia, a sentiment sticker and some ribbon to the top of the tag! I think this tag turned out so sweet. It has the vintage vibes that I love with a hint of lace and plenty of shimmer and shine!
Don't forget to head over to Scrapbook.com to stock up on supplies and score this sweet little freebie before it's gone! Until next time, happy crafting!
Adrienne
Shop the Supplies:
I am an affiliate with Scrapbook.com. When you shop the links below, I receive a small commission from the affiliate, at no additional cost to you. This helps me balance the costs of the time and love I put into my projects and blog so I can continue to share my ideas with you for FREE. If you shop the links, thank you! I greatly appreciate it.
Below are products that I used or similar products.


0 comments
I'd love to hear your thoughts!