
How to Take Amazing Photos of Your Craft Projects: Part 2 - The Design
How you arrange your items for your project photographs is part of taking amazing photos of your creations. But maybe you think you are good at designing your craft project, but not so much the photograph you take of it.

Welcome to the second part of my mini series on how to take amazing photos of your craft projects. I've recently had some questions and positive comments about my own photography and thought I would share my knowledge with all of you. I know it's a bit different than my normal blog, but I want to be a resource for you on every aspect of creating, start to finish!

In my last blog I shared my recommendations for photo backdrops, so be sure to head over to that blog if you missed it. Now back to today's topic--setting up your items for your photograph. First we'll look at items to include (other than your project, of course), some tools to help you set it all up and some design principles when it comes to arranging it all.

Items to Include
I usually include some of the key supplies or tools I used in making my project to add to my photo. These serve in essence as "photo props" and also allows people to get a sense of some of the supplies or tools you used, which I think is helpful for other crafters when wanting to learn more about your project. Some things I've included are inks, scissors and dies just to name a few. These items can also help lead a person's eyes around the photo or to a specific spot in the photo. But we'll get to this more in a bit.
Not only can including these key tools or supplies help inform viewers of your project photos, but it can also add layers and texture to your image, giving it interest. Some textural supplies you could add in your photos include ink blending brushes, gems, lace or ribbon and paper flowers.

Tools to Set It Up
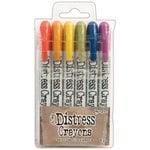
Whether you decide to do a flatly (a shot from overhead, which is great for scrapbook layouts, mixed media canvases and more) or a head-on shot (great for cards or 3D projects that you photograph standing up), there are also a few tools you can use to set your photo up even more. One of these tools is called a styling block. These are essentially items that lift your items up off the photo backdrop. These can be plain blocks hidden under your items (I like to use clear acrylic stamping blocks) or it can be something decorative, like a plate, wood slice, tin carrying case (like the Tim Holtz Distress Crayons tin in the photo above) marble coaster or mini cupcake pedestal. Either way, this brings interest to your photo by adding height and you can also layer items under what is being lifted up, like a sticker book under a handmade card.
Check out how I set up a project for photography in the Instagram Reel below!
Some other tools you might use to create interesting and well designed photos include other items around your house. Silk flowers; doilies; flour sack towels; spoons to hold beads, gems or glitter; empty frames; candlesticks or just about anything that might relate to your project. For example, if you are taking a photo of a Christmas card, you might include some tree ornaments.

Design Principles for Arranging
There are 4 different design principles you can choose from when it comes to how you arrange things for your photo. Some of these design rules will work better for certain types of projects, but for the most part, you can choose from any of the 4 to arrange your items for your photo.

1 | Diagonal
This is a great option for flatlays. Start by placing your project in the center, preferably on a design block. Then arrange your other items diagonally from one corner to the other. This particular design helps lead the viewer's eye from one corner down to the other. Remember, it doesn't have to be a perfectly straight line from one corner of your photo to the other so no need to pull out that ruler!

2 | C Shape
This design arrangement gets its name from the shape the items take and is also great for flatly. But it can also create amazing depth of field for head-on shots as well. Place your project in center then arrange your other items in a c-shape around one corner of your project. If you are doing a head-on shot, make sure that what you have in the foreground (to the front of your project) is low enough that it isn't covering your project up too much.

3 | Grid
This arrangement is perfect for flatlays and as the name suggest, has you laying out your items in a grid-like fashion. If you are photographing multiple cards, ATCs or just want to feature a lot of small supplies and tools, this layout can be extremely helpful. Again, no need to pull out the ruler to make it absolutely straight--unless you really want to, of course!

4 | Eye Level
This is a head-on shot that brings you eye level with your project. For this type of shot, you'll want to set up your project, keeping it pulled out from the "wall" behind it. Photographing your project too close to the background can really compress your depth of field, something you don't want. If you are photographing with a DSLR, get your lens at eye level with your project. If you are photographing on a phone camera, flip your phone upside down so the lens is at the bottom. This will help get the lens more at eye level.

A Couple of Last Things to Consider
Two more things to consider when it comes to photo props and design. The first is to try "the lean." This is a technique in which you lean or prop something up on something else. This is an often used design tool by product and food photographers and works well for paper crafters too! It really draws the eye in to important elements of the photo I often do this with the lids to inks or small jars of embellishments.
The last thing to consider is creating a prop bin for yourself. This is a box of items you can use in photos. Obviously keep your crafting supplies stored where you will use them, but this can apply to anything you specifically buy to use in your photos. This could be empty frames, wood slices, coasters, small vintage spoons and more. This keeps it all handy for you to use whenever you are ready to take some photos.

If you want pick up your own Replica Surfaces to take your project photos on, I have a special link you can shop that will give you a 15% discount! When you shop this link, I also get a small commission from the sale, which helps me continue to provide you amazing tutorials and information, just like this blog post!
Up next in this series is lighting, something I'm sure many of you are very interested in. Happy crafting!
Adrienne
Shop Some of the Scrapbook Supply Items in my Photos:
Reneabouquets
Scrapbook.com
I am an affiliate with Scrapbook.com. When you shop the links below, I receive a small commission from the affiliate, at no additional cost to you. This helps me balance the costs of the time and love I put into my projects and blog so I can continue to share my ideas with you for FREE. If you shop the links, thank you! I greatly appreciate it.


0 comments
I'd love to hear your thoughts!