
The Benefits of Using Paper Tearing + Tips and Tricks
Adding texture to your projects couldn't be easier.

Paper tearing is an easy technique that adds a bunch of texture to your projects. In the past, I've used a torn piece of paper on the corner of my mixed media projects to anchor my embellishments on, but this time, I wanted to create a little window down the center of my mixed media canvas for stenciled texture to peek through.

What makes paper tearing so wonderful isn't just that it's an easy way to get texture, but that it also provides some organic shape to your projects. You never know quite what you'll get until you are done tearing your paper and that is part of the fun!

Here are a few tips that I have for paper tearing in case you haven't tried it out yet:
- Hold your paper down on your work surface with one hand while tearing with the other.
- If you want to tear at a certain point, measure and then make a small tear to mark where you want the tear to begin.
- If you need a particular width for a strip of torn paper, be sure to always add on a half inch to an inch of extra paper in order to give you enough room to hold your paper to tear it.
- The part that you are holding down is the piece that will have the white or core of the paper visible after tearing.
- Experiment with trying to get your paper tears to happen in a particular direction by tearing your paper at different angles.
- Layer different pieces of torn paper together to create a layered look.
- Try adding stitching to your papers for additional interest.
- Try layering lace or other textiles under a piece of torn paper for additional texture.
- If you need it, try a tearing guide!

Now that I've shared a few of my tips be sure to check out my YouTube tutorial video for how I made this mixed media project, which I've embedded blow.
Here are the products you'll need to recreate your own version of this project:
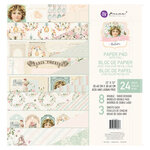
- 12x12 patterned paper | Miel
- Paper flowers | Miel, Itty Bitty Blossoms Pink
- Rub on transfers | Miel
- Charms | Miel, Indigo
- Gems | Miel Sequins Say it in Crystals
- Butterfly | Sweetheart Soft Yellow
- Glitter Glass | Gawdie Girl Pale Pink
- Chipboard | Standard Chipboard
- Stencil | Slimline Mediterranean Ceiling
- Textured stenciling paste | Light & Fluffy Textured Modeling Paste
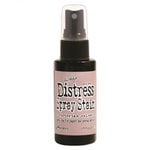
- Distress sprays | Victorian Velvet, Saltwater Taffy, Cocktail Party
- Impasto Paint | Boudoir Pink
- Heavy body gel | Art Basics
- White gesso | Heavy White Gesso
- Water spray Bottle | Distress Sprayer
- Collage Medium | Bottle and Pot
- Foam Adhesive
- Glossy Accents
- Paintbrushes
- Silicone brush
- Palette knife
- Shears
- Resin casts from various moulds (optional)
- Lace (optional)
- Pencil

I really enjoyed pulling the Miel collection from Prima back out of my stash. I love the florals, bees and pastel hues in this collection. I bought a lot of this collection because I love it so much and I think I'll be using this for the Frank Garcia class at Scrapbook.com's SBC Fest this March!

I already bought myself the Memory Hardware album for the class and I can't wait to learn some amazing tips and tricks from Frank about making mini albums!
Don't forget to watch my tutorial video! Until next time, happy crafting!
Adrienne
Shop the Supplies:
Reneabouquets
Tiny Treasures Sweetheart Soft Yellow Butterflies
Gawdie Girl Chunky Glitter Glass in Pale Pink
Similar: White Tear Drop Lace
Scrapbook.com
I am an affiliate with Scrapbook.com. When you shop the links below, I receive a small commission from the affiliate, at no additional cost to you. This helps me balance the costs of the time and love I put into my projects and blog so I can continue to share my ideas with you for FREE. If you shop the links, thank you! I greatly appreciate it.
Below are products that I used or similar products.


0 comments
I'd love to hear your thoughts!