
Groovy Watercolor Floral Tag Tutorial
Groovy, baby! These tags are inspired by rainbow florals of the 60s and 70s!

If you have been following me on my socials or my blog, you'll know that I am obsessed with anything floral! And the Sunny Lane Florals die set was definitely on my wish list and I want to thank Scrapbook.com for sending it and some other supplies to me! The great news is, this die is now available for purchase along with all of the other Sunny Lane products!

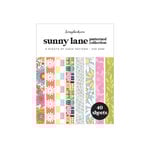
Now let's not waste time and get into this tutorial! First start by cutting out 3 sizes of the Nested A2 Arches from some Holographic paper, Sunny Lane paper and Solar White cardstock. Layer the papers together so they meet at the top center and punch a hole through all three layers to turn them into tags.

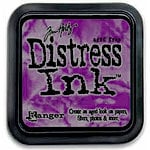
Next, use Distress Inks in a rainbow of hues and a water brush marker to watercolor some backgrounds. I used watercolor paper from Art Philosophy as this stands up to all the water well without warping or disintegrating the paper. I have the 12x12 pad so I chopped the sheets of paper up into 6x6 pieces to create different color sheets. I did one with pink, purple and coral; another that was green, teal and blue; and one that was orange, coral and yellow. Here's a list of the Distress Ink Colors that I used (you can shop all of them at the bottom of this blog post):
- Dusty Concord
- Wilted Violet
- Worn Lipstick
- Kitsch Flamingo
- Saltwater Taffy
- Abandoned Coral
- Crackling Campfire
- Spiced Marmalade
- Mustard Seed
- Fossilized Amber
- Peeled Paint
- Twisted Citron
- Salvaged Patina
- Peacock Feather
- Mermaid Lagoon
- Broken China

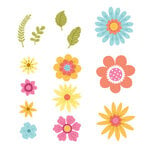
Squish some ink out on your glass media mat and pick up the colors with your water brush marker. Then randomly paint colors on the watercolor paper, allowing the colors to mix and meld where they meet. Once your backgrounds are dry, cut out all your flowers and leaves! I like to use Mint Tape to hold the dies in place as they run through my die cut machine. Pair it up with the Magic Mat for perfect cuts. I had to run some of my dies through twice to get the thicker watercolor paper to cut through all of the way.

Once your flowers and leaves are cut, add dimension to them with some shaping tools. Remember, flower petals and leaves don't always just curl up--sometimes they are a bit wonky. So use the tools to create petals and leaves that curl both up and down for a more lifelike look.

Glue the flower centers down using some Distress Collage Medium, Smart Glue or other favored liquid adhesive. To create even more dimension on the larger flowers, use a small piece of foam adhesive to adhere the two layers together.

Before adding all of your flowers to the white cardstock layer, string your three tag layers together and tie the ribbon or string into a bow. I used some chiffon ribbon and rainbow hemp cord from my stash. For the larger flowers, adhere them in place with more foam adhesive. This will allow you layer the smaller flowers underneath with liquid adhesive. Tuck in some leaves using both liquid and foam adhesive.

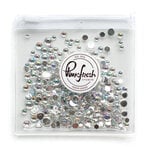
I decided I needed a few small butterflies as well, so I cut some small ones from leftover Holographic paper. Add them with a bit of foam adhesive strips. Then for a finishing touch, add a few iridescent gems to match the holographic paper. Until next time, happy crafting!
Adrienne
Shop the Supplies:
Scrapbook.com
I am an affiliate with Scrapbook.com. When you shop the links below, I receive a small commission from the affiliate, at no additional cost to you. This helps me balance the costs of the time and love I put into my projects and blog so I can continue to share my ideas with you for FREE. If you shop the links, thank you! I greatly appreciate it.
Below are products that I used for this project.


0 comments
I'd love to hear your thoughts!