
Valentine's Mailbox Card with Spellbinders and Scrapbook.com
Who doesn't adore a little love letter for Valentine's Day? I combine products from Spellbinders and Scrapbook.com to create this sweet little card.

I got the Spellbinders Glimmer Hot Foil System for Christmas and picked up the new and improved Platinum 6 (P6) die cut machine last month so I just had to use both of them together to create a sweet Valentine's Day card. And what better than to combine some pretty Spellbinders products with gorgeous cardstock from Scrapbook.com too!

After getting my Glimmer System for Christmas, I gave it a go with my Sizzix Switch. It worked well with the background hot plate that I used, but I didn't like the results as much with the more delicate hot plates. And since Spellbinders makes the Glimmer System and the P6, I knew they would be a match made in heaven.
Besides, I had no die cut machine that didn't require electricity to use it--which is a travesty during a power outage, because what else is a girl to do when you can't use power?! You can see my predicament! You can check out my unboxing video of the P6 below--plus I share the Glimmer System and my most recent Spellbinders haul.
After watching the Glimmer Bootcamp series on YouTube, I realized that an important part of getting a perfect foil is the slow speed with which the hot plate goes through the die cut machine. And since I had no control over the speed the platform goes through with my Switch, I definitely recommend getting a hand-crank die cut machine if you want to use delicate or small hot plates. I also just want to say that the P6 cuts like butter--especially when you pair it with the Scrapbook.com Magic Mat!

Now let's get into this project tutorial! Start by taking a piece of white cardstock and mist it with a little water. Place it into the Tufted 3D embossing folder and run it through your die cut machine to emboss your paper.

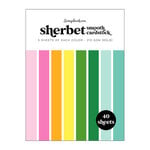
For the motif, I used the Parcel & Post Mailbox die with the Christmas Decorations add on die set. I love a good non-traditional Valentine's Day color so I paired pink with aqua for this card. Start by heating up your Glimmer platform so it's ready to use later. Then cut out the main part of the mailbox, the door layer and side layer from a sheet of aqua cardstock from the Sherbet cardstock pad from Scrapbook.com.

Once your Glimmer Platform is ready to use, foil the Valentine's Day sentiment from the All Occasion Mailbox Greeting hot plate set onto a matching piece of aqua cardstock. Make sure that your cardstock piece for this is larger than what you'll need so you have a chance to straighten it out when you die cut the sentiment. Once you've foiled the sentiment with the Prism foil, use the rectangular die in the Mailbox die set to cut the sentiment out, aligning the die so it cuts the sentiment nice and straight.

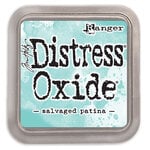
Next use Distress Oxide in Salvaged Patina to add some shading to the edges of the mailbox pieces and glue your layers together. I didn't use any ink on the edges of the sentiment piece because I wanted the center to be nice and bright and because I didn't want to accidentally dull my foil with a heavy hand. Once you've added ink, glue your mailbox pieces together.

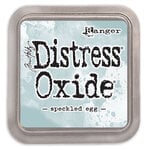
For the little envelope, use another piece of white cardstock to cut it out from. Then ink the edges with just a hint of Distress Oxide in Speckled Egg. (The new Lost Shadow would also be a good pick for this bit of shading.) The glue the layers together.

For the flowers that come in the Mailbox die set, die cut several out from the two pinks in the Sherbet cardstock pad. Then die cut the leaves out of a pretty green from the Floral cardstock pad from Scrapbook.com. And finally, add a hint of shine by cutting some of the layers out of metallic kraft cardstock from Tim Holtz. Assemble all of your pieces together using Distress Collage Medium, Glossy Accents, Smart Glue or your favorite liquid adhesive.

To add a heart to this project, cut the tiniest heart from the Stacked Hearts die set from Tim Holtz. For the bow, use the Christmas Decorations add on set and cut two bows--one from each pink. You'll also want to cut the mailbox handle from the same silver cardstock from earlier.

Now it's time to assemble your card! Gently bend the door on the mailbox and adhere it in place with some foam adhesive, leaving the area around the opening free so you can place all your flowers and envelope inside. Use liquid adhesive and foam adhesive strips to add on all the flowers, envelope and heart.

Add on the mailbox handle with a bit of foam adhesive after glueing the two layers together. Offset the two layers of the bow, gently bend the bow for dimension and then add it onto your mailbox with a dot of liquid adhesive. For a finishing touch, add a few pink and blue gems to your card. Until next time, happy crafting!
Adrienne
Shop the Supplies:
I am an affiliate with Scrapbook.com and Spellbinders. When you shop the links below, I receive a small commission from the affiliate, at no additional cost to you. This helps me balance the costs of the time and love I put into my projects and blog so I can continue to share my ideas with you for FREE. If you shop the links, thank you! I greatly appreciate it.
Below are products that I used for this project.


0 comments
I'd love to hear your thoughts!