
Sunny Lane Shopping District Vignette Tutorial with Scrapbook.com Products
This little vignette is easy to make and is for all you die cutters out there!

Scrapbook.com recently released a ton of new exclusive products, including some really cute dies and papers from their Sunny Lane collection. These little houses are absolutely perfect for creating a sweet little vignette. But what makes this project especially wonderful, is that it doesn't require any mixed media know-how or supplies. The items used in this project are all things that scrapbookers and card makers use all the time!

Here's a list of what you'll need:
- Sunny Lane Homes I die set
- Sunny Lane Homes II die set
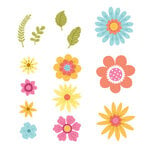
- Sunny Lane Florals die set
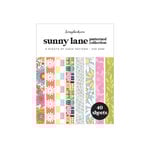
- Sunny Lane A2 Patterned Paper Pad
- Joyful alphabet die set
- 6x8 Holographic Mirror Paper Pad
- 8.5 x 11" Solar White Cardstock
- 8.5 x 11" Ultra Thick Solar White Cardstock
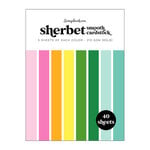
- 6x8 and A2 Smooth Cardstock in your choice of colors
- Pops of Color in coordinating hues
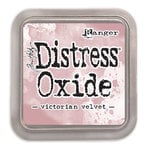
- Distress Oxide Inks in coordinating hues
- The 4.75 x 9 inch Tim Holtz Vignette Tray
- Gems (optional)
- Fine Tipped Pens
- Blending Tool
- A small brayer
- Foam Adhesive
- Adhesive Runner
- Liquid Adhesive
- Small Scissors
- Paper Trimmer
- Shaping Kit (optional, but gives your flowers more dimension)
- Water Sprayer and Heat Tool (optional)
- Scoring Tool and Bone Folder (optional)
- Mint Tape (optional, but super handy!)
- Magic Mat (optional)
- Craft Knife and Self Healing Craft Mat (optional)
- Stamp Shammy (optional)

Start by selecting the houses scene paper and the cobblestone paper from the Sunny Lane paper pad. Trim the houses scene down to fit in the back of the Tim Holtz vignette tray and the cobblestone paper to fit on the bottom of the tray. Glue your pieces in using liquid adhesive. I like to use Distress Collage Medium for this because there is less water in the glue. This means your paper won't wrinkle as the glue dries.

Next, you'll cut out your houses. Cut the base layer of each house from some Sunny Lane patterned paper. (I used the rainbow floral and the one with the butterflies.) For the de-bossed layer, select a lighter shade of smooth cardstock. Apply Distress Oxide in a coordinating hue to a small brayer and apply the ink to the de-bossed house die layer. If you get excess ink where you don't want it, use a damp cotton swab or a stamp shammy to remove the ink. Carefully place your die onto your selected cardstock and hold it in place with Mint Tape and run it through your die cut machine. The de-bossed portions should have ink on them with a bit of a distressed look to them.

Next cut out the other layers of each house in a coordinating darker shade and white cardstock. For the house with the awning, I wanted to create a striped pattern. I'm not great at coloring with Copics or other coloring tools, and if you aren't either, here's my trick. I cut out two awnings, one from a darker pink and one from white cardstock. Using a small pair of scissors, I cut along the de-bossed lines of the white awning die cut, stopping just before I went all the way to the top. I then used a craft knife to cut away every other panel in the awning. I glued the white layer on top of the pink with liquid adhesive.

I then cut the window frames and doors out for each house as well as the roof line and any other decoration. For added dimension on doors and rooflines, I cut out multiple layers and stacked them for that tiny bit of extra dimension. Glue your de-bossed house layer to your pattern paper base layer using an adhesive runner. Then glue down the windows, doors and trim with liquid adhesive. I popped the bottom of the awning up with some foam adhesive at the bottom of the awning and I popped some of the rooflines and the balcony up with the same foam adhesive.

Once the houses were assembled (minus the signs), I added some Pops of Color in coordinating hues for a bit of dimension. For the signs, I used some fine tipped pens in coordinating colors that were in my stash and wrote something on each of the signs. (The Ballroom sign is actually an off cut from one of the doors.) I popped the signs on with a foam square or liquid adhesive once the Pops of Color were dry.

I wanted my houses to be nice and sturdy and adhered to the back and bottom of the vignette tray. But if you want to skip this part, just use foam adhesive to pop your assembled houses into the vignette box. To make it more sturdy, take some ultra thick white cardstock and score it 1/4 inch from one side and then fold and crease with a bone folder. Take the base layer of each house and place it on the folded cardstock so the fold is at the bottom of the house. Line the bottom cut line up so it is just off of the paper. This will cut the house with a little folded tab at the bottom. Glue each house onto it's coordinating tabbed base layer and then use an adhesive runner on the tab and foam adhesive (I used 4 layers) on the back of each house to glue them into place in the vignette box.

To create the street sign at the top of the box, cut out your street name from the new Holographic paper pad using the new Joyful alphabet die set. I chose to name it Sunny Lane because I just loved that name! Cut out a rectangle of smooth cardstock that gives you 1/4" of negative space on each side (mine was 1.25" tall by 6" long). Then cut out a mat of holographic paper (mine was 1.5" tall by 6.25" long) to mount your smooth cardstock on. Glue down your letters using an adhesive roller. To glue your sign onto the box, add liquid adhesive to edge of the vignette box and press your sign down so it is centered over that edge.

For the flowers, use your favorite blending tool to apply your coordinating Distress Oxide Inks to. I hadn't used a green yet, so I selected one for my leaves. If you want a more distressed look, mist your paper with a sprayer and blot the water with a lint free cloth or paper towel to lift some of the ink. If you spritzed your paper, give it a quick shot with a heat tool to dry it. Then die cut out several flowers and leaves.

If you want to create more dimension on your flowers, layer together different die cuts or offset a couple of the same die cut. You can also shape the petals and leaves with a shaping kit. If you cut more than one layer for a flower, you can use foam adhesive to glue the layers together (I did this for my largest flower). I then used foam adhesive and liquid adhesive to adhere the flowers and leaves in place. The foam adhesive allows you to pop the flowers up to different levels so you can layer them and place them closer together. If you want an extra bit of sparkle, glue down some gems.
And that's it! No fancy art mediums or adhesives. I left my box mostly unfinished because I love that natural wood look, but you can cover more of your box in that first step if you like. Until next time, happy crafting!
Adrienne
Shop the Supplies:
Scrapbook.com
I am an affiliate with Scrapbook.com. When you shop the links below, I receive a small commission from the affiliate, at no additional cost to you. This helps me balance the costs of the time and love I put into my projects and blog so I can continue to share my ideas with you for FREE. If you shop the links, thank you! I greatly appreciate it.
Below are products that I used or similar products.


2 comments
You are so talented! Thanks for sharing these adorable little houses and your creativity!
ReplyDeleteThank you so much! When I saw these dies I just knew they would be so adorable in a vignette tray!
DeleteI'd love to hear your thoughts!