
Letting the Creative Process Lead You When Creating: Stellaluna Mixed Media Canvas
Sometimes your plans change when you are creating. Sometimes your plans go awry. And that’s okay. Sometimes, you just have to let the process lead you where it’s going.

I’m so happy to once again be doing some guest designs for Reneabouquets! I always enjoy creating with all the gorgeous and sparkly goodies I get. My favorite type of project is mixed media and the flowers, chipboard, butterflies and glitter glass are perfectly suited for this type of make. (I'll have all the products that I used listed at the bottom of this blog post.)

I usually try to go into my projects with a plan. I don’t plan everything out 100 percent. But I do like to plan out what elements I’m going to use, what element is the “star” of the show that I build everything else around, and the shape I want my elements to take. You know, whether it’s diagonal, zig zag, a straight line…you get the idea.
For this project, I planned on an organic zig zag shape that mimicked the stencil I chose. But then I finished the background on the canvas and realized, that wasn’t where this project was taking me.

So let’s talk about letting the process lead you when creating—just for a little bit and then I’ll get into the tutorial. You can’t always force a project to go where you want it when it shows you another path. You have to be okay with letting your plans go. You have to be open to other ideas. And those other ideas can be utterly beautiful. It’s like your project is speaking to you, like it’s inspiring you toward something new, something unique.

I was in the zone while creating the background of this canvas. I put the texture paste on as planned and started adding sprays to make the background. Once I was happy with the background, I looked at the canvas and realized that it looked like the moon. The color and the splatters of white made it look like that cratered orb in the sky. And that is when I realized this project was taking me in a different direction than I had originally intended. The new idea blossomed in me like a crocus sprouting through the snow in the spring. I knew the embellishments needed to be in a different shape, the shape of a crescent, rather than a zig zag. And now I refer to this project as my "Stellaluna" canvas, after one of my favorite childhood books!

Now that I’ve waxed heavy on the topic of changing your path while creating, let’s get into the tutorial. I started with an 8 inch round canvas and applied Cloud Whip, a textured modeling paste, through the Fanciful Fern stencil from The Crafters Workshop. I chose a leafy stencil that had an organic shape and stenciled it twice to create a V-shape.

I’m a bit impatient when it comes to mediums drying so I heated the canvas gently with my heat tool to help the paste dry faster. The paste dried a little differently at the edge of the canvas where the wood is underneath. And I realized that when I started adding the sprays. The paste at the edges soaked up the sprays but in the center, it had a slight resist-like effect. I didn’t plan for that either but I liked how it feathered out toward the edges so I wasn’t angry about it.

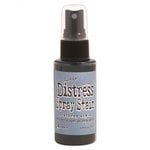
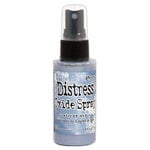
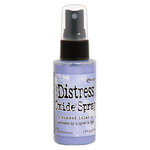
When adding sprays, I always start with Distress Spray Stains. I add the sprays, wet the canvas to get the reaction of ink and water and dry the canvas with my heat tool in between layers. Eventually I start mixing in the Distress Oxide Sprays. These sprays are more opaque and cover anything they go over so I’m always judicious when spraying them. To create the whiter, lighter spots, I flick water on the canvas and use a soft, lint free cloth to pick up the water and ink that reacted with it. I think this creates a much more interesting background—and it’s also what made this canvas look like the moon! The colors I used were Stormy Sky (stain and oxide) and Shaded Lilac (stain and oxide).

Once the canvas was dry and I realized the new direction I needed to take and I set to work with that new idea. I die cut a bunch of Delicate Leaves and Springs from some purple and gray paper from Prima’s Aquarelle Dreams collection. I shaped them all with some shaping tools and foam mat to give the leaves more dimension. I set these aside for when I was ready to begin assembling the embellishments.

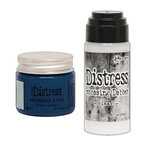
I also tested out a few Distress Glazes on the Linoleum Beautiful Board from Reneabouquets. I wasn’t sure which color would match the best with my background and flowers. I did one of each color on the corners as I cut the chipboard up into pieces. I decided on Prize Ribbon and then cut up some pieces and embossed those bits.

Then it was time to begin layering the flowers, die cuts and more on. I use heavy body gel to add all of my elements. It has a long dry time and allows you to adjust or add things later. It also holds really well once dry and adheres any type of element—paper, wood, metal, you name it.

I show the entire process in my video tutorial, so I won’t go into too much detail here. But I started with adding on the first layer of flowers in a crescent shape near the edge of the canvas. I added in some of the die cut leaves after shaping them with some tools. Once the first layer was down, I added the bits of chipboard and more flowers over the top.

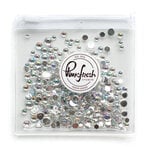
I cut up some of the Doily Lace into smaller bits and tucked those pieces under the first layer of flowers. I then added Glossy Accents to the edges of the flower petals and applied Glitter Glass in gray. I always tap off the excess and place that back into the jar. I added a few of the Mermaid Tail Iridescent Pearls, adhering with more of the heavy body gel. I then added a Watercolor Spun Lavender butterfly and a To Mercury and Back dragonfly then applied a few iridescent gems to the project for just a bit more sparkle.

I adore how this project turned out and love that is looks like the moon. I've always loved astronomy so I think it was kismet, especially with the name of that dragonfly! Until next time, happy crafting!
Adrienne
Shop the Supplies:
Reneabouquets
Watercolor Spun Lavender Butterflies
To Mercury and Back Dragonflies
Mini Dusty Blue Spring Mix Roses and Cherry Blossoms
Beautiful Board Linoleum Elements
BeautifulBeads Mermaid Tail Iridescent Pearls
Scrapbook.com
I am an affiliate with Scrapbook.com. When you shop the links below, I receive a small commission from the affiliate, at no additional cost to you. This helps me balance the costs of the time and love I put into my projects and blog so I can continue to share my ideas with you for FREE. If you shop the links, thank you! I greatly appreciate it.
Below are products that I used or similar products.


0 comments
I'd love to hear your thoughts!