
Autumn Vibes Birthday Card Tutorial

I'm not kidding about it being a busy time for birthdays. Within a period of 2 months we have 5 birthdays in my immediate family! (Luckily one is mine so I don't have to make a card for that.)

- Your favorite autumn themed patterned paper with an element that you can fussy cut--I chose Prima's Hello Pink Autumn 6x6 paper pad
- Coordinating smooth cardstock--I used the A2 Jewels pad from Scrapbook.com
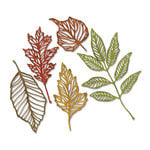
- Autumn leaves die set--I used my favorite, the Skeleton Leaves from Tim Holtz
- Shimmery ink--I opted for the new Rose Gold reinker from Scrapbook.com
- Foil and a sticky adhesive--I used the Heidi Swapp Minc Rose Gold foil and the Scrapbook.com Smart Glue
- Small scissors or craft knife--I recommend the Scrapbook.com small Precision Scissors, the Tim Holtz Snips or the WeR Swivel Craft Knife
- Other adhesives: glue runner, foam tape
- A2 card base or cardstock cut and scored to size
- Sentiment sticker or stamp
- Optional: glitter brush marker


ReplicaSurfaces
Love the background I shot my photos on? It's from Replica Surfaces, a company that makes rigid photo-realistic backgrounds. This surface is called Biscotti Linen. You can pick up your own with a 15% discount by shopping this link. When you do, I get a small commission from the sale at no extra cost to you, which helps me continue to provide you amazing tutorials and information, just like this blog post!
Scrapbook.com
I am an affiliate with Scrapbook.com. When you shop the links below, I receive a small commission from the affiliate, at no additional cost to you. This helps me balance the costs of the time and love I put into my projects and blog so I can continue to share my ideas with you for FREE. If you shop the links, thank you! I greatly appreciate it.
Below are products that I used or similar products.


0 comments
I'd love to hear your thoughts!