Reverse Mixed Media Canvas Tutorial with Sizzix Dies
Have you tried creating on the back of your stretched canvas yet?
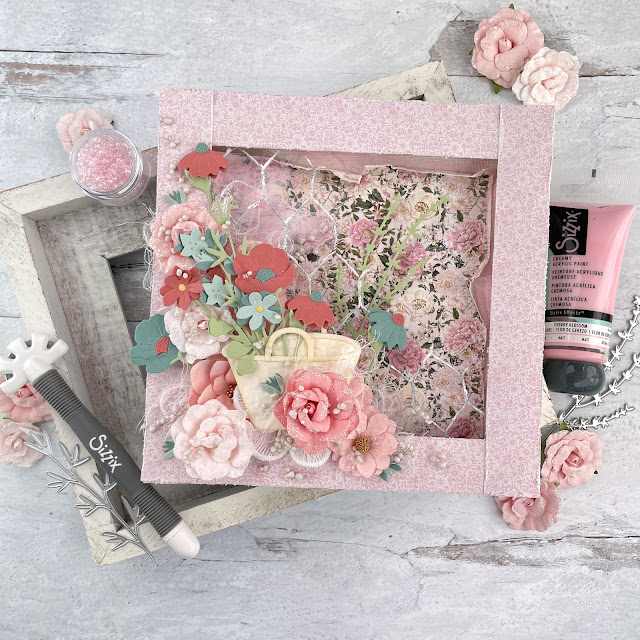
I had this 8x8 inch canvas for a while where I just wasn't happy with the texture on the front of it that I had applied a while back. And it was that way for over a year. I just kept hanging on to it hoping how I felt about it would change, but it never did. So I decided I would use the back side of the canvas for a project so it wouldn't go to waste! (See, even a mixed media aficionado can mess things up from time to time too!)
I started out by painting the wooden frame of the canvas with the Creamy Matte Acrylic Paint in Cherry Blossom. I painted just a little bit of the edges of the canvas as well as I knew I would tear and curl the edges of the paper I would put in the center.
I chose some papers from the Miel collection 6x6 and 8x8 paper pads from Prima Marketing. I cut strips of the small pink 8x8 floral paper to cover the edges of the canvas then distressed the edges of those strips and a 6x6 floral sheet for the center. I added some tears to the 6x6 piece and curled some of the edges. I then used Sizzix’s Express Glue to adhere the paper to the canvas.
I spread a thin layer of Scrpabook.com’s Cloud Whip onto the 6x6 paper on the upper left and bottom half of the paper to distress it a little more. Next, I added a thin wash of the Cherry Blossom paint over the top to bring in more pink.
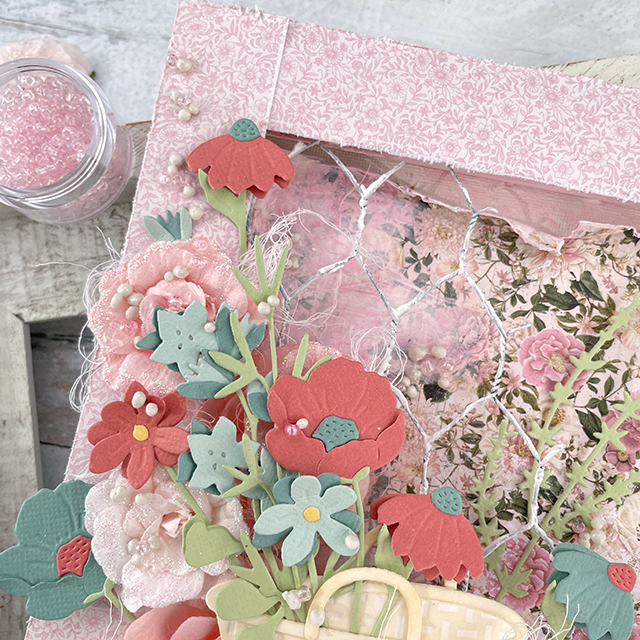
I snipped some chicken wire with wire cutters to fit into the slots where the pieces of the wooden frame fits together. After painting the wire with white gesso and inserting the edges into those slots, I added a bit of Express Glue just to help hold the chicken wire more in place. I dabbed on a little bit of Cloud Whip onto the wire as well for some texture.
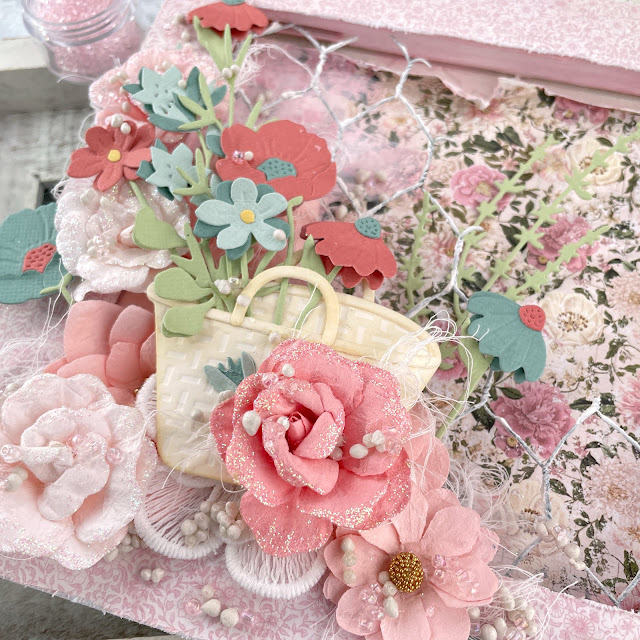
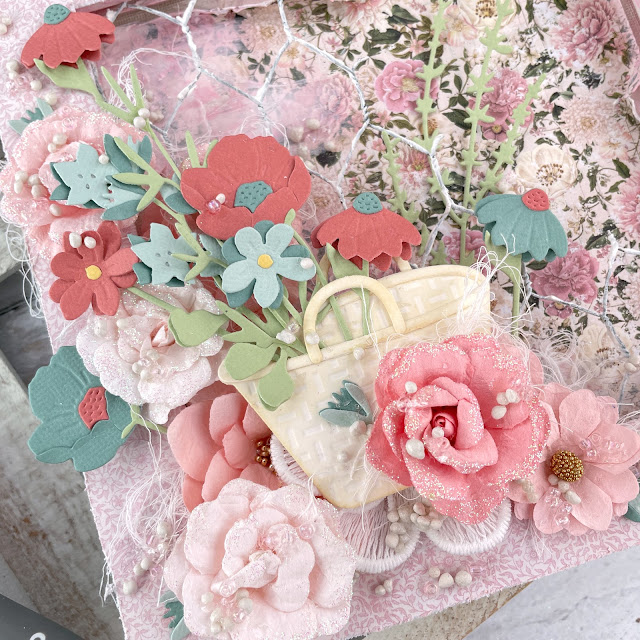
Using the Muted Surfacez cardstock pack and the In the Meadow die set, I cut a bunch of flowers and assembled them with some Distress Collage Medium and foam adhesive. I also cut some sprigs from the Woodland Stems die set.
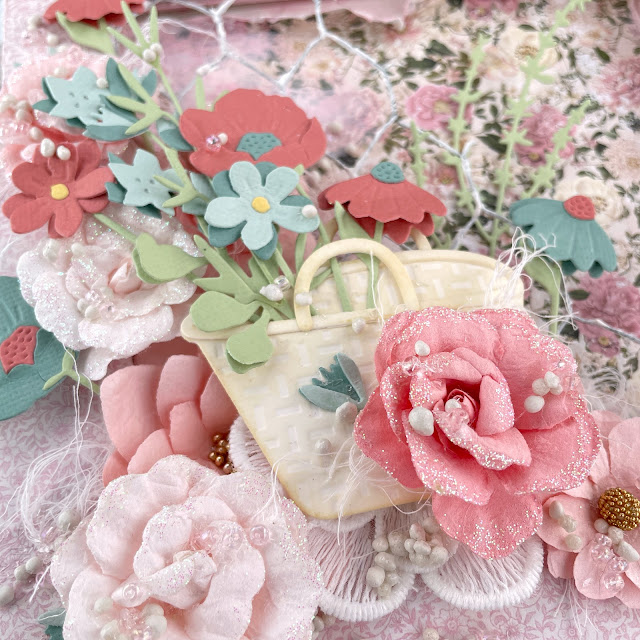
I cut out the basket from the Floral Vessels die set from the Texture Roll in White. These Texture Rolls are incredible! They are a thick material that won't rip, stands up to art mediums, cuts, embosses, and can be twisted and crumpled to create distressed texture. I knew it would work beautifully with this basket die because of the embossing on it. To highlight that embossed texture, I used a domed foam blender to add a little Distress Oxide in Antique Linen.
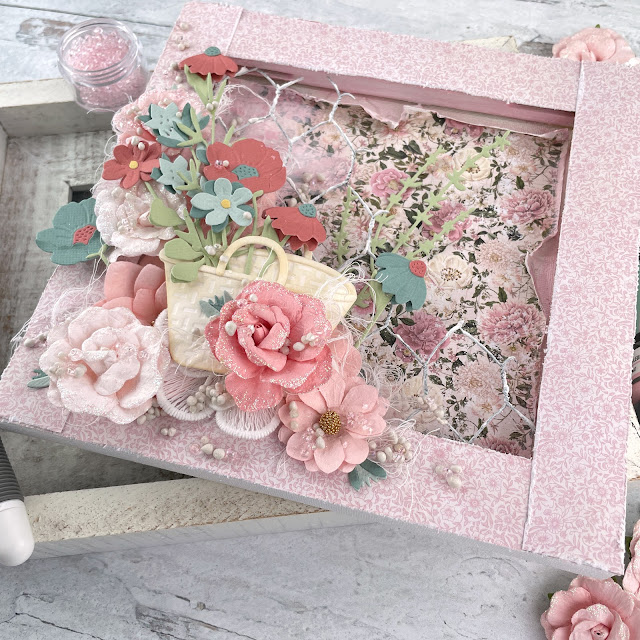
I arranged several of the florals and one of the Woodland Stems into the basket, adhering them in place with liquid and foam adhesive. Now that my elements were all ready, I began adding paper flowers and die cuts to my canvas using Heavy Body Gel (you can also use Express Glue). I layered these elements above and below the chicken wire for depth. I also added nests of cheesecloth strings and some lace flowers for texture.
I added some finishing touches to this canvas, the first of which was Pale Pink Glitter Glass from Reneabouquets, as well as some beads from the Ballet Sequin Mix and some Art Stones with Soft Gloss Gel.
I think this canvas is super sweet! I’ve always wanted to do a reverse canvas with some chicken wire! I love that the chicken wire makes it so easy to create depth and layers. Just make sure you are careful of sharp edges if you decide to use some in your own projects.
Until next time, happy crafting!
Adrienne
Shop the Supplies:
Reneabouquets
Scrapbook.com & Sizzix
I am an affiliate with Scrapbook.com and Sizzix. When you shop the links below, I receive a small commission from the affiliate, at no additional cost to you. This helps me balance the costs of the time and love I put into my projects and blog so I can continue to share my ideas with you for FREE. If you shop the links, thank you! I greatly appreciate it.
Below are products that I used or similar products.









0 comments
I'd love to hear your thoughts!