Prima Marketing New Finnabair Moulds and Stencils: Peach Reflections Mixed Media Canvas Tutorial
Happy Prima Marketing reveal day! Today is a brand new release of moulds and stencils from Finnabair.
There are so many amazing new moulds and stencils in this release from Finnabair and I can’t wait to use them all in future projects. In today’s project, I wanted to focus in on a single mould and stencil to pair together in a mixed media project.
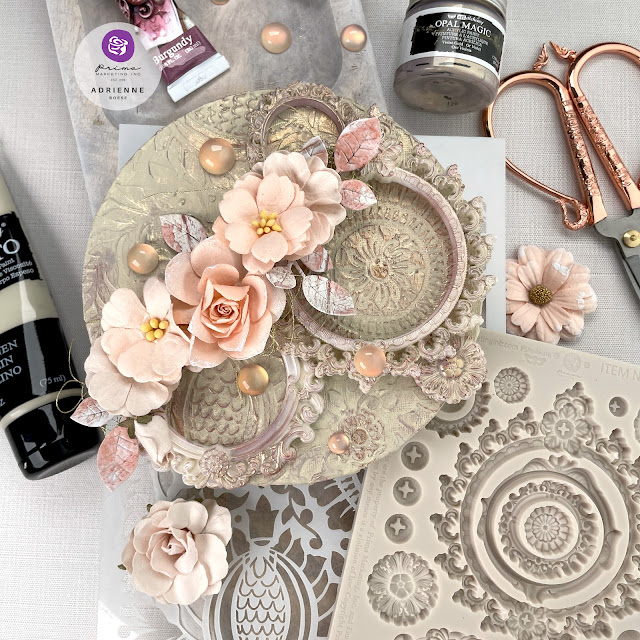
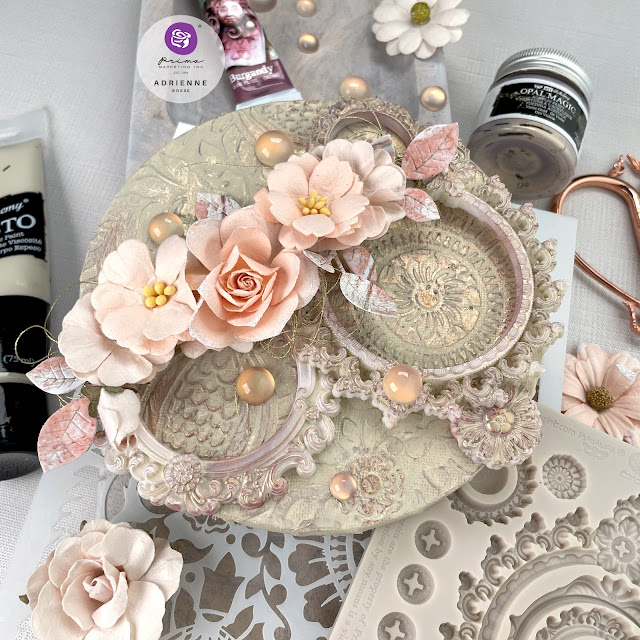
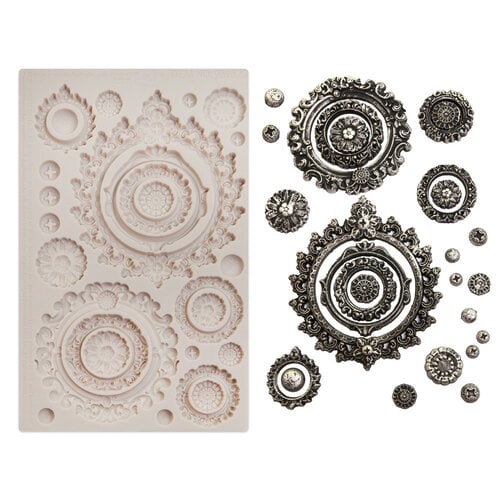
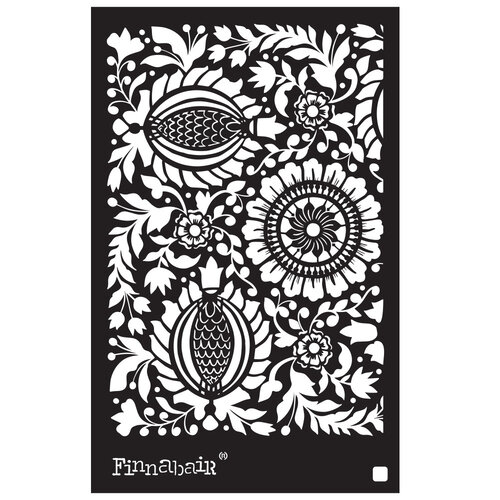
I chose the Mirror Frames Moulds and the Folk Flowers Stencil. The larger frame in the mould perfectly fits around the large round medallion element in the Folk Flowers Stencil and I felt that some of the details in the frames matched well with the stencil as well.
Here’s what you’ll need to recreate this project:
- 969523 Finnabair Imaginarium Moulds Mirror Frames
- 969752 Finnabair Stencil Folk Flowers
- 966355 Art Alchemy Impasto Paint in Linen
- 968373 Art Alchemy Métallique Wax in Burgundy
- 963637 Art Alchemy Opal Magic Paint in Violet-Gold (if you don't have any of this in your stash, the Opal Magic Paint in Rose Gold is a good similar color)
- 966294 Art Ingredients Melange Art Pebbles Vintage (if you don’t have any of these in your stash, you can use the clear ones and paint the backs with Opal Magic paint)
- 963040 Art Basics Heavy Body Gel
- 961381 Art Basics 3D Gloss Gel
- 658731 Miel Collection Dulzura Flowers
- 658786 Miel Collection Solecito Flowers
- 658410 Farm Sweet Flowers Porcelain Flowers
- 638870 Apricot Honey Collection 12x12 Paper Pad (optional)
Some other things you will need or find useful:
- 6 inch round canvas
- Gold thread
- Metal leaf die and die cut machine
- Small pair of scissors
- Palette knife or silicone brush
- Water spray bottle
Start out by laying your stencil over your canvas so that the large medallion part is visible near the center right of the canvas. Apply 3D Gloss Gel through the stencil with a palette knife. Once dry, paint your canvas with the Impasto Paint in Linen. (Pro Tip: if your Impasto paint is starting to get get old and a little thick, add a few spritzes of water to it to get it to a better consistency.)
Next, apply a thin wash of the Linen Impasto Paint to your moulds. Before the paint dries, use a baby wipe, lint free towel or a paper towel to gently wipe paint off of the raised areas to bring white back to the highlights. (If you used paper or air dry clay for your moulds, paint your moulds with gesso or Snow White Impasto Paint first.)
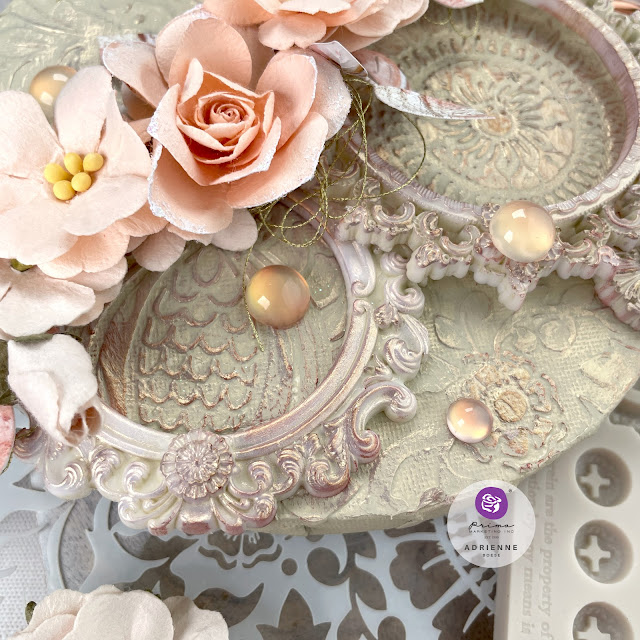
Once your canvas and your moulds are dry, it's time to add some Opal Magic Paint to the highlights. Dry brush the Opal Magic Paint in Violet-Gold over the highlights of the moulds and stenciled texture on the canvas. After the Opal Magic Paint is dry, add a touches of Métallique Wax in Burgundy to the stenciled areas of the canvas and moulds. If you get too heavy a hand on the wax, wipe the excess off with a lint free towel and/or go over it with the Opal Magic Paint again.
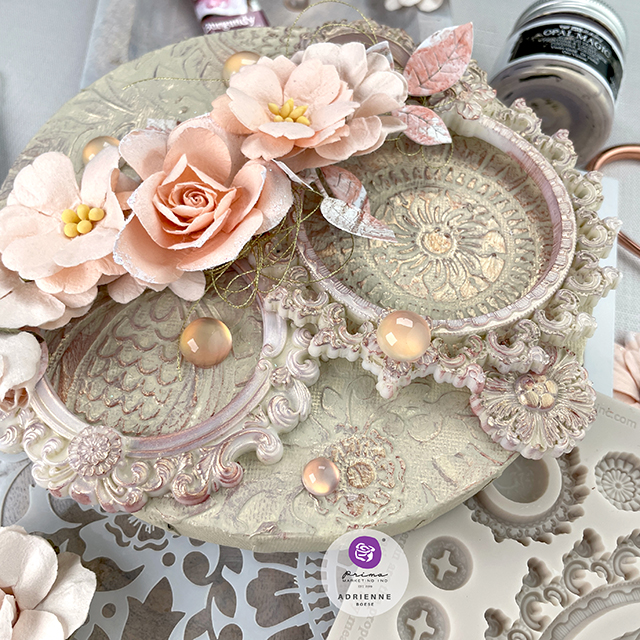
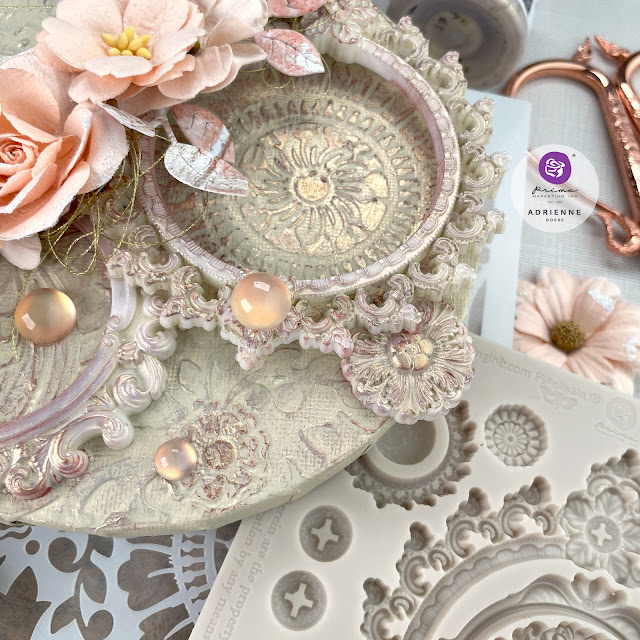
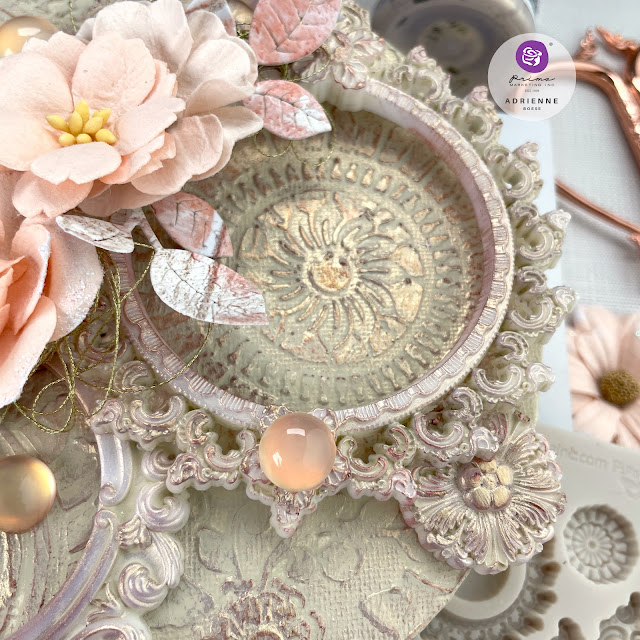
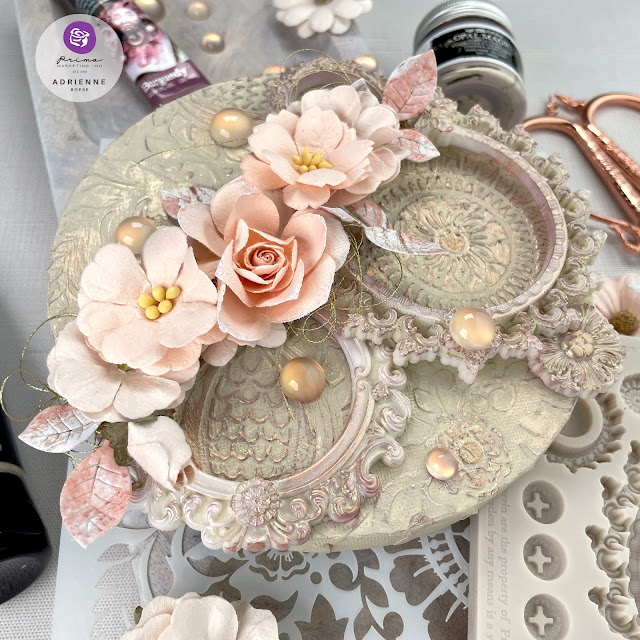
Using Heavy Body Gel, glue your moulds to your canvas, centering the largest frame over the medallion shape of the stencil and using the other moulds to pop it up from the canvas. While those set up a bit, die cut a few leaves from some peachy colored papers. I used some paper from Prima's Apricot Honey collection. Shape the leaves with your fingers or a shaping kit for a little bit of added dimension.
Glue your flowers, leaves and nests of gold thread on top of your fame moulds. I used cream and peach colored flowers from the Miel collection and the Farm Sweet Farm collection. To finish off the canvas, add some Melange Art Pebbles. I had some of the Vintage colored ones in my stash and used the light colored ones, but if you don't have these in your stash, paint some of the clear ones with a bit of some Opal Magic paint.
This beige canvas is definitely not blah! I love how it turned out, especially the hints of peach, burgundy and gold.
Until next time, happy crafting!
Adrienne
Shop the Supplies:
Scrapbook.com
I am an affiliate with Scrapbook.com. When you shop the links below, I receive a small commission from the affiliate, at no additional cost to you. This helps me balance the costs of the time and love I put into my projects and blog so I can continue to share my ideas with you for FREE. If you shop the links, thank you! I greatly appreciate it.
Below are the new products that I used For the full list of Prima supplies, visit my Scrapbook.com gallery!



0 comments
I'd love to hear your thoughts!