
The Secret for Creating Wonderful Sympathy Cards
Sympathy cards are one of the most difficult cards to create. Here's my secret for making a wonderful card that will warm someone's heart even in the darkest of days.

Sympathy cards are just plain hard to do. Odds are, if you are sending one of these cards out, you are probably also affected by the loss. And it can be difficult to know what to say.

The goal of any sympathy card is to provide comfort to a loved one who is dealing with grief. But what makes for a good sympathy card that provides that bit of comfort and love? My secret? Keep it simple. Don't overload your card with lots of colors (unless of course your friend or loved one really loves rainbows and you know that will make them smile). And keep the theme simple as well.
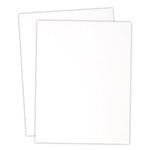
I made this card recently for a friend who just lost her husband to cancer. I know that my friend and her husband enjoyed spending time outdoors with their dogs, so I wanted a nature theme. I kept it simple by selecting leaves for the theme. For my colors, I chose gold foil and white cardstock. My personal opinion is that a heartfelt sentiment and a little bit of sparkle can help someone even in the darkest of times. Now let's break down how I created this card.

I started out by cutting the Honeycomb coverplate die from some thick white cardstock. I used a bit of Distress Collage Medium to adhere it in place on a white card base. This white on white creates just a bit of texture without it being in your face.
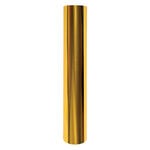
Next, I foiled a solid sheet of Spellbinder's Gold Foil using their Glimmer Essentials Solid Rectangle hot foil plate. From that solid foil, I die cut some leaves from the Sealed Bouquet and Sealed Wildflowers die sets.

Using the same foil, I hot foiled the Organic Foliage sprigs and die cut them out with the coordinating dies in the set. I hot foiled the sentiment from the Sentiments for Everyday set and then added a Duo Lines Circles border around it. I then cut out the circle using the Essentials Circles set, then cut a second circle from the same white cardstock.
I used Distress Collage Medium to clue the leaves and sprigs down to the plain white circle die cut. I then added the foiled sentiment circle over the top, adhering it with 1/4 inch double sided adhesive. Liquid adhesive would also work for this application.

I popped the circle up with a piece of 2 inch foam adhesive and added some 1/8 foam strip adhesive to the backs of some of the leaves for support.
To finish the card off, I added a few Gold Glitter Drops to the card, adhering them with a dot of Ranger's Glossy Accents. I think the gold foil is a nice touch as it is a warm color. And it was so simple to pull it all together.
Until next time, happy crafting!
Adrienne
Shop the Supplies:
Scrapbook.com & Spellbinders
I am an affiliate with Scrapbook.com and Spellbinders. When you shop the links below, I receive a small commission from the affiliate, at no additional cost to you. This helps me balance the costs of the time and love I put into my projects and blog so I can continue to share my ideas with you for FREE. If you shop the links, thank you! I greatly appreciate it.
Below are products that I used for this project.


0 comments
I'd love to hear your thoughts!