
How to Apply More than One Medium Through a Stencil
Need a last minute Christmas card idea? This one will wow with this fun and easy stenciling technique! (And no, you don't have to remove your stencil between mediums with my easy trick.)

I was recently sent some supplies from The Crafters Workshop to play with and I received a bunch of items that were perfect for the holidays! There's a lot more than what I've shared so far here and on my Instagram, but I'll get to those after the holidays--you can never start holiday projects too early!

But if like me, you work up to the very last second, this card idea is for you! You don't need these specific products (but hey, if you want to pick them up for next year, I say go for it). But this quick card idea is all about creating a background with a stencil, a little bit of Distress Oxide, and some other fun art medium you may have on hand. That medium could be Pops of Color, Stencil Butter or one of the many art mediums from Finnabair!

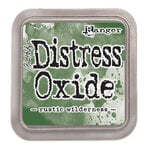
The leaves and the petals of this Poinsettia Stencil were done in different mediums for this card background. The trick here is to start with the non-dimensional medium, or the ink--in this case, Distress Oxide. Mint Tape is also essential for this trick so you don't have to remove your stencil between mediums, or worry about it shifting. Apply some Mint Tape to the back of the stencil and cardstock, then daubed on my Distress Oxide in rustic wilderness. When adding ink through a stencil with such fine details, be careful to not rub or swirl too hard or you could damage your stencil.

Once you are done inking, use a soft lint free cloth such as a flour sack towel, to gently buff the excess ink off of the stencil. Then mask of the part you just inked with more Mint Tape and add your dimensional art medium. I used TCW's Stencil Butter in barn door. This red has a nice bit of shimmer to it! When you are done applying the art medium, peel the stencil off and then clean off your stencil right away.

Let your card background dry as you cut out or gather your embellishments to layer on top. For my card, I used P13's Cosy Winter Red and Green Creative Maxi Pad. I fussy cut out a banner, some greenery sprigs and a red poinsettia.

When the background is dry, you can matte it onto a glitter or color cardstock background (I used Scrapbook.com's A2 Glitter Rainbow pad) then add on your embellishments or ephemera with foam adhesive. I added a few pearls for an extra pop of shimmer. And that's it; hope you enjoyed this fun technique! Until next time, happy crafting!
Adrienne
Shop the Supplies:
Scrapbook.com
I am an affiliate with Scrapbook.com. When you shop the links below, I receive a small commission from the affiliate, at no additional cost to you. This helps me balance the costs of the time and love I put into my projects and blog so I can continue to share my ideas with you for FREE. If you shop the links, thank you! I greatly appreciate it.
Below are products that I used for this project.


Shop Directly from The Crafters Workshop
Below are products that I used for this project.


0 comments
I'd love to hear your thoughts!