
How to Build a Snow Globe Shaker without a Snow Globe Die
If you are a little creative, you can make a snow globe shaker card without a special die!

All you need to make a snow globe shaker is a circle die, a paper trimmer, scissors and a corner rounder punch. Seriously! And I’ll take you through how to make it step by step.

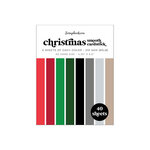
Start by cutting a circle out of an A2 card base. I used the Fancy Circle Borders die and a piece of red cardstock from the Christmas pad. Once you have cut out the circle, place adhesive on the backside around the circular hole and adhere some acetate over the circle.

Next, cut a rectangle out of brown cardstock with your paper trimmer. I used the A2 Neutrals pad, which has a lot of nice browns in it. You’ll want your rectangle to be proportional to the circle you cut. My tip is to have it be a half inch to an inch longer than the width of your circle cut out. Using the same circle die, cut out a small portion from the brown rectangle, so that it fits around the bottom of your circle cut out on your card front. On the opposite end (the bottom of the base), use a corner punch or scissors to round the corners.
To slope the base toward the circle portion, I sketched out my lines on the back side and then cut along those lines with a pair of scissors. To create some dimension to your snow globe base, trim out a thin strip of cardstock. I trimmed mine to 1/8 inch wide and a little longer than my snow globe base and used metallic kraft cardstock. Glue this strip in place and then trim off the excess on either ends with a pair of scissors. Glue your base in place with your favorite adhesive.

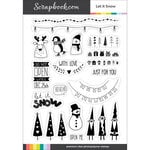
For the background, I used the new Winter Flurry stencil with white ink on a piece of black cardstock from the A2 Christmas pad. I also added some stamped winter trees from the Let It Snow stamp set to create a little wintry scene. Make sure that you let this ink dry or use a heat tool on it so your ink doesn’t smudge. Use foam adhesive to go around the back side of your circle cut out. I used two layers of foam to make sure there was plenty of room for my sequins.

Fill your shaker with sequins and a few of the small Prima Diamond Pebbles. I also glued a few of these pebbles to the background with some Glossy Accents. Then adhere your black cardstock scene to the red, using your stamp platform or wall corner to help line up your cardstock pieces more easily.
For a few more embellishments on the front, cut out a sentiment. I cut out the Fa La La die three times, layering them together and then gluing them to the front of the card with liquid adhesive. I also cut out a few small snowflakes and glued those around the snow globe, adding sequins to the center of each one. And that’s it—no special dies needed! Until next time, happy crafting!
Adrienne
Shop the Supplies:
Scrapbook.com
I am an affiliate with Scrapbook.com. When you shop the links below, I receive a small commission from the affiliate, at no additional cost to you. This helps me balance the costs of the time and love I put into my projects and blog so I can continue to share my ideas with you for FREE. If you shop the links, thank you! I greatly appreciate it.
Below are products that I used or similar products.


0 comments
I'd love to hear your thoughts!