
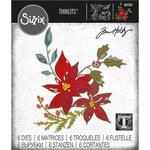
Silent Night Light Up Christmas Decor with Scrapbook.com Nested Tree Die
I love a a good Christmas vignette, especially one inspired by nature.

Hello, lovlies! Today I'm sharing this light up vignette box featuring the Scrapbook.com Nested Fir Trees die that I created for the Christmas Tree Handmade Holiday Parade hosted by Scrapbook.com! I had so much fun creating this vignette. And don't worry--I have a full picture tutorial for you in this blog post and I've done all the hard work for you of figuring out the logistics. So while this looks complicated, it's actually pretty easy! So don't let it intimidate you.

Of course you don't have to take your project to the Nth degree like I always do with a boxed vignette. I think this would be pretty as a panel with layers popped up with foam adhesive and no lights at all. But let's jump into this tutorial--maybe it will inspire you to take the leap into the world of mixed media if you haven't already!

I started out using this wooden canvas that I got at Michaels, but you could just as easily use a Tim Holtz vignette tray, a recycled cardboard box or make it out of cardstock. The full dimensions for this box is 10 x 8 x 1 3/4 inches and the inside dimensions are 8 3/4 x 6 2/4 x 1 1/2 inches.

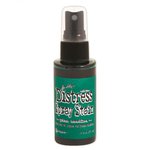
Next, I took some heavy weight smooth white cardstock and inked two sheets with green and one sheet with blue Distress Ink Sprays and Oxide Sprays. Here are the color combos I used:
- Green
- Distress Spray Stain: rustic wilderness, evergreen bough, pine needle
- Distress Oxide Spray: evergreen bough
- Blue
- Distress Spray Stain: prize ribbon, speckled egg, salvaged patina
- Distress Oxide Spray: prize ribbon
I spritzed the paper with the sprays and then with water, adding layers and layers until I was happy with how it looked and the entire sheet was colored. I used my heat tool to dry these. To flatten them out, I ran them through my Minc machine in a transfer sheet on setting 3.

Next I cut out the trees from the green inked sheets. I chose 1 cut of the largest tree and 2 of the second largest size. For the blue sheet, I trimmed it to fit inside my box (in my case, the dimensions were 8 3/4 x 6 3/4 inches).

Next I cut out two sheets of white that would fit over the front of the box (10 x 8 inches). I marked this as sheet #1 in the corner then marked a line 3/4 inches in from the bottom and left and right sides of the paper then 1 1/4 inches down from the top. This creates the window. I then sketched out some snow at the bottom of the window, making sure to not go below the 3/4 inch mark I made. I then used some craft knives to cut this window out.

I then cut out 2 white sheets that would fit inside the box, with an extra 1/2 inch on each side (9 3/4 x 6 3/4 inches). I marked one as #2 and the other as #3 in the corner. On the left and right sides of both #2 and #3, I marked in 1/2 inch--we'll score along this line later. On sheet #2, also marked a line 1 1/4 inches in on the left and right sides and then 1/2 inch from the top. I then laid #1 over #2, centering it and traced the snow line at the bottom onto #2. Next, I sketched out the snow line for #2, above the line I just traced. I then cut out the window with some craft knives.

For sheet #3, I marked 1/2 inch from the top and then 1 3/4 inches in on the left and right sides. I then lined up #2 over #3 and traced the snow line. I sketched out another snow line on #3 above the line I just traced and cut it out with craft knives.
When you have cut out all the windows and stacked them with #1 on top and #3 on the bottom, they will look like this:

Next, I cut out a piece of acetate to fit the window on layer #3. You want it big enough to overlap the edges so you can glue it onto the back of #3. The acetate will serve to pop the stenciled snowflakes out. (Do not stencil it out onto your blue background unless you want your white gesso to turn blue as Distress products are water reactive.)

I used a little mint tape to temporarily hold the acetate to the back of #3 and used a grease pencil to trace the window opening onto the acetate. Grease pencils are great because you can use them on any glossy, non porous surfaces, such as photos and acetate, and the markings will wipe away with a soft cloth! (You can find these pencils on Amazon.) These lines will help me know where I need to stencil at. (Just a note that the photo above is of my original window cut of piece #3 that does not include the 1/2 at the top--I re-did that so just ignore that part in the photo.)

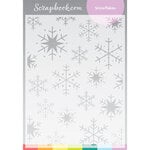
Remove the acetate from layer #3 and flip it over so the blue markings on on your work surface. hold your acetate in place with some 4 inch mint tape and then place the Scrapbook.com snowflake stencil over the top, holding it in place with more mint tape. Using a craft scraper, apply a thin layer of white gesso through the stencil (gesso will grip to non-porous surfaces, so don't use paint because that will chip off your acetate). Then remove the stencil and immediately dust it with Rock Candy glitter with the Ranger Glitter Duster. (Make sure to at least through your stencil in a bin of water until you are ready to clean it so the gesso doesn't dry on it.)

While your acetate layer is drying, it's time to splatter our trees with a little "snow." I mixed up a squeeze of the Frost reinker with a drop of water--this should give you a good splatter consistency. Load up a small paint brush with your mixture and tap the paintbrush while holding it over your die cut trees. Tap until you get the amount of snow you want on them. Then do the same with your blue background.

I set these aside to dry as well and then worked on fussy cutting out a few elements from the P13 The Four Seasons Winter pad. I chose a deer with antlers and some florals (because I have to add florals to every project)! once I cut these out using a combination of small snips and a swivel craft knife, I splattered these with a little frost ink too.

Once the snowflake acetate layer was dry, I used a lint free cloth to carefully rub the blue marks off of the back and set this aside. I then cut some white strips of cardstock to fit inside the box on the sides (my strips were 1 1/2 x 8 3/4 and 1 1/2 x 6 3/4 inches). I then used a combination of 1/4 inch adhesive and Smart Glue to glue the blue background into the box and then the white strips into the sides. You can use a craft scraper to help press the papers firmly into the box, which also helps smooth out the liquid glue.

This is an optional step if you are using a wooden box. I didn't want any pine colored edges sticking out in case I didn't place my strips of paper perfectly on the outside of the box (in a later step), so I painted the edges of the box with some white impasto paint.

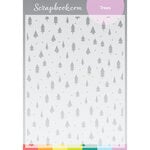
Now onto those strips for the outside! I cut strips for the 4 sides of the box from the same white cardstock that I've been using for all the other pieces. I then used some mint tape to secure the Tree stencil from Scrapbook.com to the strips and blended in some ink using the domed foam blenders. I love these because they get into the little nooks and crannies of your stencils. For my blend I used Distress Oxide in rustic wilderness, salvaged patina and speckled egg.

An important tip is to let your stenciled oxide strips dry before you attach them to the box or you could risk smudging your work! You can either set them aside to dry (like I did) or use a heat tool on them for a few seconds. While my strips were drying, I cut out a piece of patterned paper for the back of the box from the same P13 paper pad. I hung on to the strip I cut off and used it to make a holder for the battery pack at the end.

If you aren't adding lights to your box, or not using a box, you can skip this part about lighting up the box. I made a mark in the bottom right of my box and then used my drill with a drill bit that would make a hole big enough to string some Tiny Lights through. Make sure to work on a scrap piece of wood so you don't drill a hole into your work surface! Then string your lights through, attaching them to the sides of your box as close to the bottom as possible, using hot glue and some washi tape to hold it all in place (I chose a silver glitter that would reflect the lights). Snip off the excess lights with a pair of sturdy scissors (I use my Tim Holtz scissors).

Next you are going to adhere your acetate layer to the back of layer #3. I used 1/4 inch adhesive tape for this. Then score and fold along the 1/2 inch lines we marked earlier on the left and right sides of this layer. These tabs will be what you use to attach this layer to the sides of the box. Before glueing it in place, notch a tab in one side with a small circle punch (I used a 1 inch). This will help you get your fingers under the layer to press the tabs in on the final side you glue down. If you don't have a circle punch, just use some scissors to notch a tab in.

You'll want to dry fit your layer before glueing it into the box. Adjust by cutting off from the top or bottom or by scoring a little further in than a 1/2 inch. Once you are happy with the fit, attach 1/4 inch adhesive to both tabs. Glue down the side that isn't notched first, pressing it firmly down to the side of the box and as far down into the box as possible.

Next I added some 1 inch and 1/4 inch foam adhesive to the back of one of the smaller trees and then I pressed it down onto the layer. Then attached the notched side of the layer to the side of the box.

Dry fit, adjust and attach layer #2. I cut the trunk off the bottom of the other smaller tree using the Scrapbook.com small scissors and then attached it with some 1inch foam adhesive to layer #2.

Cut the largest tree in half using your paper trimmer.

Glue layer #1 to the front of the box using 1/4 inch adhesive and Smart Glue. I had to trim the bottom of the trunk off my trees so I started by placing one of the halves on the box where I wanted it, and then holding it in place with a bit of mint tape. I then used a pencil and marked where I needed to cut the trunk off at, removed the tree, stuck the halves back to back and cut along the line I drew. Attach a tree half to either side of the box using 1/4 inch adhesive.

I wanted to give this box a little height up off the ground so I painted the largest set of Tim Holtz finials with white impasto paint. I then applied a thin layer of Smart Glue to strategic areas on each piece of the finial, let it dry and then pressed gold flakes into the glue (which remains tacky after drying). I had to dig through my foil flakes to pull out the gold and then I had a little accident and flakes when flying everywhere! On the bright side, the WeR Memory Keepers Glitter Vac works great for picking up flake escapees! Burnish off the excess flakes and set aside.

Before glueing on the stenciled strips to the outside of the box, I took the pieces for the top and bottom and marked the center point. This is where I will glue the finial pieces on at. Attach the stenciled strips to the outside of your box using Smart Glue and 1/4 inch adhesive. Using Smart Glue, attach the finial pieces, trying to center them over your marks as much as possible.

Next I added a sheet of double sided adhesive to the back of a piece of kraft metallic gold cardstock from Tim Holtz. I die cut out "Stille Nacht" (Silent Night in German) using the Uptown upper and lower case alpha dies from Scrapbook.com. I centered the saying on the bottom of the box. I then added some fussy cut florals to the left side of the box after using some shaping tools on them to add a bit of dimension. I attached them with Collage Medium. I also added a few metallic gold pearls from Pinkfresh to the two tree halves.

I then spritzed up a sheet of white cardstock with red and pink Distress sprays (I added some of my Distress Stain in aged mahogany to a small spritz bottle and then also used Distress Oxide Spray in kitsch flamingo and Distress Mica Spray in winterberry). I inked, spritzed with water, dried, layered and dried until I was happy, then flipped the sheet over and inked up the backside. Once it was all dry, I ran it through my die cut machine with the two floral dies from the Festive Bouquet set, cutting each one twice. I shaped the solid layers with various shaping tools and then attached them all together with a yellow pearl brad.

I cut out some of the greenery from the same die set from some of the leftover inked green sheets from the trees, shaping them with shaping tools. I then glued the flower and the greens to the top of the box with heavy body gel after adding a bow of white velvet trim to the top finial.

And the final step is to create a box to hold the tiny lights battery pack in, using a cut off strip from the white paper I cut earlier. I used Tami's tutorial, which you can find on her blog. I used 1/4 inch adhesive to hold the box together and to glue it to the back of my project.

I just love all the layers to this project. It was a bit of a challenge to figure it all out, but now I've done all the hard work for you!

And honestly you know I couldn't resist adding my signature floral element! It's rare that I make a project without some kind of floral or leaves.

And no winter/Christmas project is complete without a bit of glitter and some snowflakes. I love that the detail of the stencil shows through with the lights on.

I cannot wait to see what you create with the Nested Tree die this holiday season! Be sure to tag me in it when you share on your socials! Be sure to head back over to Instagram to finish this parade (or start it)! Until next time, happy crafting!
Adrienne
hop the Supplies:
Scrapbook.com
I am an affiliate with Scrapbook.com. When you shop the links below, I receive a small commission from the affiliate, at no additional cost to you. This helps me balance the costs of the time and love I put into my projects and blog so I can continue to share my ideas with you for FREE. If you shop the links, thank you! I greatly appreciate it.
Below are products that I used or similar products.


0 comments
I'd love to hear your thoughts!