
There is simply nothing more magical than a holiday shaker tag on your gifts.

And while the notion is that they are perfect for kids, in all honesty, adults love them too! Just like the holiday spirit brings out the child in us all, so do shake cards and tags! And this shaker tag is super simple to make too and you probably have most of the supplies in your stash already (like adhesive and cardstock)!

Here are the supplies you'll need:
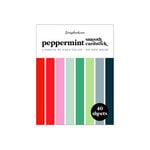
- Scrapbook.com A2 Peppermint Smooth Cardstock
- Scrapbook.com A2 Cools Smooth Cardstock
- Scrapbook.com A2 Solar White Flat Card Front
- Scrapbook.com 5x6 Acetate Sheet
- Scrapbook.com Snowflake Winter Wishes Die
- Scrapbook.com Magic Mat (optional but makes die cutting a breeze!)
- Scrapbook.com Pops of Color in Seafoam
- Scrapbook.com 1/4" Double Sided Adhesive Roll
- Scrapbook.com 1/4" Foam Adhesive Roll
- Scrapbook.com Small Adhesive Foam Squares
- Scrapbook.com Smart Glue
- Scrapbook.com Mint Tape
- Scrapbook.com Domed Foam Blending Tool
- Tim Holtz Distress Oxide Ink in Salvaged Patina
- Tim Holtz 7" Scissors
- Craft Medley Cup Sequins in Viola
- Pinkfresh Essentials Crystals in Clear
- Nested Tag Die Set
- Nested Rectangles Die Set
- White Pen or Marker
- Ribbon, Baker's Twine and Silver Thread
- Hole Punch

Start by cutting out a tag from the solar white card front--this will be the base of your tag. Then select a nesting rectangle die that fits inside your tag die to create a window and cut this tag with window from a mint color sheet in the Peppermint pad. Use a strip of mint tape to hold your dies in place while running them through your machine.

Next, cut the Snowflake Winter Wishes die from the deep teal in the Cools cardstock pad. Hold it up to your tag, placing it about where you want and make a mark with a pencil of where you need to trim off the excess then use a paper trimmer or scissors to slice that off.

Using a domed foam blending tool, add some Distress Oxide in salvaged patina to the outer edges of your tag with the window. The use the tool and pounce over the ends of the snowflake arms for a frosty look.

Set these both aside to dry so you don't smudge and then cut a tag out of a sheet of acetate. It won't cut all the way through, but it will create a nice crease that you'll be able to cut along with a pair of scissors. Then snip off the top of the acetate tag where the hole is (or you can use a punch tool to punch out the hole).

On the back of the mint tag, apply strips of 1/4" adhesive around the edges and then stick down the acetate. Then place strips of 1/4" foam adhesive around the window (I did two layers to give my thicker shaker elements room to move). Sprinkle in your shaker elements like sequins and crystals, peel off the adhesive on the foam strips, line up the white tag and press down on the adhesive foam.

Around the top of the tag where the hole for ribbon is, apply a few dots of liquid smart glue and pinch the tops of the tag layers together. Nest up some silver thread and place it on the tag where you will add the snowflake. Then adhere the snowflake with a few small foam squares to pop it up.

To create the smaller tag for the name, select the darker purple from the Cools cardstock pad and cut out the banner layer from the snowflake die set. Lay it over the shaker tag and snip off the excess then punch a hole through it. Using a white pen or marker, write your recipient's name on it. Use your fingers to gently curl the end of the small tag then glue it in place with a small dot of smart glue.

Loop some baker's twine through the tag and add a little bow of ribbon to the top with a dot of smart glue. To finish it off, add a few dots of Pops of Color to the snowflake for a little more sparkle and dimension!
Now make sure that you head back over to my Instagram to finish the Holiday Handmade Papercrafting Parade being hosted by Scrapbook.com! You don't want to miss a single inspirational project from this group of makers! Until next time, happy crafting!
Adrienne
Shop the Supplies:
Scrapbook.com
I am an affiliate with Scrapbook.com. When you shop the links below, I receive a small commission from the affiliate, at no additional cost to you. This helps me balance the costs of the time and love I put into my projects and blog so I can continue to share my ideas with you for FREE. If you shop the links, thank you! I greatly appreciate it.
Below are products that I used or similar products.


0 comments
I'd love to hear your thoughts!