
Silent Night Tim Holtz Mini Display Dome Christmas Vignette
I love wintery scenes with sparkling snow. Maybe it's because I'm a Colorado girl with Austrian ancestry, but nothing is quite as serene as glittering snow in the mountains.

And what better for creating sparkling snow than grit paste, mica flakes and rock candy from Tim Holtz!
Before I get into the project, I just want to remind you that Scrapbook.com is still holding their 12 Days of Christmas sale and Tim Holtz products are on sale! They also have an awesome freebie today as well--their 1/8" roll of adhesive. I recently got myself some and it's perfect for adhering cardstock to your projects. It tears easily so you don't need to waste time reaching for your scissors. Just think of all the tiny houses from Tim's paper village die you could assemble in a cinch!

Now that I've gotten that "Enabler Alert" out of the way, let's get back to the project! After seeing Tim's live Facebook video on how to make ombre trees, I've been dying (haha, get it?!) to make some for a project. I knew a snow-filled mountain scene would be the perfect way to add some of those pretty trees so I bought myself some new Distress Spray Stains and set about to planning my project.

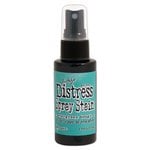
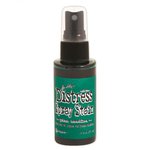
I chose the two smallest tree sizes from Tim's tree lot because they fit so nicely under the mini display dome. For the bigger of the two trees, I spritzed on Distress Spray Stain in pine needles, dunked the top half of the tree into water then used a paper towel to lift some of the color (per Tim's instructions). I did the same for the smaller tree but used Distress Spray Stain in evergreen bough. I set them both aside to dry completely before moving on to adding "snow."

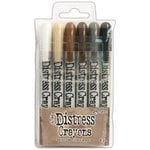
While my trees were drying, I colored a decorative deer. I used Distress Crayon in vintage photo and colored directly on the body of the deer then did the same with antique linen on the antlers and the belly. Using a water brush pen, I then created a watercolor effect on the deer. I set him aside to dry completely before adding a little glitz to him.

I returned to my now dry trees and took a small scoop of opaque Distress Grit Paste and placed it on the non-stick craft mat of my glass media mat. Just as Tim showed in his live video, I used my fingers to pat the "snow" in place on a tree. I decided to go with the opaque grit paste of the clear because I wanted the branches to look like they had heavy snow on them. Before the grit paste dried, I dumped copious amounts of Distress Rock Candy glitter over it and then lightly tapped off the excess. I repeated this process for the second tree then set both aside to dry.

Now that my deer was dry, I used Glossy Accents to add a touch of adhesive to the tops of the antlers and along the top of his back. I then added Rock Candy glitter to the deer as well and set him aside to dry again.
To assemble the dome, I added a layer of grit paste to the cork. To texturize, I laid the flat side of my pallet knife into the grit paste and then pull directly up. It creates the look of tiny snow drifts and will allow the mica flakes that I add later to fall more randomly over the snow so the facets catch no matter the light direction. I pressed the two trees into the grit paste and then using a spade shaped pallet knife, I added snow drifts around the wooden base of each tree. then I pressed the deer into the grit paste plus a few baubles because they look so pretty! For the final touch on the inside of the dome, I sprinkled lots of Distress Mica Flakes over the top and then lightly tapped off the excess. If you want, you can lightly press some of the flakes into place, but I preferred letting my chips fall where they may, so to speak.

Now that the inside of my dome was complete, it was time to add something pretty to the outside. The first thing I did was a some of Tim's velvet Christmas trim to around the glass dome. I decided to go with the dark red since I used green on the trees.
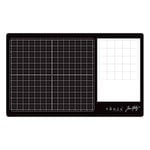
I also wanted to add a little tag with a small sentiment. So I chose a piece of paper from Tim's 2019 Christmas paper stash that had a nordic pattern on it because it reminded me of one of my Oma's favorite Christmas cardigans. I used the banner die cut from Scrapbook.com's Rainbow Wishes to cut out a banner from the nordic pattern paper. I held the die in place with their mint tape and used my new Magic Mat, which I love because my plastic cutting pad doesn't warp! I then added the "Silent Night" sticker from Scrapbook.com's Classic Christmas sticker book (in honor of my Austrian heritage and my Oma) to one end of the banner and snipped off the excess, leaving about a quarter inch.

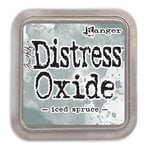
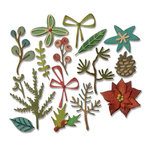
I've been obsessed with the Concord & 9th Take A Bough Encore die since I used it on my Advent Calendar project and wanted to use it again to make some evergreen bough sprigs to add greenery to the outside of my dome. I cut two of the smaller boughs and added dabs of iced spruce Distress Oxide to the ends of each bough. Using my mini snips, I cut off two boughs from one die cut, leaving the center with the hole so I could use it as a tag. I then cut off one bough along with the center portion from the second die cut and layered the two pieces of evergreen bough together, using Scrapbook.com's Smart Glue and lining up the holes from the center of each die cut.

I also cut out a sprig of berries from the Funky Festive die set in both red and brown, layering the red berries over the brown twig. I used Smart Glue to adhere it onto the sprigs of greenery. Then I punched a hole in the Silent Night tag and glued the greenery sprig with Smart Glue to the back of the tag.
I wanted to add a snowflake so I took a scrap of a Neenah Solar White flat card front and inked it with iced spruce Distress Oxide on both sides. I then ran it through my Vagabond with the Magic Mat and a Mini Paper Snowflake die. I glued the snowflake on to the back of the tag with the Smart Glue.

To attach the tag, I used a little bit of my silver WeR Memory Keepers Stitch Happy thread and a needle to sew the tag and an antiqued gem onto the velvet ribbon. To finish off the project, I added a curio knob to the top of the glass dome with a small amount of heavy body gel.
I just love how this project turned out and it is a sweet little compliment to my Stille Nacht (Silent Night) Chapel Vignette that I made last year.

Happy Crafting!
Adrienne
I am an affiliate with Scrapbook.com. When you shop the links below, I receive a small commission from the affiliate, at no additional cost to you. This helps me balance the costs of the time and love I put into my projects and blog so I can continue to share my ideas with you for FREE. If you shop the links, thank you! I greatly appreciate it.
Below are products that I used or similar products. (As of writing this post, you can't get Tim's Tree Lot at Scrapbook.com anymore, but I did list some similar trees for your convenience.)


0 comments
I'd love to hear your thoughts!