
DIY Holiday Thank You Cards + Sales
Thank you cards aren't just for wedding or shower gifts. They can be for any gift or anything!

First, I just want to say that the 12 Days of Christmas sale going on at Scrapbook.com is almost over. You only have 2 days left to nab those last minute deals. Scrapbook.com currently has all 12 of their most popular brands on sale!
Ranger Ink
Sizzix
Echo Park
Prima Marketing
Doodlebug
Simple Stories
We R Memory Keepers
Photo Play
Hero Arts
Spellbinders
Pinkfresh
Tim Holtz

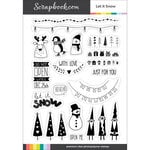
Not to mention that you get a really awesome freebie that is exclusive to Scrapbook.com. Today's free gift is the Sizzix Thank You Banner die.

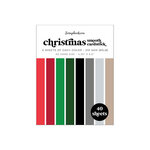
I'd also thought that I would give you some inspiration using that freebie! First up is this red and green holiday thank you card. I used one of the greens from the Christmas pad of smooth cardstock from Scrapbook.com as the base for the card front. I then used that same green and a red to cut out the two parts of the banner. I used the Smart Glue to adhere the banner pieces together and set it aside.

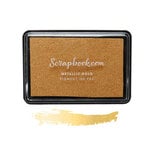
Next, I sliced off a quarter inch from each side of the Neenah Solar White Flat Cards and then stamped a repeating motif in fired brick and forest moss Distress Oxides. For the stamps, I used the Scrapbook.com Bold Caps Solid stamps to spell out thanks, but used a gnome from the Let it Snow stamp set to create the A. All that was left was to glue the stamped cardstock to the green cardstock and then adhere the banner with some foam squares to pop it up off the front of the card.

And because that first one was so simple, I wanted to make another using some non-traditional holiday colors of navy, gold and red. To start, I sliced off a quarter inch on each side of the navy cardstock from the Boho smooth cardstock pad. I then used my domed foam blending tool, the Mod Asterisk stencil and the new Scrapbook.com gold pigment ink to create a shimmery gold and navy background.

Next, I cut out the banner from a light blue and reddish-pink cardstock from the same pad of cardstock and used my Smart Glue to adhere the pieces together. I added some foam squares to the back of the banner cut and stuck it to the center of the card. To finish it off, I added a few drops of Nuvo Vintage Drops in postbox red to some of the asterisks.
Easy peasy! Don't forget to head over to Scrapbook.com to stock up on your favorite brands and get this sweet little freebie while supplies last!
Happy Crafting!
Adrienne
I am an affiliate with Scrapbook.com. When you shop the links below, I receive a small commission from the affiliate, at no additional cost to you. This helps me balance the costs of the time and love I put into my projects and blog so I can continue to share my ideas with you for FREE. If you shop the links, thank you! I greatly appreciate it.
Below are products that I used or similar products.


0 comments
I'd love to hear your thoughts!