
DIY Vintage Sled Christmas Tag with Tim Holtz Sizzix Dies
This vintage sled is the perfect size for cards and tags!

It’s Tim Holtz Sizzix Christmas release day! First I want to thank Scrapbook.com for sending me a few of the dies and an embossing folder to play with. Tim always brings the creativity with every release, and as always, Sizzix’s die quality is top notch!

The Vintage Sled die is the perfect size for a card or for a tag that you can put on a Christmas gift. It reminded me of the vintage sled we put outside on our porch every winter. And just like this die set, we also stick a greenery piece on it! While the one on our porch is decorated in shades of blue, I decided to go with pinks and reds for this paper version. So let’s get into how I made this tag!

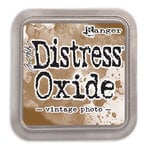
I first started out by die cutting the pieces of the sled out. The wood slat layer of the sled die actually embosses your paper. So before sending it through my die cut machine, I inked up the small brayer with Distress Oxide in Vintage Photo and rolled it over the die. Mist your die with a little bit of water to help activate the Oxide then tape it to your cardstock with a bit of Mint Tape to hold it in place—we don’t want any inky smudges here!

For the sled pieces, I used Tim’s kraft cardstock and kraft metallic cardstock. This is because this cardstock is smooth like metal, nor would there be any texture that interfered with the embossing on the wood slat pieces.

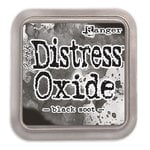
Once I die cut out the major pieces of the sled (i.e. everything but the bow and greenery), I distressed them with some Distress Oxide in Black Soot with a domed foam blending tool. Then I glued the pieces together with Distress Collage Medium Matte. Once assembled, I could figure out how big to make my tag. I’m visual so seeing it on my craft mat where I could measure out the size of the die and the card is how I work best.

I then created custom tag using the new Sizzix Scoring Board and Trimmer tool. I started by cutting a strip of patterned paper from Scrapbook.com’s 6x8 Christmas Patterned Paper Pad to 6.5 inches by 3 inches. Rather than using the ruler attached to the hub at an angle to cut the corners off the top of this tag, it is actually small enough to use the chamfer punch. (I think bigger tags need a custom cut with the angled ruler to look balanced.) The chamfer punch is on the same punch as the rounded corner punch. Just pull up the punch, turn it and place it back in the board to use the chamfer (which cuts a right angle edge). Then use the hole punch to add the hole to the top center of your tag—easy peasy!

After the tag was cut, I added a little bit of Distress Oxide in black soot to the edges of the tag using a domed foam blending tool. But before gluing the sled down to the tag, I wanted to cut out the greenery. For a more natural look, I chose textured cardstock to cut the greenery and bow from. I also decided to cut out three ornaments from the new Trim a Tree die set as well. The base of the ornaments were also cut from the metallic kraft cardstock.

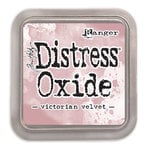
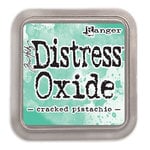
Using a Tiny Details Flawless Blending Brush, I added a little bit of Distress Oxide in Cracked Pistachio to the greenery pieces. I then did the same on the pink pieces, but used Distress Oxide in Victorian Velvet. Then I glued the layers together with Distress Collage Medium Matte.

The longer sprigs of greenery toward the back were glued to the sled with Distress Collage Medium Matte. Then the bow, ornaments and the other pieces of greenery were glued to the sled with Foam Adhesive. The sled was also added to the tag at an angle with more foam adhesive.

I fussy cut a few presents from that same Christmas patterned paper pad and added them to the tag with foam adhesive. For sparkle, I applied Ranger’s Glossy Accents to where I thought snow might accumulate on a sled propped up outside, then sprinkled on Distress Rock Candy Glitter. (Make sure you tap off the excess and stick it back in your jar!

I stamped out a sentiment from Scrapbook.com’s Wordfetti Fa La La set onto some of that present pattern paper where there was a nice bit of open space. I used Distress Oxide in Black Soot to stamp it. Then I cut out the sentiment with a pair of scissors, notching it into a flag on one end. I used one of the extra green leaf die cuts to adorn the sentiment and adhered it to the sled with some Foam Adhesive.

The finishing touch was adding some Pinkfresh Jewels in Ballet Slipper to the tag and in the center of the bow then adding a bit of Velvet Trim to the top of the tag. Once your tag is done, all you have to do is attach it to a gift or send it in the mail instead of a card! Until next time, happy crafting!
Adrienne
Shop the Supplies:
Scrapbook.com
I am an affiliate with Scrapbook.com. When you shop the links below, I receive a small commission from the affiliate, at no additional cost to you. This helps me balance the costs of the time and love I put into my projects and blog so I can continue to share my ideas with you for FREE. If you shop the links, thank you! I greatly appreciate it.
Below are products that I used for this project.


0 comments
I'd love to hear your thoughts!