Mixed Media Technique with Tim Holtz Ranger Distress Embossing Glazes
Distress Embossing Glazes from Tim Holtz are so versatile!
I use several techniques in this tutorial to showcase the beauty of the Distress Embossing Glazes. Tim Holtz showed one of these techniques a while back, but I think that with the release of new Distress Embossing Glazes, it’s a good time to revisit this technique, but in a slightly different way.
First, I want to thank Scrapbook.com for sending me the latest release of the Ranger Distress Embossing Glazes. I’m so excited that several of my favorite Tim Holtz Distress colors are now in Embossing Glaze form—like Peacock Feathers and Abandoned Coral!
So this mixed media technique using the Distress Embossing Glazes applied over an art medium. In Tim’s version, he sprinkled it over one of his own Distress pastes. But for my version, I wanted to try it over a different paste—one that has some grit but also puffs up a bit when you heat it.
But let’s start from the beginning before I get into the paste that I used. I started out by die cutting a tag from some heavy white cardstock. I used one of the new Scrapbook.com blending brushes to apply some Distress Oxide in Saltwater Taffy to the tag I just cut out. These new blending brushes come in multiple sizes and are so soft and smooth, allowing you to really build up your ink. There is even a multi-purpose tool tray that you can organize them in.
Once my ink was dry on the tag, I placed the 6x8 Mums stencil over the tag. Using the project grip mat or mint tape will help you keep your stencil in place. The paste I decided to use was Scrapbook.com’s Cloud Whip. When you heat it before it is done drying, it puffs up a bit like a marshmallow. So I applied the paste through the stencil and before it dried, using my fingers I sprinkled on a mix of three different Embossing Glazes: Crackling Campfire, Saltwater Taffy, and from the new release, Abandoned Coral. I didn’t toss my excess powder, but placed it into a spare jar that holds my “party mix,” as Tim calls it.
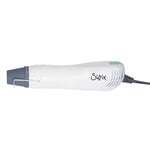
I took some time to clean off my stencil and workplace but before the paste totally dried, I heated the paste and Embossing Glazes to set them both. This is a little different that how Tim does it. He waits for his paste to dry before heating the Glaze. This creates a cool crackle-like effect, but I was going for colorful sugared marshmallow, here.
Once the background was created, it was time to move on to the embellishments. I really wanted to highlight just how gorgeously bright Abandoned Coral is over a white background. So I picked out a flower ephemera piece from the Engraving set. I used the Distress Embossing Dabber and Embossing Pen to color in the flower petals and added the Abandoned Coral Embossing Glaze to it. I heated the glaze then colored in the leaves with the embossing pen and added one of the other new release colors—Bundled Sage and heated that as well.
I pulled out my Pops of Color swatch book to see what color of yellow would look nice with Abandoned Coral. I wanted to add some tiny dimensional dots to the center of the flower for more texture. I decided on the new Banana Split, a pale yellow, and piped it on to the flower center.
I then used some of the leftover thick white cardstock and rubbed the Embossing Dabber over it. I applied Distress Embossing Glaze in Saltwater Taffy, heated it, then applied a second coat. I then Die cut 3 leaves from the new Cozy Foliage die set from Scrapbook.com.
Once all my embellishments were ready, it was time to assemble everything. I used two layers of foam adhesive to pop the glazed flower up. I then tucked the leaves and some Prima Marketing flowers in around the glazed flower. I added some gems from Pinkfresh and then topped off the tag with some ribbon.
I hope that you enjoyed this tutorial and that it inspired you to try out something new with the Distress Embossing Glazes. Don’t forget to head over to Scrapbook.com to purchase your favorites from the new release—or just throw all of them in your basket! There are some gorgeous colors in here so you won’t be disappointed if you get them all—especially if you love green as there are several green hues in this release!
Until next time, happy crafting!
Adrienne
Shop the Supplies:
Scrapbook.com
I am an affiliate with Scrapbook.com. When you shop the links below, I receive a small commission from the affiliate, at no additional cost to you. This helps me balance the costs of the time and love I put into my projects and blog so I can continue to share my ideas with you for FREE. If you shop the links, thank you! I greatly appreciate it.
Below are products that I used for this project.













0 comments
I'd love to hear your thoughts!