
Vintage Glass Christmas Ornament Card
I love the look of vintage glass Christmas ornaments! And this product creates the perfect vintage glass look perfect for your Christmas cards and more.

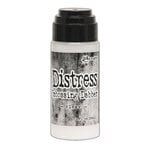
It’s time for a little Christmas in July. I’m hoping that I can get a jump on my cardmaking this year as I know I’m going to be so busy. So when I was sent the latest Tim Holtz and Ranger release of Distress Embossing Glazes, I knew I needed to make at least one Christmas card with these powders!

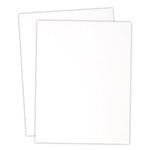
Applying Distress Embossing Glazes over smooth white cardstock, like Scrapbook.com’s Solar White cardstock, creates the perfect vintage glass effect! And I had the perfect die to use it with—the Spellbinder’s Stitched Ornament die. I bought this die a while back and have been waiting for July to roll around so I would have a good excuse to make with it and share it.
I die cut out the base and stitched layer from the Solar White cardstock. I also die cut out the Geo Squares plate from Scrapbook.com. I wanted to create a white on white background so it appears to be embossed, rather than die cut.

I also die cut the embellishment layers of the Stitched Ornament from Tim Holt’z metallic kraft cardstock in gold. I cut both the ornament top and the geometric lines twice. This way, I could double up the top for more stability. I cut the leaves from som textures Sizzix Muted Cardstock
I used the Distress Embossing Dabber to cover the stitching layer of the ornament. I covered it in one of the colors from this new release of Distress Embossing Glazes, Peacock Feathers. After heating this first layer, I added a second layer of Glaze for a deeper color and more even coverage.

I used the new Artis Glue with the precision tip applicator to glue the white Geo Squares die cut onto a white card base. To make sure it adhered well over the entire die, I added a stamping block on top to press the two layers together.
While the glue cured, I set about adding my stitching with some white embroidery floss. This was my first time doing a stitching die, so it’s not perfect, but I do love how it turned out. Once I was done adding the floss, I adhered the stitched layer to the plain base I cut out for the ornament using a little bit of foam adhesive.

I also glued the two ornament tops I cut together, then added it to the top of the ornament. I also glued on the other gold dies used to embellish this ornament. I used more foam adhesive to apply the ornament to the card background. I used a little bit of 1/8 inch foam strips to pop up the die cut leaves and make it look like the ornament is hanging from them.

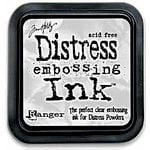
I kept the sentiment small and simple, using an embossing ink pad to stamp out a sentiment from the Winter Wishes and Spruce Sprigs stamp set. I embossed it with the same embossing glaze I used on the ornament. And since there is now a matching die set to this stamp set, I die cut out the sentiment and added it to the card with a bit of foam adhesive.
To finish off this card, I added a bunch of little gold pearls from Pinkfresh Studio. I hope that you love this tutorial and that you try out your favorite Embossing Glaze color to create this gorgeous vintage glass-like effect.
Until next time, happy crafting!
Adrienne
Shop the Supplies:
Scrapbook.com
I am an affiliate with Scrapbook.com. When you shop the links below, I receive a small commission from the affiliate, at no additional cost to you. This helps me balance the costs of the time and love I put into my projects and blog so I can continue to share my ideas with you for FREE. If you shop the links, thank you! I greatly appreciate it.
Below are products that I used for this project.


0 comments
I'd love to hear your thoughts!