
Simple Mixed Media Floral Card with New Scrapbook.com Products
Adding texture to cards with a mixed media art medium can really add a “wow factor.”

I have really been enjoying using the new Cloud Whip and wanted to test it out over Distress products. With Distress, all of the products are water reactive even after drying—except for Distress Paint. I wanted to test and see how much of the ink the Cloud Whip would soak up.

I started this project by making a blue Distress background on Distress Mixed Media Heavystock. I used Distress Spray Stain in speckled egg, Distress Oxide Spray in uncharted mariner. I also mixed in a little bit of Distress Mica Stain in winter frost. Pick out your favorite colors to use—there is literally no right or wrong with this! Once the background is distressed to your liking, you can flatten it out by setting something heavy on top overnight, or you can run it through your Minc machine on heat setting 3. Pro tip: I always add a sheet of printer paper over the top of my backgrounds with mica to keep the Minc transfer folder clean.

I then pulled out several of the new products that Scrapbook.com sent me. I used the new Roma stencil, adhering the card background in place with a bit of 4 inch mint tape. This keeps the stencil from moving while you are working with it. Give your Cloud Whip a little stir and then dollop a bit on top of your stencil with a palette knife. Using a craft scraper, spread and scrape your Cloud Whip through the stencil and set it aside to dry. Dry time will vary depending on your climate and thick you applied the medium.

When looking at it after it dried, I can see where the Cloud Whip picked up just a little bit of the Blue Distress inks in some of the thinner areas. In the thicker areas, the Cloud Whip stayed pretty white.

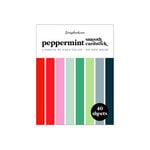
To decorate this card, I used two of the Nested Circles die to create a hoop. I cut it from some champagne gold kraft stock, using 1 inch mint tape to hold the dies in place while running it through the die cut machine. I also cut out the small rose and some of the leaves from the new Layered Roses die. For the solid bottom layer of the rose, I spritzed a bit of pink mica spray onto some white cardstock and let it dry before cutting (I used winterberry, but if you don't have it, try cocktail party). The detail layer was cut from the pink cardstock from the Peppermint pad. The leaves were cut from the mint cardstock from that same pad. I also cut a few leaves from the Sprigs die set to layer in.

To assemble, use liquid glue to adhere the top layer on the rose. Then add a bit of foam adhesive to the back of the rose. Set your leaves where you want them and then stick the rose down on top of them—the foam adhesive will hold them in place. If you need some extra hold and pop of dimension, add some foam adhesive to the backs of some of the leaves. I finished off with a few sparkly gems, gluing them on with some Glossy Accents.
I’m so excited to continue playing with the new Cloud Whip and find fun new uses for it! I definitely want to use it on a mixed media canvas and one some Christmas projects with Distress Rock Candy Glitter. Until next time, happy crafting!
Adrienne
Shop the Supplies:
Scrapbook.com
I am an affiliate with Scrapbook.com. When you shop the links below, I receive a small commission from the affiliate, at no additional cost to you. This helps me balance the costs of the time and love I put into my projects and blog so I can continue to share my ideas with you for FREE. If you shop the links, thank you! I greatly appreciate it.
Below are products that I used for this project.


0 comments
I'd love to hear your thoughts!