How to Easily Add Texture to Tags or Backgrounds
Adding texture using a mixed media art medium can seem overwhelming, but it doesn't have to be!
I know that there are lots of choices of different mediums out there and it can get overwhelming, even for the most seasoned mixed media pro, let alone a newbie. So if you are looking to dip your toes into the world of mixed media, there is one medium that I suggest starting with and that is Pops of Color.
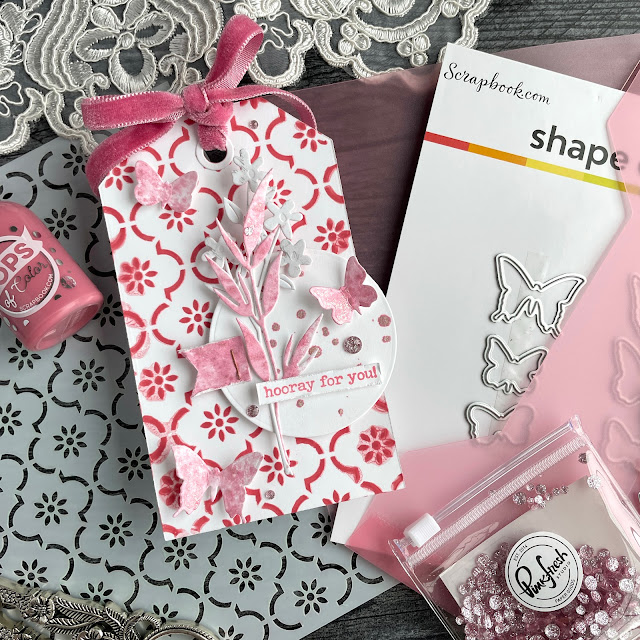
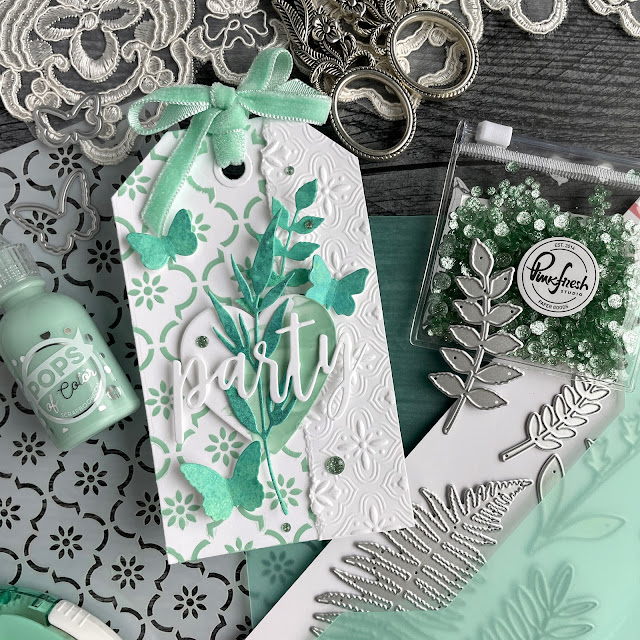
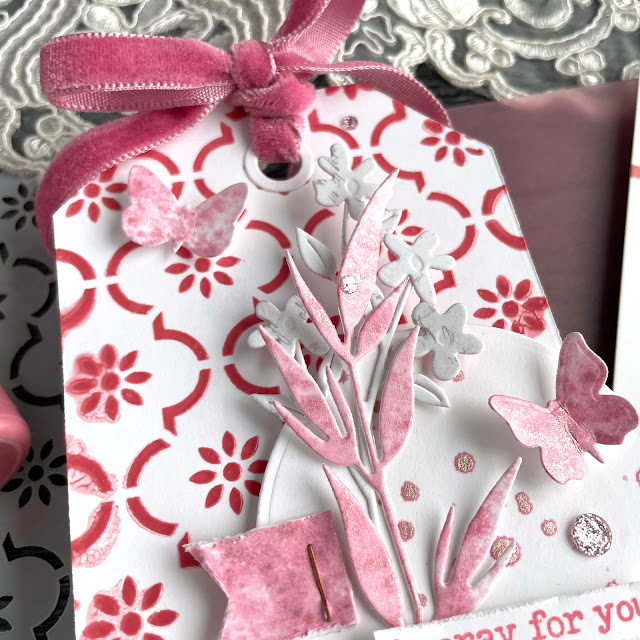
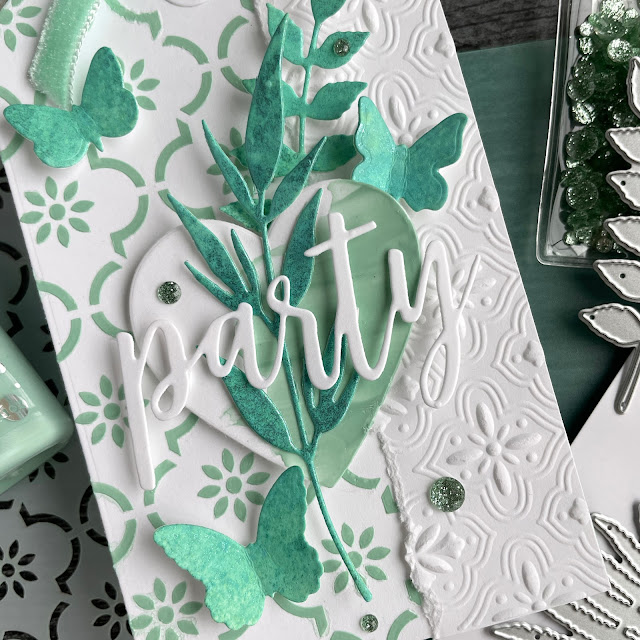
Pops of Color are extremely versatile and they are easy to use. You can paint with it, splatter it, smear it and scrape it through a stencil to create fun, colorful texture. With this baseline technique, don't expect perfection. Each color of Pops of Color has its own consistency. You'll find that some colors smoosh out of the stencil along the edges a bit, like the tag using Dusty Rose above. And other ones hold up pretty well through a stencil, such as the tag using Mint shown below. But if you are going for a distressed look, like I personally love, those imperfections won't matter.
Now if you are a perfectionist, you can mix Pops of Color with the brand new Cloud Whip. Cloud Whip is a modeling paste medium. Keep in mind that the more Pops of Color you add to the Cloud Whip, the thinner the Cloud Whip will get, also causing it smoosh out a bit too when scraping it through a stencil. Also, your Pops will be more pastel or muted. So it really just depends on the look you are going for!
I decided to use these two newer shades of Pops of Color with some new products that Scrapbook.com sent me (big thank you to them for that!), one of which is this gorgeous Spanish Tile stencil. It reminds me of some tiles that my grandmother had in her bathroom that were fun and colorful. And because you know I can't not add something having to do with foliage or florals, I wanted to embellish these tags with the brand new Delicate Leaves die set. Helloooooo, gorgeous! This is definitely a new favorite die set!
Now let's dive into the step-by-step tutorial for these tags. Start by cutting two tags out of white cardstock using the Nested Tags die set. Adhere the Spanish Tile stencil to your tag using some mint tape and then apply your choice of Pops of Color onto the stencil, scraping it through with a craft scraper. Don't press too hard, or you'll get a ton of squish out. Use gentle, even pressure. Once you have applied the Pops, carefully peel your stencil off and submerge it in water and remove the mint tape from your tag. Set your tag aside to dry while you work on your other elements. Dry time will vary depending on your climate, but Pops dries pretty fast, so you won't be waiting more than a half hour.
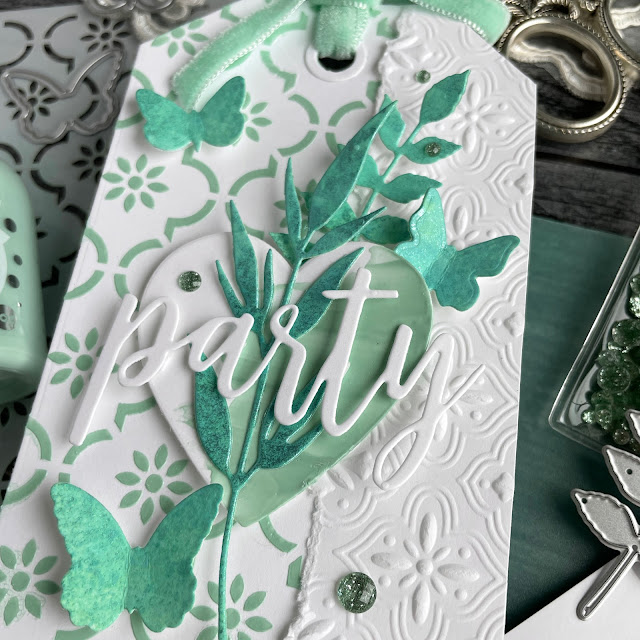
Cut out a base shape to hold your embellishments on. I chose a Nested Heart and a Nested Circle die for my two tags, cutting them from the same white cardstock. For the mint tag, I smeared some of the same Mint Pops on the heart. You can use a silicone brush or a palette knife for this. For the pink tag, I splattered some pink Mica Spray Stain on a circle. Set these aside to dry as well.
For the leaves, I created some Distress backgrounds, but you can use plain cardstock if you aren't ready to dip your toes into this mixed media art form. With Distress, there really is no right or wrong. Just remember that Oxides will cover up what is underneath it, while Inks will be more transparent. And all are water reactive! I sprayed some Distress Ink Stain and Distress Oxide Spray in cracked pistachio onto another piece of the same white cardstock that was spritzed with a bit of water. I added in a little bit of Distress Mica Stain in merry mint (2022 release). For the pink, I spritzed the cardstock with water and then a little bit of Distress Mica Stain in winter berry (2021 release). I wanted this one to be a bit more delicate. I dried both with a heat tool and then cut some of the Delicate Leaves and small Butterflies out of each.
The tile pattern in the stencil is also similar to the new Tile Reflection embossing folder from Spellbinders' Floral Reflection collection. I had a strip left over from a previous project as well as a sprig of flowers from the Sealed Wildflower die set, cutting it from some white based paper from 49 & Market, and added those into the mix as well. For sentiments, I cut a word die out three times and layered it together to add dimension. I also stamped a sentiment for the other tag with Distress Oxide in worn lipstick.
To assemble, I added some adhesive to the back of the torn strip of embossed paper and added it to the mint tag. I then placed one of the pieces of foliage on top of the mint tag. This will be held in place by the next element we put down. Add some 1" foam adhesive to the back of the heart (or whatever base shape you chose), and place that on your tag, holding the first foliage die cut in place on the mint tag. Before adding the circle on the pink tag, I cut out a little banner and stapled it onto the circle then added foam and placed it on the tag.
Using a bit of liquid adhesive, glue down your other foliage elements--for the pink tag, that's both the foliage die cuts. Using a small bit of 1/8" foam adhesive, adhere your butterflies in place. Use that same adhesive to add your sentiments and then glue on some sparkly gems with a bit of Glossy Accents. I used the new Pinkfresh Glitter Drops in blush and leaf. Then add a little bit of velvet trim to each tag and you are done! Oh, and if you are wanting to know about those pretty storage envelopes, I used the new Mint and Pink medium sized storage envelopes. These are such a fun way to add color to your craft room! Until next time, happy crafting!
Adrienne
Shop the Supplies:
Scrapbook.com
I am an affiliate with Scrapbook.com. When you shop the links below, I receive a small commission from the affiliate, at no additional cost to you. This helps me balance the costs of the time and love I put into my projects and blog so I can continue to share my ideas with you for FREE. If you shop the links, thank you! I greatly appreciate it.
Below are products that I used for this project.



















0 comments
I'd love to hear your thoughts!