
Alcohol Ink Dupe Tutorial with Scrapbook.com Pops of Color
I love alcohol ink backgrounds but I've never really played with the medium much to really get the hang of it.

I also know that some people can be pretty sensitive to the fumes, even with proper ventilation. So finding a good dupe can be difficult.

I was inspired by my friend, Sasha, who used WOW embossing powders to create an alcohol ink looking background. The Reel she shared on Instagram was fascinating and it got me thinking about what else you could use to create an alcohol ink-like background.

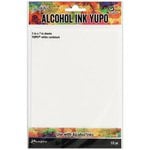
I thought I would give Scrapbook.com's Pops of Color a try. These liquid drops are thinner than Nuvo's drops and figured they would move around on the page easier. I wanted to reduce friction as much as possible though, so I chose Yupo to work on because of it's smooth plastic surface.
Be sure to check out my process video on my Instagram embedded above and give me a follow there so you don't miss any of my projects!

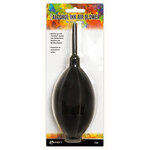
All you need are a few Pops of Color and something that blows air to move the medium around. I have an old Tim Holt marker spritzer that I used. I also tried a straw and blowing air through it and that worked just as well. You can also use the new air blower from Tim Holtz that is designed for alcohol inks.

I work with 2 to 4 dots of medium at a time. I start with some generous dollops of Pops of Color on the Yupo. I take my spritzer and hold it directly over the dollop of paint, perpendicular to the paper. Give a spritz or two to break up the dollop of paint and then as you continue to spritz air at it, move your spritzer to a 30 or 45 degree angle. The greater the angle, the more you'll see the color move across the Yupo.

Pops of Color have varying consistencies. I found that the pearl paints were a little thicker. The gloss ones were thinner, with the lighter colors being the thinnest. The glitter was similar to the lightest gloss Pops of Color. The thinner the paint, the further and easier it is to move it on the paper.

Continue to build up your color by adding a few drops, blowing air on them to move them and then repeating until you are happy with your background. Then be sure to set it aside to dry completely before doing anything with your background. Drying time depends on how much medium you have applied and the environment you live in. I live in über dry Colorado so things dry relatively quickly here. Even so, I often set it aside to dry overnight.

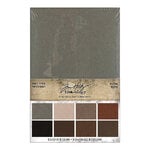
Unlike alcohol ink, you won't see too much mixing of your colors. Some of the gloss paints are a bit more translucent so you might get a little color play there. But I think the real bonus of this technique (other than not having to deal with fumes or heat), is that you get incredible texture!

The finished product cut smoothly in both my guillotine style trimmer and my rotary style trimmer. I haven't tried die cutting these backgrounds yet, but I love them as a background so much I'm not sure that I want to do that. If you want to give it a try, make sure that you use two plastic cutting pads, rather than a self-healing one. This will allow the blades to cut all the way through. If you have a Sizzix machine, I also know the they recommend loading your dies blade side up so the mechanism that applies pressure is closer to the blade (I do this for glitter paper so I get clean cuts each time). If you try die cutting yours, drop a comment below! I'd love to hear how it turns out. Until next time, happy crafting!
Adrienne
Shop the Supplies:
Scrapbook.com
I am an affiliate with Scrapbook.com. When you shop the links below, I receive a small commission from the affiliate, at no additional cost to you. This helps me balance the costs of the time and love I put into my projects and blog so I can continue to share my ideas with you for FREE. If you shop the links, thank you! I greatly appreciate it.
Below are products that I used or similar products.


2 comments
I love this! I just ordered my POPS of color! So excited to try this when I receive mine! Thank you!
ReplyDeleteSo happy to hear that you were inspired!
DeleteI'd love to hear your thoughts!