
Mixed Media Monday: Floral Butterfly Panel with Distress Ink and Oxide Sprays
What I love about mixed media are all the layers you can add. You aren't limited by a project being smooshed or flattened by a scrapbook so you can really go for it!

It's Mixed Media Monday and that means more pretty mixed media inspiration! Today, I'm brining you a picture tutorial to go along with the inspiration.

Once I started playing with Kitsch Flamingo, I couldn't put it down. This time I decided to use the sprays to create a pretty floral inspired project. Let's jump right into this tutorial!

First, choose your base surface. I decided to go with a lid to a round paper mâché box. I used the box for something else so this lid was hanging out in my collection of junk items to repurpose. Because you'll be covering the top of the lid with watercolor paper that is inked, you only need to worry about covering the edges and sides of your surface. I started by brushing my base with a purple impasto paint and then dry brushed a pink over the top.

Next, trace your surface onto watercolor cardstock and cut it out using some scissors. I distressed the edges of the watercolor cardstock as well. Spray your watercolor cardstock with a Distress Oxide Spray--I used Kitsch Flamingo. Dry it with a heat tool then spray and splatter it with water, lift with a paper towel and dry again. Repeat this until you get a look you like.

After you are done with the Distress Oxide Spray, add Distress Spray Stain over the top. I chose Kitsch Flamingo and Dusty Concord. Again, spray, dry, spritz with water, lift and dry again.

If you aren't sure why layering Distress Spray Stain over Distress Oxide Spray is amazing, just check out the difference. When layering the two products, always start with the Oxide. This is because Spray Stain is semi-transparent. Spray Stains are also affected by the colors underneath them. You can see how the Spray Stains took on oxidization properties and how the pink became more intense and the purple softened in my color combo.

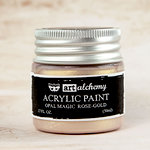
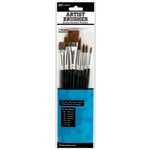
On to the next step. To add a little bit of shimmer, mix a small amount of a shimmery acrylic based paint, like Finnabair's Art Alchemy acrylic paints (metallique, opal magic or sparks), with a little bit of water in cup or pan. Use the Tim Holtz splatter brush to pick up the paint and splatter it on your watercolor cardstock. (If you've never used the splatter brush before, pick up the paint, hold it over your project then using your hand, pull the thick bristles back and release them to create splatters.)

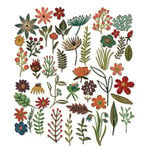
Set your splattered watercolor cardstock aside to dry or use a heat tool on it to speed up the process. While that is drying, fussy cut out some elements. I used a bowl to trace out and cut a circle and then fussy cut some floral elements with my snips and swivel craft knife. Then add some splatters of paint to these as well.

To add a good amount of dimension between the base and larger paper element, you can use layers of foam adhesive or you can use small clothespins. For the clothespins, add a small amount of adhesive, like the 1/4" roll adhesive, to one side of the clothespins and stick them down to the back of the fussy cut element.

To stick the fussy cut element down onto the base, apply heavy body gel to the clothespins. I sometimes like to place other elements of my project down without glue, just to help me get the placement of other larger items on just right.

Once you have the main element stuck down, you can add other pieces. Use heavy body gel to attach lace and flowers and double sided foam for paper elements, like the fussy cut florals.

To add a little bit more to your florals, cut some leaves out of white cardstock and spritz them with Distress Oxide and dry them. Apply little bits of Smart Glue to the leaves. This glue is perfect for foiling because it remains tacky after drying. Once dry, simply lay your foil sheet over, rub and lift.

For the final steps, apply an effect paste with glimmer in it for added sparkle in spots on your project.

Then add a butterfly (I bought this one from ReneaBouquets), a sentiment sticker and a few gems.

I really like how this project turned out with all the pinks and purples and a few highlights of blues.

Just look at those fussy cut floral elements! Not everyone likes fussy cutting, but I find it relaxing. If you don't like fussy cutting, use coordinating pre-cut ephemera instead.

That sparkle is off the charts! (Yes, this is the "gratuitous smattering of finished project photos" part of the blog!)

And that dimension is really off the charts! Keep scrolling for products used in this project.

Happy Crafting!
Adrienne
I am an affiliate with Scrapbook.com. When you shop the links below, I receive a small commission from the affiliate, at no additional cost to you. This helps me balance the costs of the time and love I put into my projects and blog so I can continue to share my ideas with you for FREE. If you shop the links, thank you! I greatly appreciate it.
Below are products that I used or similar products.


0 comments
I'd love to hear your thoughts!