
Mixed Media Monday: Easy P13 Forest Tea Party Panel Tutorial
Mixed media projects don't have to be difficult. A few simple techniques and products are all that are needed to create something truly stunning.

To start, I wanted to let you know that today begins a new series called Mixed Media Monday. On every first Monday of the month, I'll be sharing a new mixed media project with you! Not only will it encourage me to keep creating, but I hope that each month you find fresh new inspiration to help keep you creating as well. Now on to the project!

I always hear how intimidated people are when they look at mixed media. But once you dip your toes in, it's rather exciting. If you haven't done mixed media before, I suggest looking at a couple of my helpful past blog posts to get you started. The first is my post on the different art mediums and what they are used for. This is post is the perfect primer (pun intended) to help you figure decode all the different ingredients used in mixed media. The second post is my tutorial on building layers on your project. Mixed media is all about texture and layers and this blog post takes a deep dive into that.

Now let's get into this mixed media tutorial. Here is a list of what you'll need:
- Small panel (if you don't have one of these, chipboard will also work!)
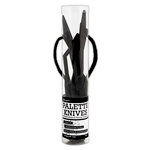
- Palett knives
- Craft scraper
- Stencil
- Paintbrush
- Splatter brush
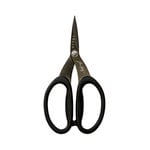
- Small scissors
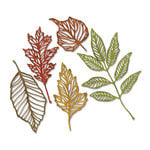
- Leaf dies
- Die cut machine
- Effect paste
- Heavy body gel
- Impasto paint
- Shimmer watercolor
- Smart Glue
- Foam Mounting Squares
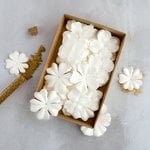
- Paper flowers
- Thread
- Gems
- Foil sheet
- Watercolor cardstock
- Smooth white cardstock
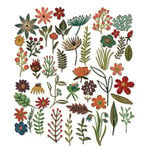
- P13 Forest Tea Party 12x12 paper pad
- Tim Holtz Small Talk Stickers
A lot of these items you'll probably already have in your stash, like the tools and glue. And remember, you don't have to use the exact same things that I did (but if you scraplift it exactly, I will totally be flattered)! But make this project your own, have fun and do a little experimenting.

1 | Prep your base
Start by preparing your base. I used white impasto paint to go around the edges of my mini panel. (I used the frame for something else, so this project just uses the base of the panel.) Next, I cut some watercolor cardstock to size. Using the Smart Glue and a craft scraper, I applied it to the panel.

2 | A Hint of Color
Next, I watered down some pink impasto paint. To apply this pink paint, I brushed plain water on to my watercolor cardstock then dipped the paintbrush in the watered down pink paint and applied it to the wet cardstock, letting the color spread. I let it dry and then added some more pink to create some darker spots. To give it just a hint of shimmer, I added some pearly white metallic watercolor over some of the pink paint.
I wanted to add a bit of interest and tone down the pink with splatters of white and iridescent pearl watercolor. I dipped my splatter brush in some watered down white impasto paint and splattered it on the panel. I then did the same thing with the pearly white watercolor.

3 | Add Sparkle and Texture
Once the watercolor was dry, I added a little of sparkle and texture with the new Crushed Ice effect paste. Simply place a stencil down and then apply some of the paste using palette knife. I put on a thin layer, which dried quickly.

4 | Paper Flowers Pops
Now starts the really fun part--adding all the layers! I began by adding flowers that serve as the base to pop everything else up. To help me plan the placement of the paper flowers, I started by fussy cutting some elements from the P13 Forest Tea Party papers. The small Tim Holtz snips are perfect for fussy cutting. Once I figured out where the flowers needed to go based off the fussy cut elements, I applied a small amount of heavy body gel to the back of the flowers and stuck them down. I tucked in nests of silver thread under a couple of the flowers for added interest. Helpful Hint: Heavy body gel has some work time so don't worry about accidentally ripping your project by adjusting the placement of a flower later.

5 | Fussy Cut + Foil
Next, I die cut some skeleton leaves and funky floral ferns and leaves from smooth white cardstock. To get clean cuts, I highly recommend using the Magic Mat with your die cut machine. Not only do you get perfect cuts each time, but it extends the life of your plastic cutting pads! To give a little shimmer to these die cuts, I applied Smart Glue in areas where I wanted to apply silver foil and then set these die cuts aside to dry. When dry, Smart Glue remains tacky, allowing you to apply foil!

I added a large floral fussy cut element over my paper flowers, using Smart Glue in strategic places to glue it down. Before moving on to the fussy cut bunny in a teacup, I went back to the die cut elements. Smart Glue doesn't take long to dry if you use a small amount. To apply the silver foil, I simply cut a small section from my roll, laid it over the die cuts and rubbed to adhere the foil to the glue.

To add these foiled die cuts, I placed a small drop of glue on the back of the stem and pressed them into place. I added some around the paper flowers and over the top of the large fussy cut floral element. Then I added some foam mounting squares to the back of the fussy cut bunny. Before pressing it down in place over the large fussy cut floral and foiled die cuts, I added another nest of silver thread then added the bunny to my project.

6 | The Finishing Touches
To finish off the project, I added a sticker from Tim Holtz's Small Talk sticker pad, using small foam mounting squares to pop it up. I also added a bee ephemera from his field notes snippets set, adding a hint of Glossy Accents to the wings. This really is optional, but I felt it was appropriate to have a bee with all these gorgeous flowers! Finally, I adhered a few pretty iridescent jewels.

I hope you enjoyed this tutorial and looking at all the pictures of this pretty project!
I am an affiliate with Scrapbook.com. When you shop the links below, I receive a small commission from the affiliate, at no additional cost to you. This helps me balance the costs of the time and love I put into my projects and blog so I can continue to share my ideas with you for FREE. If you shop the links, thank you! I greatly appreciate it.
Below are products that I used or similar products.


0 comments
I'd love to hear your thoughts!