
DIY Gothic Beauty Raven Embroidery Hoop Wreath Tutorial
You can't have some beauty without some strangeness. Create an easy gothic embroidery hoop wreath with some moulds, stamps, inks and die cuts.

This sentiment of opposites existing together has existed throughout cultures and history. The Yin Yang, life and death, light and dark. Everything we know to exist in this world is subjective because what one thing is, is based off what other things are, particularly what the opposite is. You cannot understand what light is without understanding the darkness.

I think as humans, we are compelled to look for these dichotomous appearances in the world around us. It helps our understanding. Unfortunately, humans are fallible and it has also led to some really dark times in our history, such as slavery, the witch trials, and the Holocaust--where that "opposite" was seen as something sinister.
But those people chose not to see the beauty in the diversity splayed in front of them. I choose to see and celebrate that diversity. Perhaps it is why I have two modes of creating--one very shabby chic, pastel "princess" Adrienne, and the other strange, dark "goth" Adrienne.

Goth Adrienne slipped from her hibernation coffin and I let her come out to play with my other half. It was a good opportunity to celebrate that dichotomy I cherish so much in this project that I have been dreaming about for weeks.
This gothic embroidery hoop embodies my two modes--delicate pastel pink magnolias and sparkly bits combined with black painted moulds and an ever watchful corvid.
I've got a supply list at the bottom of this blog. For things I used that are no longer sold (the black paint), I have listed a comparable item so that you too can recreate this gothic beauty.
Jump to a Section
Making the Magnolias | Moulds on the Hoop | Painting the Hoop | Die Cutting the Raven | Assembling | Shop the Supplies

Making the Magnolias
Start by stamping out the Magnolia stamp three times onto smooth, heavy white cardstock. I liked to use my Sizzix Stencil and Stamp tool for this so that I can re-stamp the image if needed without having to worry about lining the stamp back up again. The hinged lid allows you to re-ink and stamp as many times as you like. Be sure to stamp with a permanent ink, like the Distress Archival Ink in Black Soot.
After you have the images stamped, it's time to watercolor them. Smoosh out the Tattered Rose Distress Ink onto a glass surface. Dip a water brush into the ink to pick it up and shade in the areas that would be darker, like the backs of petals, the buds and around the centers of the flowers.
Then smoosh the Spun Sugar Distress Ink onto your glass surface and color the entirety of the flowers--going over your first color to blend the two seamlessly.

After the images are dry, fussy cut them out using either a pair of small scissors, or a craft knife and self healing work surface or mat. Cut 2 of the magnolia branches out fully. On the third one, cut the 3 larger flowers out into three separate pieces. These will serve as layers over the 2 full magnolia branches.
Shape the 3 single flowers using a foam mat and shaping tools. Add a bit of glue along the bottom edge or center of the flower and glue it to the matching flower. I glued the bottom and top flower on one branch and the middle one to the other branch. Set these aside for now.
Want to see some other ways to use this stamp set? Check out my DIY Floral Coasters and my Magnolia Embroidery projects!

Adding Moulds to the Hoop
Let's cover a 9 inch wood embroidery hoop with moulds. The Redesign with Prima Regal Flourish moulds has some lovely trims and a flourish. Brush the large flourish with cornstarch and add work a ball of paper clay in your hands to warm it up. Press some clay into part of the large flourish--I used the center and two of the smaller flourish arms near the center.
Use a brayer, like the one on the Sizzix Making Tool with interchangeable tool heads, to really press that clay in the mould. Use an old gift card or scraper tool to scrape any excess clay off the mould so you get clean edges. Flip the mould over and roll the silicone mould off of your mould cast.
Pro Tip: Use a craft knife to cut your mould casts into pieces or to get rid of any excess clay that didn't come off in the scraping process.
Apply Sizzix Express Glue liberally to the top of the hoop, spreading it with your finger. Place the mould cast into the glue. I placed the flourish arms on either side of the top and a bit of the center of the flourish over the screw that tightens and closes the hoop--make sure this is fully tightened before adding your moulds!

Choose one of the trims in the mould and brush the inside of the mould with cornstarch.
Work a small ball of paper clay in your hands to warm it up then roll it into a long log. Place it into the mould with the cornstarch and press it in. If the clay isn't filling the mould up, add some more clay where needed.
Use a brayer, like the one on the Sizzix Making Tool with interchangeable tool heads, to really press that clay in the mould. Use an old gift card or scraper tool to scrape any excess clay off the mould so you get clean edges. Flip the mould over and roll the silicone mould off of your mould cast.
Apply Sizzix Express Glue liberally to the hoop, spreading it with your finger. Place the mould cast into the glue. Repeat these steps until you have covered the entire hoop with the trim mould.
Let your moulds dry for a couple of hours. There should be a harness to the outer part of the mould casts, but you may still feel some give in the centers of the mould casts where there is still wet clay inside. This is sufficient enough dryness to move on the next step.
Painting the Hoop
With paper clay and wood, there is no need to prime so we can get right into painting. Once the moulds are mostly dry, paint the entire hoop with matte black paint. I used Sizzix's Matte Acrylic Black paint because I wanted to use it up, but this paint is no longer sold. So a black Chalk Paint is the perfect substitute.
Once the black is dry, take a dry brush and dab it into a bit of grey Chalk Paint. Brush the excess paint off your brush, then dry brush over the highlights of the moulds. This will bring out that texture and age the hoop for that spooky look.
Set this aside to let it dry.

Die Cutting the Raven and the Black Sprigs
Next, die cut some sprigs from some thick black smooth cardstock. I used the Scrapbook.com Mixed Media Black Cardstock. I also used Sizzix's Woodland Stems, but this is also no longer sold. I also have the Scrapbook.com Delicate Leaves die set, which is still sold, and one of the sprigs in here is very close to the Sizzix one and would work perfectly with this! Die cut this sprig out 4 times and glue two layers together to create 2 sprigs. This will make your sprigs nice and sturdy.
Die cut the Honey Bee Stamps Lovely Layers Crow from the black cardstock in the Sizzix Neutrals Surfacez pack. Cut each layer once, except for the wing, which you should die cut 3 times. (To me, this guy is a raven, so I'll refer to it as Raven from here on out.)

Using Sizzix Express Glue, glue the layers of the Raven together. I used the Sizzix Intricate Making Tool's rubber tip to help me place that tiny dot for the eye.
When gluing the three wings together, only add a tiny dab of glue at the top of the wing. Also, leave the tail layer free of glue. We are going to add dimension to these and we want them to be unglued to do so.
Pro Tip: Set a heavy acrylic stamp block over your freshly glued die cut to really press those layers together. I like to set it on top of one glued layer while I add glue to another layer, remove the die cut from under the stamp block, add the next layer, then stick it back under the block.
Once the Raven is glued together, roll the wings and tail a bit between two fingers, like curling a ribbon on a gift, to add a bit of lifelike dimension to your Raven.

Assembling the Wreath
Heat up a hot glue gun. While it heats up, use Sizzix Express glue to attach a black die cut sprig to a magnolia branch.
Once the hot glue gun is ready to use, add the left magnolia branch first. Start by placing some 3mm thick black foam onto the hoop about where the top magnolias will land. Use a little hot glue to help secure this foam to the hoop. Remove the backing on the foam and then add hot glue further down the hoop toward the bottom center where the bottom of the magnolia branch will hit. Place the left magnolia into your hoop, pressing it into the hot glue and the foam.
Then add the Raven. Use a small dab of hot glue to attach his feet to the hoop and some Sizzix Express glue to attach his tail to the Magnolia for extra sturdiness.
Then add the second Magnolia branch to the right of the Raven, using foam adhesive and hot glue, just like you did for the left Magnolia.

Add some gems to your Magnolias. I used the Buttons Galore & More Crytalz in Coconut and Grapefruit. Because these gems are clear, we want to use a medium/glue that dries clear and gloss, rather than matte, like the Sizzix Express Glue. So to glue these gems in place, use a tiny dot of Sizzix Effectz Liquid Gloss. You may also find that a jewel picker with a wax tip and a little triangle tray to hold the gems will be helpful in this process.
I also added a druzy style stone to the top center of my hoop. I used one from my stash that is no longer sold, but I added an option from Amazon that is similar in case you also want to add this stone too.

And that's it! Now you have a wonderfully gothic yet delicate embroidery hoop wreath to hang inside your home. And no need to wait for Spooky Season to hang it up, in my opinion. This lovely art piece will be hung up in my home year-round; and until next time, happy crafting!
Adrienne
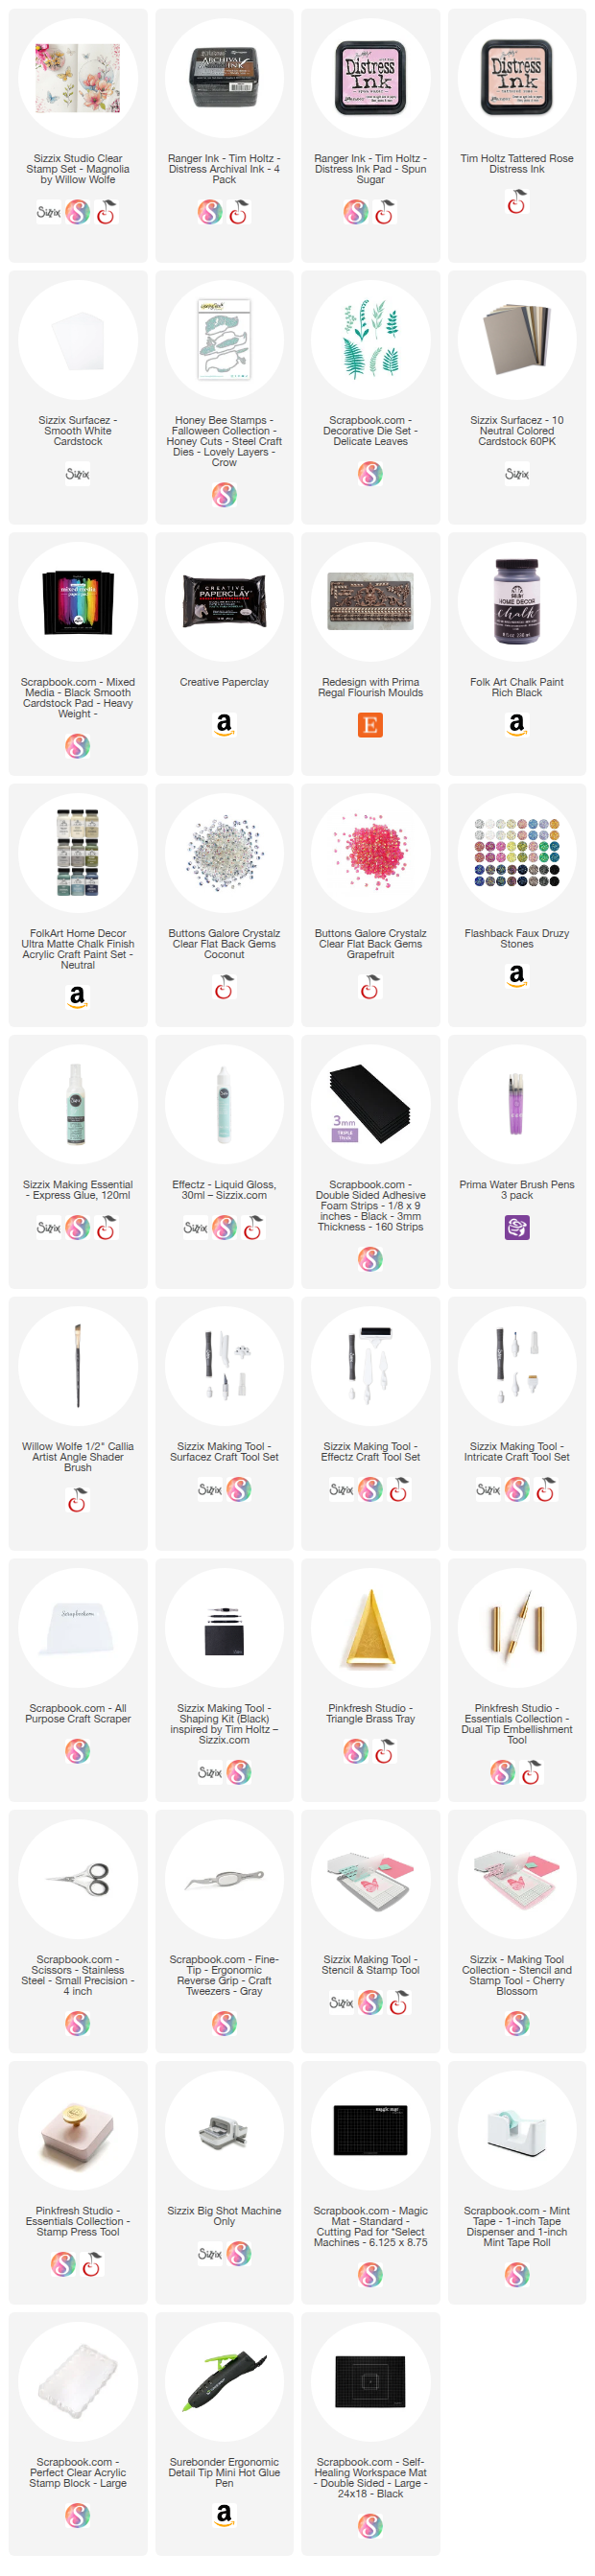
Shop the Supplies:
Scrapbook.com, A Cherry On Top, Sizzix, Prima Marketing, Spellbinders, Scrap Diva Designs, Etsy & Amazon
I am an affiliate with multiple companies. When you shop the links below, I receive a small commission from the affiliate, at no additional cost to you. This helps me balance the costs of the time and love I put into my projects and blog so I can continue to share my ideas with you for FREE. If you shop the links, thank you! I greatly appreciate it.
Below are products that I used for this project.


0 comments
I'd love to hear your thoughts!