
Masculine Floral Scrapbook Layout Idea Using Simple Vintage Collection
Think florals can't be masculine enough? Think again! This layout celebrates a walk through a botanical garden but with a more masculine color way.

Hey, crafty friend! I adore flowers and I love to add them to all of my projects. But I don't find that it limits me in creating more masculine styled projects. You don't always need gears and grunge for something to be masculine. Flowers can be masculine too--and I think my brother-in-law, who is featured in this layout with my niece, would agree. (Besides, I've never favored the dichotomy set by traditional social norms anyway! This girl marches to the beat of her own drum!)

All you need is a more masculine color palette to bring your florals into that darker, more masculine theme. For this layout, I focused on using browns and yellows as my two main colors, with pops of pink and green. I also had the perfect photo for this layout--my brother-in-law and my niece walking through a botanical garden in the early spring. I still get a giggle out of how similar their gait is--this photo was taken at the perfect moment!
And there are some perfect papers in the Simple Vintage Flower Shoppe collection (sent to me from Spellbinders) to create this color palette. So let's get into the tutorial!

- Matte your photo with Spellbinder's Alabaster Cardstock.
- Cut two additional photo mattes from the Simple Stories Simple Vintage Flower Shoppe "4x6 Elements" and "Captured" 12x12 papers. Distress the edges of these papers with a distressing tool or edge of a blade then adhere these two layers together.
- Add your photo to the patterned paper matte piece, placing it at an angle.
- Adhere your matted photo to the background paper, Simple Vintage Flower Shoppe "Fabulous" 12x12 paper.
Tip: Only add adhesive to the center of your matte, leaving the edges free so you can tuck some other elements under later.

- Die cut two scalloped borders from the Simple Vintage Flower Shoppe Stitch & Dots Scallop Borders Etched Dies from a brown and a yellow cardstock.
- Offset the scallops and glue them together. Slip them under the photo on the left side and adhere with more liquid glue.
- Die cut the smallest scalloped circle from the Simple Vintage Flower Shoppe Scallop Journal Cards Etched Dies from some brown cardstock.
- Die cut the wider bucket and roses from the Simple Vintage Flower Shoppe Flower Cart Etched Dies from green, yellow, light brown and pearl silver cardstocks. Add a bit of brown ink to the edges of the roses and glue the layers together. Use a bit of 1mm thick foam adhesive to add the flowers to the bucket.
Tip: The pearl silver cardstock in the Silver Assortment Treasured Cardstock is the perfect galvanized bucket color!

- Add a spray of flowers from the Simple Vintage Floral Bits and Pieces ephemera to the bottom left of the photo.
- Glue the bucket of flowers to the scalloped circle, placing it closer to the top of the circle.
- Then add the scalloped circle with flower bucket to the bottom right corner of your photo with a bit of 2mm thick foam adhesive.
- Place the Simple Vintage Flower Shoppe "Little Moments" foam sticker over the bottom of the galvanized bucket and scalloped circle.
- Add the "Today" foam sticker to the top left of your photo.
- Shape one of the butterfly ephemera pieces with your fingers to give it a little dimension then add it to your layout with foam adhesive and liquid glue.
Tip: For more control when shaping ephemera, use a shaping tool kit. Apply light pressure to start to help warm up the paper fibers so you don't tear your ephemera.

- Tuck a small daisy ephemera piece so it peeks out from under your photo, layering it over the scalloped border pieces.
- Pop on a heart from the Simple Vintage Flower Shoppe Cardstock Sticker Sheet just under the daisy, and a sentiment sticker over the scalloped circle.
- Add a foam heart sticker near the daisy ephemera.
- Add a few of the Simple Vintage Flower Shoppe Decorative Brads.
- Pop on a few of the Smoky Topaz Color Essential Gems.
Tip: Think of each area around your photo as a little embellishment cluster. This page has three: the top left, the left and the bottom right. By organizing your embellishments in this way, it will help you create a balanced layout.

Brown and florals never looked so good together! I hope that this also gives you some ideas for adding dimension and texture to your projects as well. Speaking of, if you missed my guest blog over on Spellbinders about how to add dimension to your projects using this collection, be sure to head over there now, and until next time, happy crafting!
Adrienne
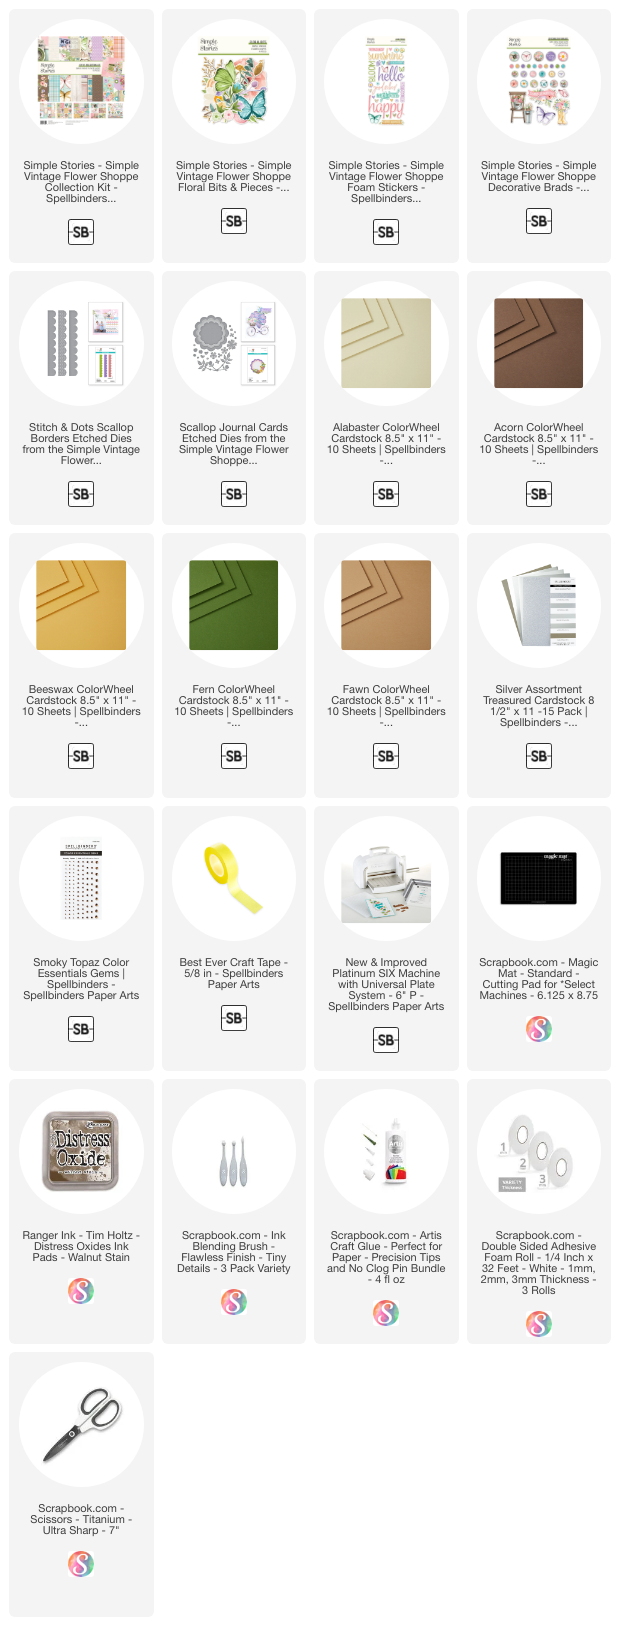
Shop the Supplies:
Spellbinders & Scrapbook.com
I am an affiliate with multiple companies. When you shop the links below, I receive a small commission from the affiliate, at no additional cost to you. This helps me balance the costs of the time and love I put into my projects and blog so I can continue to share my ideas with you for FREE. If you shop the links, thank you! I greatly appreciate it.
Below are products that I used for this project.


0 comments
I'd love to hear your thoughts!