
DIY Hummingbird Pop Up Card
Creating a special card to brighten someone's day doesn't need to be difficult. In fact, with a stencil and pop-up die, it's downright simple!

I wanted to show you how easy it is to not only mix and match your supplies, but do it across brands. So this card features a Sizzix stencil on the outside, and a Spellbinders die on the inside!
Just want the list of supplies used? Check out my full list of shoppable (affiliate) links at the bottom of this article.

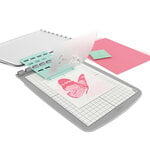
Let's start with the outside first. I cut a sheet of Sizzix Smooth White Cardstock to an A2 size (4.25 x 5.5 inches). I placed the sheet of cardstock in my Stencil and Stamp Tool with the stencil adapter.
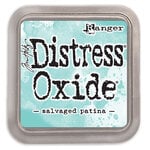
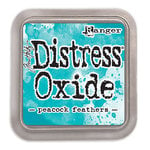
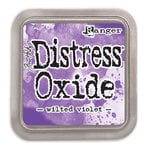
This Hummingbird Stencil is a 4 layer stencil and each stencil is numbered 1 through 4. I placed stencil layer 1 onto the notches of the adapter and then pulled out Distress Oxides in Lucky Clover, Salvaged Patina, Peacock Feathers, Wilted Violet, Worn Lipstick and Saltwater Taffy.

I wanted to recreate the ruby throated hummingbirds that are common to my area (The Rocky Mountains) and so I used the green, blue-greens and pink to add color to the hummer. The Wilted Violet and Saltwater Taffy were used to the color the mixed media paint splash behind the hummer.

I simply added the Worn Lipstick color to the belly and throat of the hummer with each layer of the stencil, darkening the color with each layer. Lucky Clover was added to the interior of the hummer, blended into Salvaged patina, which was then blended into Peacock Feather at the tips of the tail, wings and top of the head of the hummer.
On the 4th stencil layer, I used the inks to deepen the color, then before removing the stencil, I used two colors of Finnabair Mica from the Vintage Roses set--a green and a pink. I used a fluffy brush to swipe the mica powder into the still wet Distress Oxides.

I learned this technique from Angelica Conrad's Spring 2024 SBC Fest class, however she used Ranger's Perfect Pearls. It adds a hint of shimmer to your project, which I think really brings this hummingbird to life! It shimmers just like the feathers on a real hummingbird now.

For the sentiment, I used the Sunnyside Sentiments #3 from Pete Hughes. I stamped the sentiment with Distress Archival Ink in Black Soot using my Stencil and Stamp Tool.

For the inside of the card, I used the Spellbinders Pop-Up Hummingbird die. I die cut all of the layers of the flower and hummer from the same smooth white cardstock, except for the eyes and beak which I cut from some black cardstock from the Sizzix Festive Surfacez cardstock set. Then I placed each of these layers onto the Sticky Grid of my Stencil and Stamp Tool.
The Sticky Grid helps hold your die cuts in place as you ink them up. I used the Wilted Violet, Saltwater Taffy and Worn Lipstick to color the flower. Then I used Lucky Clover to color the leaves, plus the body and the wings of the hummer. The belly of the hummer was colored with Worn Lipstick. Then just like the card front with the stencil, I added the same mica powders to the hummer body, belly and wings.

To assemble the card, I started by trimming down the stenciled card front to 4 inches by 5.25 inches using my Scoring Board and Trimmer tool. I also cut down a piece of the green cardstock from the Sizzix Festive Surfacez cardstock pack to an A2 size to matte the stenciled card front on.
Then I folded, glued and attached the layers of the pop-up elements. I glued the two outer layers of the flower together, along with the Saltwater Taffy inner layer of the flower. (Save the smallest layer of the flower and the leaves for later!) Then I glued the eyes, beak and belly of the hummer on. Be sure to check out Bibi's YouTube tutorial which shows you how to assemble this die and attach it to your card base.


Insert your flower and hummer's tabs into the slits and glue the tabs to the card base with Express Glue. I used several pairs of strong reverse action tweezers to hold the tabs in place until the glue dried. Then glue the smallest center of the flower in place to cover the hole in the center, and then add the leaves onto the flower--I glued them to the backs of one side of the petals.

The finishing touch was glueing the matte and stenciled card front on. Then I popped on a few gems. And that's it! It's super easy once you understand how to assemble the pop-up elements. I hope you enjoyed this quick little card idea and that it inspires you to take different elements from across your own stash of supplies. Until next time, happy crafting!
Adrienne
Shop the Supplies:
Scrapbook.com, Spellbinders & Sizzix
I am an affiliate with Scrapbook.com, Spellbinders and Sizzix. When you shop the links below, I receive a small commission from the affiliate, at no additional cost to you. This helps me balance the costs of the time and love I put into my projects and blog so I can continue to share my ideas with you for FREE. If you shop the links, thank you! I greatly appreciate it.
Below are products that I used for this project.


0 comments
I'd love to hear your thoughts!