
DIY Eileen Hull Needle Book Mini Album
I created a mini book reminiscent of a wedding with a blushing bride or the first blush of crocus flowers in spring poking through the snow and I absolutely adore it!

Hello, crafty friends! Today I want to share a mini album created with some amazing Sizzix supplies, including the Needle Book Bigz Scoreboards die and their White Texture Roll. I'm sure that many of you are already familiar with Bigz dies, but if not, these are the steel rule dies encased in foam that cut through a variety of materials including chipboard and mat board.
Sizzix Texture Rolls are a strong and durable. They stand up to sewing, embossing and mixed media techniques and are hard to rip, even if you twist or crumple it to your heart's desire. You can even make it mimic leather!
Learn more about it from one of the Sizzix Engineers in a YouTube video.

Texture Roll is perfect for mini albums because it is flexible and strong. I used it on the outside of this mini album, as well as the inside cover. You can use it for all the interior pages as well, but I opted for Smooth White Cardstock for the inside. But I also used the White Texture roll to die cut the Woodland Boarders die. It's a delicate die, but I wanted it to last on the cover of the album, and Texture Roll is the ideal candidate for that!
Let's get into this tutorial!
We are going to start by cutting the Needle Book out. For Scoreboards Bigz dies, you want to use the Crease Pad or Premium Crease Pad for the Big Shot Switch. This will ensure that the part of the die that is supposed to score, won't cut all the way through your material. But if like me you don't have that handy crease pad, we'll talk about how you can get around that.

I die cut the Needle Book from chipboard once, the White Texture Roll twice, and from Smooth White Cardstock twice. No if you don't have the Crease Pad or Premium Crease Pad, you'll notice that your machine will most likely have cut in many of the places it should have only scored. But don't worry--we'll get that fixed!
For the chipboard piece, we do want to keep it all together. I used the Spellbinders Best Ever Craft Tape, which is basically washi tape, to hold the chipboard pieces together along the binding. You want to make sure that your binding is still flexible and the book can still open and close even with the tape holding it all together.

We won't need the binding on the White Texture Roll and Smooth White Cardstock cuts, so use a pair of scissors and trim off any of the binding that is still hanging on. Next, we'll emboss the texture roll. If you have a highly textured 3D embossing folder, you may want to mist it just a bit with water, but you really shouldn't need to for Texture Roll. I send all 4 of the Texture Roll album cover pieces through my machine with the Summer Foliage 3D Embossing Folder (I didn't mist mine with water).
Next, we'll glue the Texture Roll cuts to the inside and outside of the Needle Book's cover. Add a good amount of the Sizzix Express Glue or other liquid glue to your Texture Roll cut then place it on the chipboard, lining it up well. Then use the Brayer on the Sizzix Effectz Mulit-Tool to apply light pressure over the dies to spread the liquid glue, laminating the chipboard and Texture Roll together.

To cover the binding with the washi tape, I used fabric tape. This is fabric that is sticky on one side. You could buy fabric tape online or from a craft store, or you could apply fabric to some double-sided adhesive to make it sticky on one side. I covered the outside and inside of the binding with the fabric tape.
For the closure of the mini album, I decided to use some seam binding to tie it closed. Before fully sticking the fabric tape down on the outside binding, I placed a piece of seam binding over the center of the book, then pressed the fabric tape over it to hold it in place.

Once you've covered the outside and inside of the album with your embossed Texture Roll die cuts, it's time to make the pages. Let's start with the waterfall binding that will hold the White Cardstock pages. Using your Scoring Board and Trimmer tool, cut a piece of the same Smooth White Cardstock to the height of the Needle Book (3 5/8 inches) and trim it to 1 1/2 inches wide.
Then change your Scoring Board and Trimmer tool over to the scoring function by lifting up on the hub and moving the mint colored ruler to the side. Place your piece of white cardstock on the scoring board so the 1.5 inch measurement is perpendicular to the scoring lines. Then score your cardstock piece at 1/8, 3/8, 5/8, 7/8, 1 1/8, 1 3/8, and 1 1/2.

Then using your bone folder tool, crease your waterfall mechanism so that you create 2 tabbed pieces that point up that your pages will be glued to and use liquid glue to glue the tabs together. Using the same liquid glue, glue the waterfall mechanism to the inside binding. Using some reverse action tweezers will help press and hold it in place as the glue dries.
Want to see a waterfall mechanism in action? Check out how I create a waterfall mechanism in one of my other YouTube mini album tutorials.

Next, you want to glue the white cardstock pages to the waterfall mechanism. I used 1/8 and 1/4 inch wide double sided adhesives for this, but you can also use liquid glue. To one of the pages, I applied the 1/4 inch wide adhesive to the long straight side that gets glued to the 1/4 inch tab of the waterfall binding.

Then I applied 1/8 inch wide adhesive to the two shorter straight sides. I left the scalloped side unglued, just in case I ever want to use them as pockets to hold photos, tags or ephemera. Then I glued it to the tab. For the opposite side, I just applied the 1/4 inch wide adhesive then glued it to the binding and the back of the first page. Repeat this for the second page.
I added a little stitching around the edges of the white cardstock pages before gluing them in for some extra detail, but this is totally optional.

Now it's time to decorate this mini! I die cut one of the Woodland Borders and the coordinating flower layers from the White Texture Roll. This is because I'm putting it on the outside and I don't want to worry about it getting messed up.
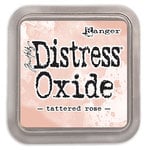
For the flower layers, I used a small blending brush and the Distress Oxide in Tattered Rose to add a bit of color to the center of each flower. This hint of light pink on white is what makes me think of a blushing bride or a pastel flower popping up through the snow in spring--so pretty!
Pro Tip: Use a Scrapbook.com Project Grip Mat or Sizzix Sticky Grid to hold your dies in place while inking them.

For the outside decoration, I glued 2 of the base layer die cuts together to add additional strength. Then I added layers of inked flowers on top. The small flowers got a die cut flower center and the larger flowers got an iridescent gem for the flower center. I glued the entire piece down with liquid glue, which will also help strengthen and hold the seam binding on the front cover.
The inside pages were decorated with some of the Faux Postage die cuts I had left over from a previous project as well as cut up pieces of the Woodland Boarder die. Page 1 and 4 got a Reneabouquets Butterfly Kisses, page 2 got one of the Scrapbook.com Butterflies die, and page 3 got a Reneabouquets Tiny Treasures Butterfly as additional embellishment.

To place the embellishments on, I used liquid glue and 1mm thick foam adhesive. You want to make sure that your embellishments aren't too dimensional or you will have problems closing your album. You also want to make sure that on the facing middle pages that they aren't going to rub or knock up against each other in a way that will degrade them over time.
I hope that this tutorial inspires you to create a pretty little mini book and to play with the amazing Sizzix Texture Roll material! If you love Distress sprays and inks, you'll adore how this surface stands up to the moisture. Until next time, happy crafting!
Adrienne
Shop the Supplies:
Scrapbook.com & Sizzix
I am an affiliate with Scrapbook.com and Sizzix. When you shop the links below, I receive a small commission from the affiliate, at no additional cost to you. This helps me balance the costs of the time and love I put into my projects and blog so I can continue to share my ideas with you for FREE. If you shop the links, thank you! I greatly appreciate it.
Below are products that I used for this project.


Reneabouquets
Reneabouquets is a small business that offers bespoke paper crafting embellishments.
Below are products that I used for this project.


0 comments
I'd love to hear your thoughts!