Magical DIY Star Wands with Prima Marketing
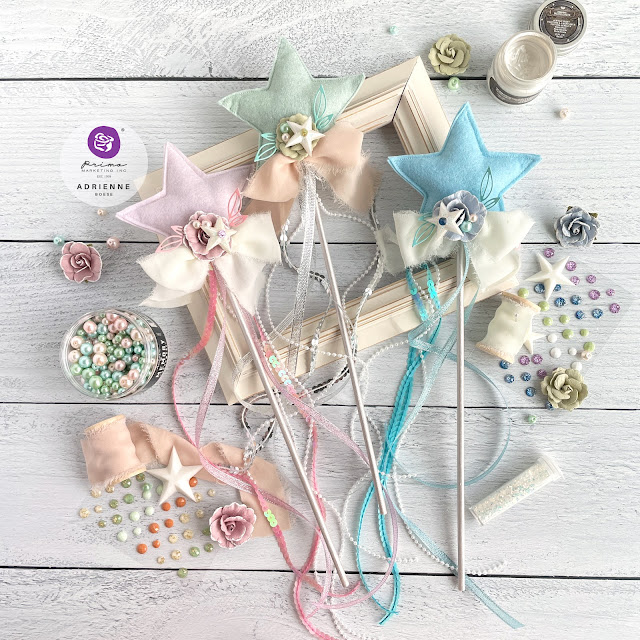
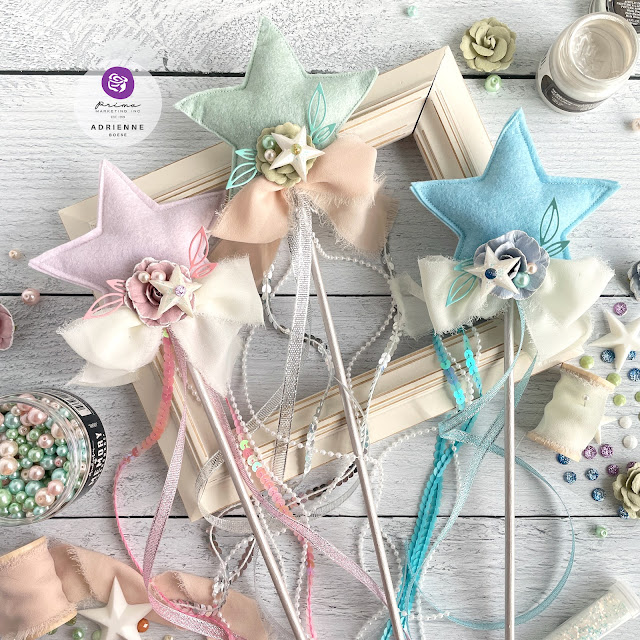
These cute little star wands are perfect for ringing in the New Year or for your child's dress up or Halloween costume!
Sometimes I love something that is simple yet magical. And you don't need a lot of expensive supplies to create these little wands.
Here is what you'll need:
- Wooden dowel rod (I used 12" long 1/4" wide dowels)
- Metal star die (I used the second largest die from Scrapbook.com's Nested Star Die set)
- Metal flourish or sprig die (I used the Scrapbook.com Sprigs die)
- Smooth cardstock (I used Scrapbook.com cardstock)
- Die cut machine
- Felt (I used the Pastel set from Sizzix)
- Various ribbons and pearl trim, cut to 16"
- Sewing machine and thread or needle and thread
- Polyfil stuffing
- A hot glue gun (I love the one from Sizzix because it doesn't squeeze out too much glue)
- Paintbrush
- Resin, paper clay or modeling clay
- Washitape or other low tack craft tape
- Finnabair Star and Moons Mould or other mould of your choice
- Finnabair Art Alchemy Métallique Paint in Pearl White
- Finnabair Art Ingredients Glitter in Winter
- Frank Garcia Memory Hardware Pearls III "Fantasy"
- The 3 Girls Tale Lost in Wonderland Ribbons, cut to 16"
- Karolina Bukowska Bohemian Heart Say It In Crystals
- Karolina Bukowska Bohemian Heart Wild at Heart Flowers
- Karolina Bukowska In the Moment Say It In Crystals
- Karolina Bukowska In the Moment Floral Adventure Flowers
To start, mould out your stars using whatever medium (resin, paper clay, modeling material, etc.) that you love and let them dry or cure. Once ready, paint them with the Metallique Acrylic Paint in Pearl White. Before they dry, sprinkle on a little bit of glitter. Also paint your dowel rods with the same acrylic paint.
While your moulded stars and dowels dry, cut out 2 stars from some felt. Pin them and sew them together, leaving a small opening at the bottom that will fit the dowel and some ribbons. Stuff your felt star with some polyfil stuffing.
Add various ribbons and pearl trim to your dowel. I used a bit of the Spellbinders yellow tape to put them on the dowel. Then add a bit of glue to the top of the dowel where the ribbons are attached and place it inside the felt star. Add glue as needed to hold the dowel in place and to shut the bottom of the felt star.
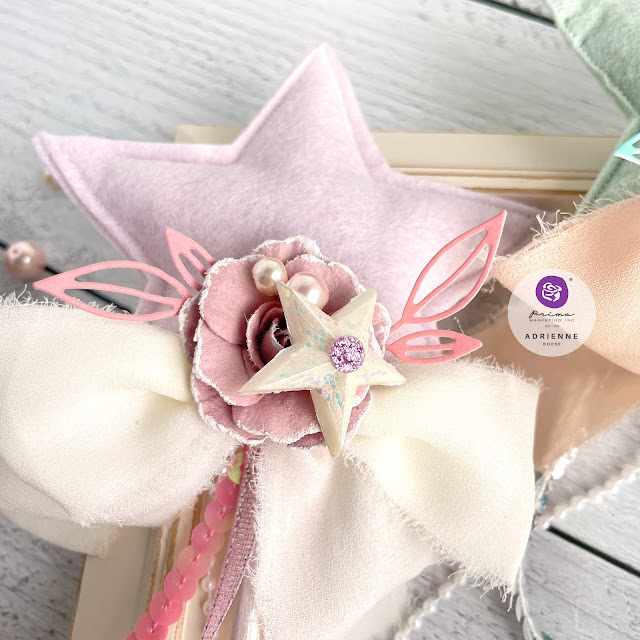
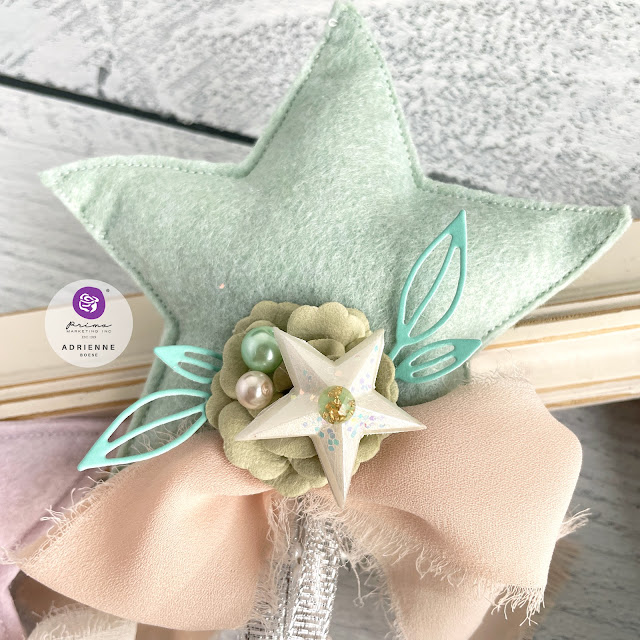
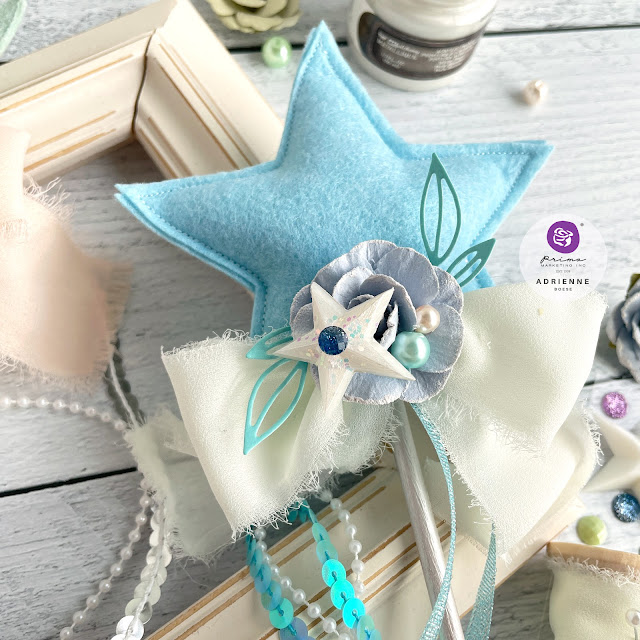
Take the Lost in Wonderland chiffon ribbon and fold it into 3 sections, create a looped shape that looks a bit like an awareness ribbon. using a bit of thread, tie off the center of the chiffon ribbon to create a bow. Then die cut some sprigs or flourishes from the smooth cardstock.
Add a dab of hot glue to the bottom of the felt star where the dowel is coming out and place the chiffon ribbon on the hot glue. Next, hot glue a flower just above the ribbon, letting the petals overlap the center of the ribbon a bit. Tuck in some of the flourishes or sprigs. Then hot glue on the star mould and some pearls. Place a small dab of hot glue on the center of the star mould and add a crystal.
And that's it! It's so simple, yet so pretty and magical! I hope that you enjoyed this little tutorial and that it inspires you to make your own little wand. Until next time, happy crafting!
Adrienne
Scrapbook.com
I am an affiliate with Scrapbook.com. When you shop the links below, I receive a small commission from the affiliate, at no additional cost to you. This helps me balance the costs of the time and love I put into my projects and blog so I can continue to share my ideas with you for FREE. If you shop the links, thank you! I greatly appreciate it.
Below are some of the products that I used for this project.








0 comments
I'd love to hear your thoughts!