
Easy Watercolor Technique with New Tim Holtz Products
Watercolor doesn't have to be hard, especially when you use a stamp and a just two colors of Distress Ink!

I love the Floral Outlines stamp from Tim Holtz. And when I saw the Floral Elements stamp, I knew I just had to pick it up so I could fussy cut even more to my heart's content!

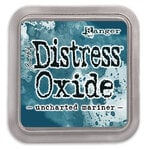
I needed to make a handful of super pretty cards so I pulled out the Floral Elements stamp along with Uncharted Mariner Distress Ink and Oxide. This new color is so pretty, and while there aren't many blue-hued flowers, I just love the look of blue paper flowers! (Also, if you want my updated inkable Distress Ink Labels with names, including Uncharted Mariner, click this link!)

To start, grab a piece of white cardstock cut A2 size. I like using the solar white A2 flat card fronts from Scrapbook.com. They are pre-cut and the white is nice and bright, giving you true colors when you ink and stamp. Cover the entire surface of the card front in your chosen Distress Oxide Ink with a domed foam blender. I use a piece of mint tape or magnets to help hold my cardstock in place while inking so I don't get fingerprints on my inked surface.

Give your card front a quick shot with a heat cut to help set the ink. Then affix the Mixed Stripes stencil the the card front with some 4" mint tape. Apply a coordinating color of gloss Pops of Color through the stencil using a craft scraper. I paired Uncharted Mariner with the Royal Blue Pops of Color. Make sure to wash or soak your stencil right away to get the Pops of Color off before it fully dries.

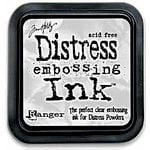
Set your card front aside to dry and then stamp out several of the flowers and leaves from the Floral Elements stamp set. I used another solar white A2 flat card front for this, my stamping platform and embossing ink. I used a static pad first, but if these impressions don't come out 100 percent, don't fret! This is a watercolor look and things don't have to be perfect.
For heat embossing, I used the Ranger Super Fine Embossing Powder in silver. I like the super fine powders for detailed stamps, especially ones with thin lines like these stamps. Once all of your stamped images are heat embossed, it's time to watercolor! I used Distress Ink in Uncharted Mariner and Peeled Paint. I start with a light wash over the entire image and then slowly build up the same color darker and darker for shading. Just use less water for creating a darker wash. The more you layer, the darker it will get too. This is by far the easiest way to watercolor!

Let your watercolored stamps dry a bit before going on to cut them out. They can still be damp, but you don't want to smudge your hard work. To fussy cut, you can use a small pair of scissors, a craft knife with a self healing mat, or both. I prefer a swivel craft knife and mat. Be sure to check out my blog on fussy cutting like a pro if you want some additional tips!
Once all your flowers and leaves are cut out, it's time to assemble your card! I used the dotted adhesive runner to attach the card front onto a scored card base. I arranged all of my flowers and leaves how I wanted them to make sure I had enough and to see where I would need what adhesive.

For adhesive, I used Collage Medium, 1/4" and 1" foam adhesive and small foam squares. I placed a small strip of 1/4" foam on the backs of the smaller flowers and two layers of 1" foam on the back of the biggest flower. I kept the adhesive mostly to the center to make sure that the elements could comfortably overlap one another. For the leaves and rose buds, I used the foam squares, adding it to the tops of the leaves, allowing for the stems to be glued down with Collage Medium.

I started by adhering the leaves and rose buds in place just with the foam so that I could tuck them under the not yet glued down flowers exactly where I wanted them. I then removed the flowers and tacked down the ends of the stems of the leaves and buds with Collage Medium. I then placed the flowers back on where I wanted them, then began peeling off the backing on the foam and adhering them working from the sides to the inside, saving the biggest flower for last.

For a finishing sparkly touch, I added a couple of Pinkfresh jewels in sapphire with a dot of Glossy Accents! And because I needed a couple of cards, I then made two more--one in Saltwater Taffy and the other in Wilted Violet! If you want the full list of supplies for all three cards, be sure to check out my Scrapbook.com gallery post for these three cards! Until next time, happy crafting!
Adrienne
Shop the Supplies:
Scrapbook.com
I am an affiliate with Scrapbook.com. When you shop the links below, I receive a small commission from the affiliate, at no additional cost to you. This helps me balance the costs of the time and love I put into my projects and blog so I can continue to share my ideas with you for FREE. If you shop the links, thank you! I greatly appreciate it.
Below are products that I used for the Uncharted Mariner Striped Floral Card or similar.


0 comments
I'd love to hear your thoughts!