Mixed Media Floating Filigree Frame Tutorial with Reneabouquets

by - 3:40:00 PM

Floating frames aren't just for photos, but can be altered to create a beautiful home decor piece as well. 


I'm thrilled to be a Guest Designer once again for Reneabouquets! If you follow my blog or my social accounts, you know that I am in love with her gorgeous butterflies, bees and more! Today I'm sharing the first of two projects for this year's guest designs. 


I'm always looking for things that can be altered, such as boxes, bins and even frames. For this tutorial, I'll be altering a floating frame using some gorgeous pink and white embellishments from Reneabouquets


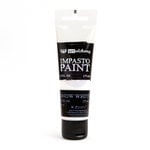
I started by removing the clear acrylic panels to prep the wood with a little sanding. There was a printed label on one side that I wanted to get rid of before painting. Once I sanded down all of the sides a bit, I used a soft lint-free cloth to remove any dust. Next I dry brushed some white impasto paint on all of the sides. Once dry, I sanded the paint just a little bit to make it a bit more distressed. 


I absolutely adore the Wedding Day Lace trim and the large pink Texture Pattern Printed Beautiful Board--these elements are the reason I chose a floating frame for this project, so that the clear panels would show off all the delicate swirls and filigree. I trimmed down a bit of the lace to fit inside the frame and used a touch of Glossy Accents to glue down both edges. You don't need much for this as additional adhesive in the center will help keep this firmly in place. 


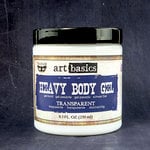
Next I began adding layers of flowers using the Mini Whisper Pink Mulberry Roses and the White Roses, Gardenias and Leaves. I like to lay out the flowers in the general shape I want to create before gluing anything in place--especially since this is a floating frame and excess adhesive, even when it dries clear, can look messy. Once I chose the general shape and the flowers I wanted use, I began adhering them in place using heavy body gel


To float a second layer of embellishments over the first layer of flowers, I die cut a small scalloped oval using a Sizzix die and some pink patterned paper from Scrapbook.com. I glued it down onto the lower flowers using a small bit of heavy body gel. 


I had a resin keyhole mould cast already covered in white gesso. I chose it because its shape resembled that of the lace. I used Distress Spray Stain and Distress Oxide Spray in kitsch flamingo, layering the sprays to tint the mould. I spritzed with a bit of water to activate the Distress sprays and then dabbed off the excess to bring back some white highlights. Once this was dry, I adhered it to the die cut oval with heavy body gel and added two small flowers around it.


Next I popped on the medium sized Misty Morning butterfly onto the mould using a little heavy body gel. I then added a few leaves into the mix as well. I then turned to decorating the sides of the frame. I glued down the four larger pieces of the large pink Texture Pattern Printed Beautiful Board to the corners of the frame using a little bit of Glossy Accents. 


To decorate the chipboard a bit, I added two pink Tiny Treasures Sweat Pea Butterflies to two of the corners using a dab of heavy body gel. I wasn't quite done adding flowers after that and added one tiny pink rose to each of the three butterflies. 


Next I added a few die cut leaves using the same patterned paper, tucking them in under flowers and butterflies after curling the leaves a little with my fingers. The finishing touches were just a little bit of sparkle! I added a bit of Glossy Accents to all of the flowers and sprinkled on Gawdie Girl Diamond Shard Glitter Glass. Once I was happy with the amount of glitter glass, I tapped the excess off. I then added a few pale pink jewels from Pinkfresh. Once all of my heavy body gel was set, I sat the frame up and added a clear curio knob to the top of the frame with a small dollop of heavy body gel.

And that's it! I hope that you enjoyed this pink and white shabby chic tutorial. Until next time, happy crafting!
Adrienne

Shop the Supplies:


Reneabouquets

Misty Morning Premium Paper Glitter Glass Butterflies

Tiny Treasures Sweet Pea Premium Paper Glitter Glass Butterflies

Mini Whisper Pink Mulberry Paper Roses and Leaves Set

White Roses, Gardenias & Leaves Mulberry Flowers

Beautiful Board 6 Piece Large Texture Pattern in Pink***

Gawdie Girl Diamond Shard German Glitter Glass

Wedding Day Lace


Scrapbook.com

I am an affiliate with Scrapbook.com. When you shop the links below, I receive a small commission from the affiliate, at no additional cost to you. This helps me balance the costs of the time and love I put into my projects and blog so I can continue to share my ideas with you for FREE. If you shop the links, thank you! I greatly appreciate it.


Below are products that I used or similar products.


You May Also Like

2 comments

  1. So incredibly gorgeous Adrienne!! Thank you for being a Reneabouquets Guest Designer!! I am truly grateful to have your talent represent my business.

    ReplyDelete
    Replies
    1. Thank you so much,Renea! It is always a joy to create projects using your incredibly beautiful embellishments!

      Delete

I'd love to hear your thoughts!