
Farmhouse Style DIY Christmas Advent Calendar
Christmas just isn't complete without an Advent Calendar.

I'm so excited to be participating in Scrapbook.com's Handmade Holiday Papercrafting Parade this year! Make sure that you head over to my Instagram to learn how you can win a $25 gift certificate to Scrapbook.com! Now on to the project.
As a little girl, my Oma (grandmother) would buy me a chocolate Advent Calendar from the commissary every year. I loved looking at the vintage styled illustrations and hearing that satisfying "pop" that the chocolates made when taking them out.

But more than that, I felt a deep connection to my Austrian heritage. My Oma would always talk about how beautiful Austria was during the holiday season with the streets decked out in lights, the Christkindle Markets and how you could find Advent Calendars all over Austria. So I always felt like I was holding a little piece of my heritage in my hands.

I've been lucky enough to visit Austria, though it was during the summer with my Youth Orchestra many years ago. I hope to go back and visit with my family sometime in the future--perhaps around the holidays so I can visit a Christkindle Market and see the lit chandeliers suspended above the streets of Vienna.

And while my waistline no longer appreciates chocolate, I still love a good Advent Calendar. Since this one is made entirely of papercrafting supplies, it's guilt free! However, I think I will be giving this one to my sister. Green and purple are her colors and my little niece needs a fun way to count down to Christmas!

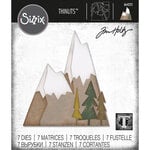
For this Advent Calendar, I used the Scrapbook.com Advent Tree digital cut file. I cut out the top layer of the tree from Prima's Watercolor Cardstock then used Tim Holtz Distress Oxides and Distress Inks in purples, greens, grey and creams to create a watercolor effect. I simply pressed some ink onto my glass media mat, spritzed it with water, then used some plastic packaging to pick up the watery ink and dab it onto my paper.

Next, I cut some squares of a pretty purple-red cardstock from Bazzil to decorate the doors with. I also cut some small stars in the digital cut file from Tim Holtz's gold kraft cardstock. I added these stars to some of the doors with foam squares, along with a sweet sentiment from the Scrapbook.com Classic Christmas sticker book. For the other doors, I stamped the numbers using the Scrapbook.com Bold Caps Solid stamp set then embossed them in gold. On the back side of the doors, I cut out squares of a pastel yellow cardstock from the Scrapbook.com Boho Smooth Cardstock pad.

After that, I cut out the base of the tree from smooth white cardstock. I added some dashed lines where the openings would be so I would know where to place all my cute images. I also made the background paper that the tree and wreath would sit on from watercolor cardstock. I cut one 12x12 sheet into 3 inch wide strips and then inked the edges with Antique Linen Distress Oxide and a domed foam blending tool to create some definition. I glued down these shiplap slats onto another piece of 12x12 watercolor cardstock using 1/4 inch roll tape adhesive.

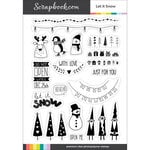
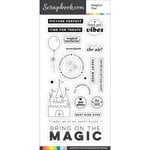
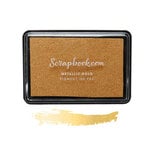
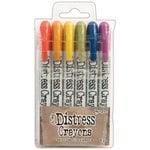
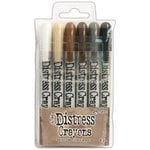
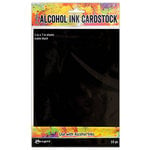
Then I set about creating all of the little images for each door. I used a variety of Scrapbook.com holiday themed stamps, sometimes masking or layering them, stamping them on flat Solar White cards. I colored many of the images with Distress Crayons and a water brush pen to create a more vibrant watercolor look. I also added accents of glitter with the Scrapbook.com Glitter Brush Marker. For some of the others, I cut out squares of cardstock from the Boho pad, adding embossing or die cuts. And on a couple of them, I used the Ranger Alcohol Ink Cardstock in matte black, the Mod Asterisk stencil and the metallic inks in Gold and Frost to create a shimmery snowflake background.

I glued down all of my little images using the 1/4 inch roll tape adhesive, then ran a brayer over them to fully secure them. This is a great way to quickly press down little bits quickly! Then I glued the top layer of the tree down to the bottom layer using a combination of 1/4 inch roll tape adhesive and 1/8 inch roll tape adhesive.

To create the star on top, I cut out the large star from the digital cut file from a flat Solar White card and from metallic kraft cardstock. Then using the Daffodil hybrid ink and a domed foam blending tool, I colored the white star yellow. Then I blended some gold ink over the top to make it shimmery. Then I glued the small metallic star on top then popped it onto the top of my tree with a foam square.

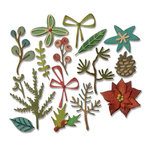
Next I set about making the wreath. I cut out a ton of greenery using the Concord & 9th Take a Bough Encore die set. I used three shades of green cardstock from Bazzill and the Scrapbook.com's Boho pad. I used the new Magic Mat with my Vagabond 2 to cut out all these dies and let me tell you, they came out so clean each and every time! (I just had to add a paper shim for this die set.) Not only that, but I also didn't have to spend time using a die pick to get the cuts out of the dies! Wow!!! Then I just used my Tim Holtz snips to cut the branches apart.

I also used the Funky Festive Tim Holtz die to cut out sprigs of tiny berries from a brown cardstock then added some Nuvo Vintage Drops in Postbox Red to the berries for some color and dimension. I set these aside to dry while working on adding the greenery.

Using my Silhouette, I cut out a thin circle from smooth white cardstock as a guide for creating my wreath. I used the mini Smart Glue to add the guide onto my background. I used a dot of the same glue on the back of each sprig of green and pressed it down onto my guide, layering the three colors for variety. This glue is great because it stays tacky even after it dries so you don't have to worry about glue squish out when pressing delicate elements down. (Just be careful to not squeeze the bottle much at all or you'll get glue everywhere!)

For the bottom center of the wreath, I added a sentiment using Ranger's Archival Ink in Thistle, giving it a mat of metallic kraft cardstock. I adhered it to the wreath with some foam squares. Once the berry sprigs were fully set, I added them with the Smart Glue. To finish off the wreath, I added some grey velvet trim from Tim Holtz's 2020 Christmas collection and adhered it with a Scrapbook.com small sticky square.

I hope you enjoyed this holiday project as much as I loved creating it!
Happy Crafting,
Adrienne
I am an affiliate with Scrapbook.com. When you shop the links below, I receive a small commission from the affiliate, at no additional cost to you. This helps me balance the costs of the time and love I put into my projects and blog so I can continue to share my ideas with you for FREE. If you shop the links, thank you! I greatly appreciate it.
Below are products that I used or similar products.


0 comments
I'd love to hear your thoughts!