
Noire Ronne's Requiem: A Tombstone Overlay Mixed Media Project for Halloween
It's that time of year again! I love creating Halloween projects because you get more of a license to be weird and create odd things. And what better than Tim Holtz products to create your Halloween mixed media projects?

I finally, FINALLY, got around to using my tombstone overlay from last year. Of course all of my home decor projects have to fit in with my Halloween decoration theme of "The Raven Talon Dead & Breakfast." (Check out my Halloween home tour on the blog I do with my mom and sister where you can see all of my decor and the amazing Dead & Breakfast sign I created for our front yard!) So it's a requirement that ravens or Edgar Allen Poe be a part of the decor. I was also inspired by one of the maker's projects for Tim's 2018 Halloween release. I loved Stacy's "Hyacinth Ravenwood" tombstone. I just loved that Stacy made it double sided and how she covered the hole on the back of the tag.

I came up with a story behind my tombstone and found names that mean raven to use for my "cast of characters." This tombstone belongs to the late Noir Ronne (her name literally means black raven) who was born on January 19, 1809 and died on October 7, 1849 (Edgar Allen Poe's birthday and the day he died). She was in a tragic carriage accident and her surviving family is her father, Corbin, (means raven) and her mother, Branwn (means beautiful raven). Noire was to be wed to her fiancé, Edgar Nevermore (see what I did there?), but he died soon after from a broken heart. Since he passed, no one has moved the last bouquet that he left at Noire's tombstone and now the flowers are taking on a life of there own!

I started by making a mold of a medallion using hot glue then glued it to my tombstone after painting it with white gesso. Next, I decided I wanted some cracks in my tombstone where rougher stone shows through so I took some texture paste and added it to the tombstone. To create a seamless transition, I added a line of hot glue around the texture paste in small line so I had time to use a popsicle stick to pull a bit of the glue out, creating a bit of a slope.

After the hot glue dried, I used crackle past to go over and around the hot glue as well as here and there over the rest of the tombstone. Using chipboard, I also cut out letters for the front of my tombstone with Tim's "society" die cut. I placed them on the tombstone and figured out where to cut off bits of the letters where the cracks where, trimmed them up and used a thin layer of quick dry super glue to adhere them to the tombstone.
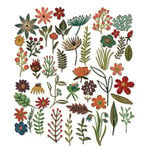
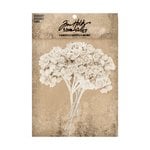
Once everything was dry, I went over it all with impasto paint (I mixed a white and a linen color to create a light cream color). While that was drying, I began cutting out flowers from 3 of the "funky florals" die sets as well as a raven. I cut several ravens out to layer them together so I could fluff the tail feathers and to give the cut more stability and bulk on the tombstone (also inspired by Stacy's tombstone). I also colored a clear gem and the pearl on Tim's new spider embellishment with bottle green alcohol ink and set those aside to dry.
Once the tombstone was dry, I created a custom dark grey wash using various inks, mists and water to age the tombstone more. Since the mixture was very watery, I just used a paintbrush to apply the wash where I thought aging would occur, letting it drip down the tombstone. Once I was happy with the drips, I laid the tombstone flat to work on darkening the cracks. I darkened my wash and applied it to the gritty texture areas and left it to dry.

I decided I wanted to patina the hardware I was adding to the tombstone so I used some patina effects paste to add texture and patina color to the chain, hardware and to the top of the spider. I also added some to the tombstone where I thought the patina would occur naturally around where the hard was attached to the tombstone and also a little on the medallion. I also added some green impasto paint for mold.
I used one of my grey color mists, I colored some mummy cloth that I would be tying around the bouquet of flowers and left it to dry. Inspired by Tami's use of the broomstick bristles for a plant, I also took some water and brown mist to wet down the bristles of a Tim Holtz broom after removing the broom handle. (The makers Tim features for releases are all so creative and amazing!) Once I was happy with the way the bristles looked, I spritzed some Tim Holtz flowers and then set those aside to dry and began working on the funk florals die cuts.
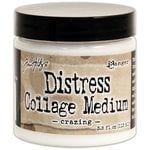
First I used Distress Ink to add grunginess to the flowers and leaves. Then, I used my McGill flower shaping tools and mat to add dimension to all of the die cuts. I layered and glued my flowers and left those to dry for a minute while I glued together the raven cuts, leaving the tail feathers unglued for fluffing. I also added some crazing paste to the front layer of the raven die cut and set that aside to dry.

I went back to the flowers, poking holes in the center with a paper piercer tool. I started by adding some flower stamens and then used a drop of Glossy Accents to glue it in place on the back of the flower. For the 3 larger flowers, I glued an eye to the center of the flower, covering up the flower stamens. Next, I used green floral tape and some floral wire to lengthen the stems and make everything posable. I started by attaching the floral stems to the floral wire with the tape and wound my way down the stem with the tape. For the smaller flowers, I would attach 1 to 2 of them per floral stem.
Once the broomstick bristles and mummy cloth were both completely dry, I added my flowers to the center of my floral arrangement and then wrapped and tied my mummy cloth to hold it all in place. Next I used some black soot Distress Ink to my raven to darken him back up then set that aside to dry a bit. I also used a gold metallic paint to add a bit of glitz to the center of the medallion on the front of the tombstone.
Before I started glueing things to the front of the tombstone, I wanted to work on the back as those embellishments would be more flat than the bouquet. I found a photo that from the 2018 Halloween paper stash of a woman and cut her out to fit into a foundry frame. I used a very thin layer of quick dry super glue to glue the photo to the back of the frame and then the frame to the tombstone, covering the hole in the tag, just like Stacy did on her tombstone.

I also used my computer to write up Noire's obituary and printed it out on cream cardstock. I matted the obituary with some paper from the 2018 Halloween paper stash that reminded me of Victorian wall paper. Using a spray adhesive, I glued the layers together and then to the tombstone itself. I used the Rest in Peace quote chip, piercing some holes on either end to add mini metal brads for a hardware look. I also used super glue to attach it to the tombstone. None of this stuff is ever going to break off (fingers crossed)! Finally, I added some of my extra flower and leaf die cuts around the bottom of the foundry frame, using a gel medium as adhesive.

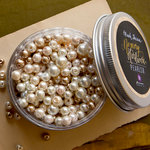
Using gel medium, I glued the ravens feet to the tombstone as well as some flowers to the top of the tombstone. Next, using needle nosed pliers and an extra link from the chain, I attached the spider embellishment. I also used some jewelry findings and pearls to add some pearl dangles to the chain as well. Using super glue, I glued the chain down by sliding it over some hardware and glueing the hardware in place. Now that the gold paint in the center of the medallion was dry, I used some clear glue to place the green gem into the center of the medallion. Finally, I glued on my bouquet and voila!

I'm really happy with how this turned out and can't wait to display it on my mantle this Halloween.
Happy Crafting,
Adrienne
Products Used
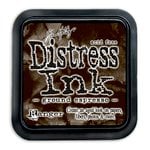
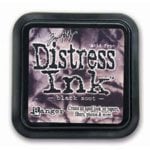
Tim Holtz: Etcetera - tombstone overlay medium; Idea-ology - paper stash materialize, adornments spiders, creepy eyes, foundry frames, mummy cloth, broomsticks, bouquet, quote chips halloween; Atlerations - society, feather & ravens, funky floral 1, funky floral 2, funky floral 3; Distress - collage medium crazing; Distress Ink - tea dye, ground espresso, pumice stone, black soot, re-inker tea dye | Ranger: Adirondack Alcohol Ink - bottle; Texture Paste - opaque crackle | Dina Wakley: Media - white gesso | Prima: Art Basics - heavy body gel; Art Extravagance - texture paste graphite, patina effect pastes; Art Alchemy Wax - old silver, vintage gold; Art Alchemy Opal Magic - violet gold; Art Alchemy Impasto - snow white, linen, victorian green; Art Ingredients - melange art pebbles; Mechanicals - hardware accents; Memory Hardware - cote d' azure antique chain copper, pearls II | ReDesign: Moulds - warrington framework | Marion Smith Designs: Color Lab - tornado; Bloom Impressions - flower stamens yellow | Little B: Paper Flowers - flower stems | Bazzill: Cardstock - cocoa, java, cinnamon stick, sued dark brown | Ellmer's: Craft Bond - adhesive spray | Recollections: Gems- halloween mix; Cardstock - black | Other: floral tape, super glue, pop dots, hot glue
I am an affiliate with Scrapbook.com. When you shop the links below, I receive a small commission from the affiliate, at no additional cost to you. This helps me balance the costs of the time and love I put into my projects and blog so I can continue to share my ideas with you for FREE. If you shop the links, thank you! I greatly appreciate it.
Below are products that I used or similar products.


0 comments
I'd love to hear your thoughts!