
Horror D'Oeuvre Tray: A Tim Holtz Halloween Mixed Media Project
I'm not sure if I just like a bit of the macabre or if I just like being creative, either way, I'm really pleased with how this little tray of "horror d'oeuvre" turned out!

I came up with this idea late at night, just before falling asleep (I'm not sure if that says anything about my macabre preferences) and scribbled it out onto a scrap of paper. Drawing up the idea was a lot faster than making this delicious little tray with my poisoned candied apple, eyeball with putrid strawberry sauce and stabbed clotted heart. Due to the fact that I molded my tasty little bites from paper clay, it took a few days to create this mixed media project.

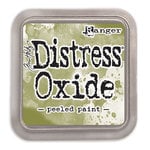
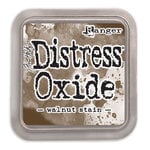
I started out choosing some papers from Tim Holtz's 2019 Halloween paper stash, Abandoned. The tray was a little wider than 8" so I used some strips of a contrasting color on the sides, which really helped to frame the elements in the tray quite nicely. Once these were cut out, I set them aside. Using Mod Podge, I covered the back and sides of the box with the Halloween lace collage paper. Once that was dry, I added a wash of Distress Stain in walnut stain over the top and to the insides of the vignette tray.

Next, I began molding my delicacies. The apple and the eyeball both have a foam ball base that I layered and molded clay over. The heart was made using a candy mold! Before the clay dried, I made sure to stab each piece. The Apple stick is made from a Tim Holtz broomstick handle that I sharpened to a point to be able to better stab the foam and clay with. The eyeball and heart both have a Tim Holtz mini silverware piece.

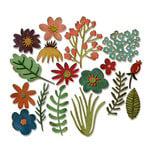
After each little morsel was stabbed, I carefully painted each piece layer by layer. Once the paint was dry, I used the clear Nuvo drops to add a glossy exterior then added a pupil from one of creepy eyes to the eyeball. Then I used the Moroccan Red Nuvo drops to add some "putrid strawberry sauce" to my eyeball. I also used a funky florals die to create a leaf for the apple.
Once the main stars of my tray were complete, it was time to move on to the other parts of the tray. I stained a finial set with Distress Stain and set this aside to dry. I also wanted a zombie butler bursting through the wall behind the horror d'oeuvre so I poked a tiny hole where the center of the zombie arm would go and then carefully tore the paper back so it would look like torn wallpaper.

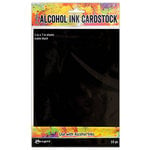
Using the 3D wood texture fade, brown cardstock and the walnut stain Distress Oxide ink pad, I created some faux wood paneling for my zombie butler to also smash through. Using the matte black alcohol ink cardstock, I created the black backdrop for the zombie arm to be attached to, adding some wood beams above and below the zombie hand just poking out from the torn wallpaper. I cut two more "broken" strips to add below the zombie arm to look like broken beams that had crashed to the floor.
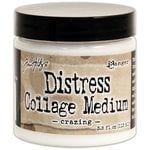
My zombie hand had to be holding a bottle of poison so I used an alcohol ink to color a tiny vial red. Next, I added some crazing collage medium to age the bottle. Once that was dry, I aged it further by using Distress Stain, wiping off the excess after it settled into the cracks. I tied some black twine around the neck of the bottle, added a poison label, inserted the cork and then dripped candle wax over it to seal it closed. At this point, I glued down my background papers and zombie hand into the tray.

I found a fun little ephemera piece with a skull and the word "cured" on it that I just knew I had to incorporate. I backed it with black cardstock and then created a tiny easel to prop it up. I created a small shelf out of chipboard and covered that with leftover "wood." I cut a bone in half and using an emery board, smoothed the cut end to a 45 degree angle. Then using quick dry super glue, attached the bones as brackets under the shelf.

I wanted to make some candles to add to the vignette so I cut a plastic straw to varying heights. I lit my candle again and dropped a dot of wax on my non-stick craft mat. Before the wax hardened, I inserted the end of a piece of black jute twine into the wax then slid the plastic straw over it. Holding the jute straight, I dripped hot wax into the straw. I did this for all 3 mini candles and waited for the wax to cool before removing the straws from the mat. Once cooled, I used a craft knife to slice the straws lengthwise and removed it from my mini candles. I again used the real candle to drip wax drips down the sides of my mini faux candles. I glued two of the candles and the ephemera to the shelf and then added the third candle on the floor under the zombie hand.
Next, I glued my tasty little morsels into the tray using super glue. Then I added a piece of cream tassel trim to the top of the vignette for a little flair and created a "Horror D'Oeuvre" banner using my Typecast typewriter, cardstock and Distress Oxide ink.

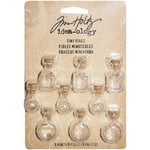
Finally, I added a little bit of gold wax to the finial set and then glued them on using a heavy body gel. As this dried, I set it aside while I worked on coloring some crinkle ribbon with a red color mist. Next, using a paper piercer, I poked a tiny hole into the top of a wishbone through which I inserted a silver jump ring. I also inserted this jump ring through a jewelry finding. I added a Halloween story stick and the wishbone to a safety pin. Using another jewelry finding, I attached two red glass beads to the wishbone's jewelry finding. Once the finials and the crinkle ribbon were dry, I tied my crinkle ribbon in a bow then attached the safety pin.

This project was so much fun to make! I just love all the little details I put into it. I hope this inspired you to make some of your own Halloween home decor!
Happy Crafting,
Adrienne
Products Used
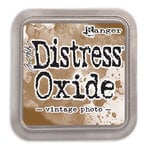
Tim Holtz: Idea-ology - vignette tray, abandoned, collage paper halloween, creepy eyes, broomsticks, halloween ephemera, wishbones, story sticks halloween, boneyard, cryptic, vignette finial set, silverware, crinkle ribbon; 3D Texture Fades - lumber; Alterations - funky florals 1; Distress Oxide - peeled paint, vintage photo, walnut stain; Distress Stain - walnut stain; Collage Medium - crazing | Ranger: Alcohol Ink Cardstock - matte black; Alcohol Ink - poppy field; Glossy Accents | Prima: Art Basics - heavy body gel; Art Alchemy Impasto - snow white; Art Alchemy Wax - vintage gold | Nuvo: Crystal Drops - morning dew, moroccan red | Marion Smith Designs: Color Lab - merlot | American Crafts: Jute Twine - black; This & That - double sided tape | Bazzill: Cardstock - chocolate truffle | DCWV: Neutrals Stack | Recollections: Trim - cream; Cardstock - cream | Reeves: Acrylic Paint | Elmer's: Craft Bond - spray adhesive | Mod Podge: Matte | Other: pop dots, plastic straw, candle, super glue, beads, jewelry findings, floral foam 0.9" spheres, paper clay
I am an affiliate with Scrapbook.com. When you shop the links below, I receive a small commission from the affiliate, at no additional cost to you. This helps me balance the costs of the time and love I put into my projects and blog so I can continue to share my ideas with you for FREE. If you shop the links, thank you! I greatly appreciate it.
Below are the products I used or similar products.


0 comments
I'd love to hear your thoughts!