So my mom and I decided to make one of those adorable tutu dresses you can buy all over Etsy as a gift to Rylee for her birthday. These dresses are really, very easy to make. We went with Elsa colors but you can certainly adapt this for an Anna dress!
 |
| I left plenty of length on the skirt so I could cut it to fit Rylee the day of the party as this dress was a surprise for her! |
After watching YouTube video tutorials and reading tips and tricks we then bought a crochet tube top (or you can use a headband), a bolt of tulle, 4 crystal snowflakes, 2 Elsa cabochons, Swarovski crystals in bulk and a pair of teal Converse low tops online. I also went to my local Joann's for cluny (cotton) lace and spray paint.
Start by measuring the length you would like your tulle to be (from the bottom of crochet top/headband to where you would like the the tulle to hit). You want to make sure that you add about 5 inches to your measurement, especially if you make the dress super pouffy. My mom and I also decided to recreate the V-shaped waistline of Elsa's dress on Rylee's dress so I added on an additional 3 inches. So In total I added on 8 inches to the length I made Rylee's dress. And because her dress was a surprise, I erred on the side of having way to much length than not enough. Plus we wanted her to be able to wear it for more than just a year. Finally, take that total length and double it. This is the length you will cut from the bolt of tulle. (For example, if you want the finished skirt to be 40 inches in length, add on 5 inches for layering and an additional 3 inches for the V-shaped waistline and you get 48. Double this and you get 96 inches for the length you end up cutting.)
I set up shop with the tulle on my grandmother's dining room table by marking off the length I needed to cut with washi tape. I proceeded to cut many (I lost count) pieces off the bolt of tulle. Next, take your cut lengths of tulle with the fold on the left. Roll or fold you tulle up. Now we will be cutting the strips for the skirt. Most tutorials suggest that the pouffier you want your dress with the least amount of work, cut your strips into 6 inches. I wouldn't suggest cutting strips of anything less than 4 inches. I cut my strips into 6 inches. Because my bolt was 52 inches wide, I ended up with 1 3 inch strip. I wasn't going to waste any of this beautiful tulle so I made sure the 3 inch strip I cut would always be the folded end of the tulle--that way, when you unfold it, the width doubles to 6 inches!
 |
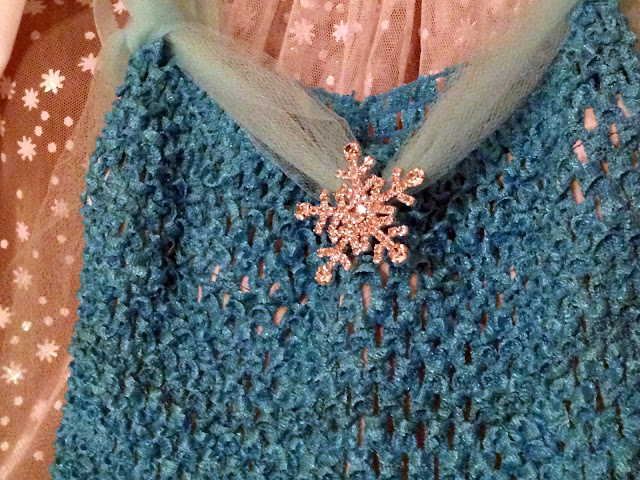
| Detail of the V-shaped neckline and waistline to mimic Elsa's dress. |
Because we wanted to give my cousin plenty of coverage, we opted to sew a ladies' skirt slip to the inside of the crochet top. My mom sewed the slip a few rows down from the top of the crochet top so that we could add sleeves later. You can die your slip to match with Rit Dye or fabric spray. We used a glittery fabric spray on ours just to add a little pizzazz. Many people will layer flowers all over the top of the dress for coverage, which you can also do, but we wanted to keep it simple and let the snowflake be the shining star of the top of the dress.
Once you cut a ton of these strips and sew on the slip, start layering them onto your crochet top. I would take 2 strips at a time when I did this. Because I didn't take any photos of the process and I'm no expert on this, Hip Girl Clips has a great visual tutorial on how to attach the tulle to the crochet top. Remember I adjusted this for the V-shape waistline I wanted to recreate.
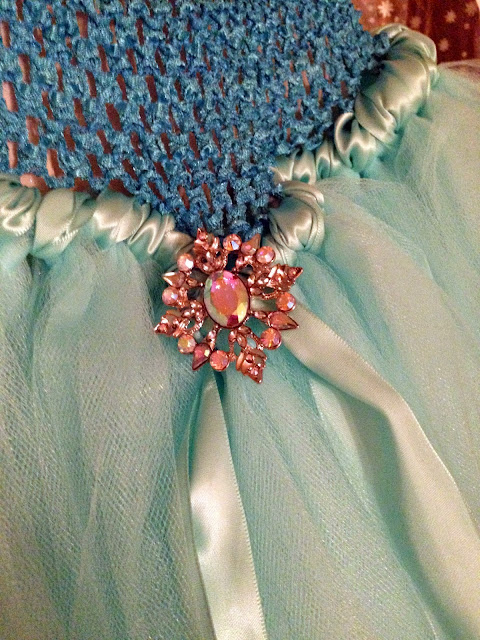
To make the line between the crochet top and tulle appear more finished, my mom wound a ribbon around the tulle. I finished it off with a diamond-shaped pin in the center that accentuated the V-shaped waistline.
Next we added on the sleeves with a few more strips of tulle. We used this tulle to also create a V-shaped neckline as well. I kept the extra length to cut off later after fitting it to Rylee. You can also use ribbon for this and just tie it in the back instead.
I also found white tulle with sparkly snowflakes on it and my mom made a cape. She sewed quilt edging onto 3 of the edges. My mom kept it simple by leaving the fabric in a rectangular shape, but if you are a great sewer, feel free to go all out and make a rounded bottom edge. The top edge my mom made a pocket fold to gather the cape on a ribbon. We then used this ribbon to attach to the crochet top--we didn't make this permanent in case Rylee wanted to take the cape off to play. I'll get to the snowflake on the dress top here in a minute.
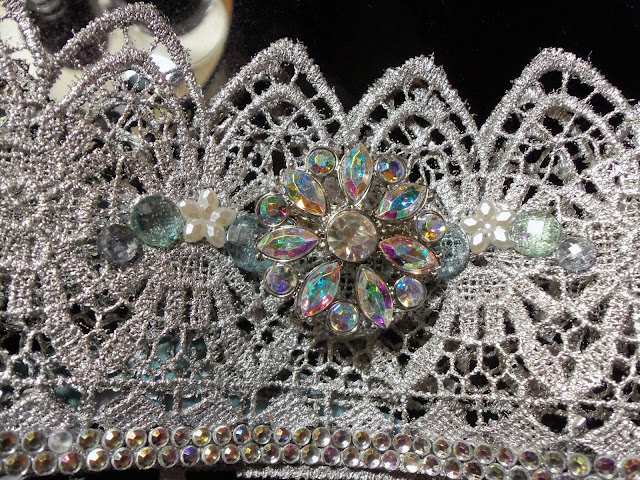
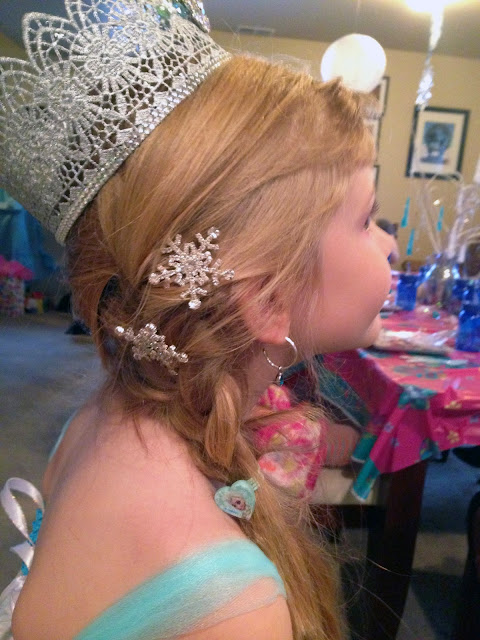
Now on to that cute and glitzy crown! I won't go through the steps of this one because there is already a great tutorial out there by Rook No. 17. This version is a super easy spray paint crown that does not need starch or a microwave (though she has that tutorial as well). After making the crown, I added on a few scrapbooking jewels and a pin I bought at Joann's.
 |
| I just happen to run across these sweet Elsa cabochons online. A large jewel would also work. |
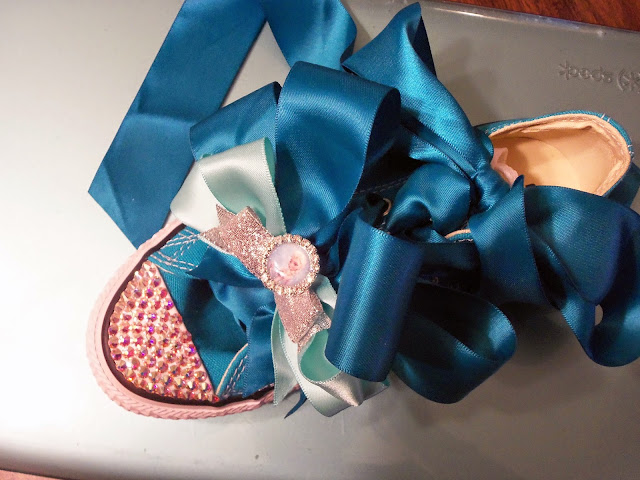
Who needs glass slippers or high heels when you can have Converse low tops decorated with Swarovski crystals!? All you need is E6000 glue and lots of crystals. I bought mine in bulk from Amazon. You can buy all kinds of pretty colors but I purchased the Xillion Rose AB Crystal in size 20ss. I bough a packet of 144 crystals and that was more than enough for my cousin's shoes. I also bough a variety pack of sizes of the same color crystals at Joann's. I used the 20ss on the toe and smaller ones on the back of the shoe--though you can use the same size if you wish.
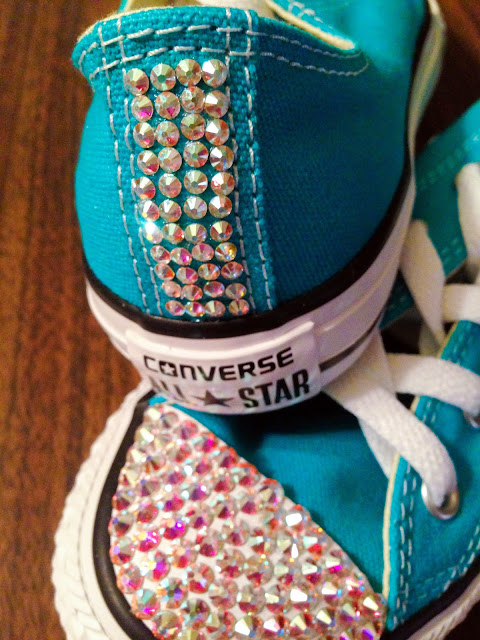 |
| Swarovski crystals adorn the back and the toe of each shoe. |
I used a bit of the E6000 glue to add bobby pins to 3 snowflakes and pins to the other snowflake and the Elsa cabochons. I let these dry with the shoes.
I then used my Bow-it-All tool to make 2 pretty layered bows (teal, aqua and silver). I sewed the bows together and used E6000 glue to attach an alligator clip/safety pin combo. You can find these in your local craft store. Let this dry as well.
Once the cabochons and bows were dry, I pinned the cabochons to the center of the layered bows. (You could also use E6000 to glue the cabochons onto the bow instead).
Then I took the laces out of the Converse shoes and re-laced them with ribbon. I used my Imaginisce ribbon cutter and sealer on the laces and bows to keep them from fraying as well as the ribbon on the waistline of the dress. Then pin or clip the bows onto the shoelaces.
The snowflake with the pin was used on the top of the dress. I pinned it to the center of the V of tulle.
The other 3 snowflakes with the bobby pins we left for Rylee's hair and to help attach the crown! (I'm jealous of all the super thick blonde hair she has!) My aunt is a hairdresser so she did a simple side braid for Rylee to match Elsa's hair.
And because I had some excess tulle and a blue crochet headband, I made a matching dress for my sister's dog, Bella. However I hand gathered and stitched the tulle onto the headband so the tulle wouldn't fall to either side of Bella.
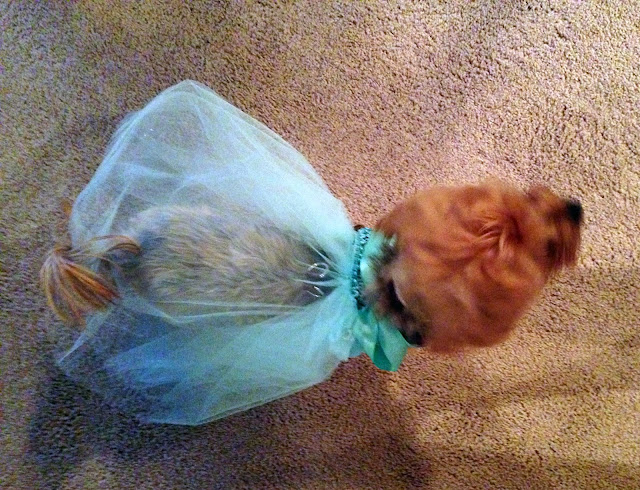 |
| Bella wouldn't hold still for the picture, but you get the idea! |
Happy crafting!
Adrienne





0 comments
I'd love to hear your thoughts!