Today I'll be going over the decor, tablescape, and goodie bags! Let's just jump right into it--here are some ideas to whet your crafting whistle:
First off, I created a banner with my cousin's name in the Frozen color scheme. It was something I wanted her to be able to display in her room later on so I didn't make it too wintry themed--just a snowflake on either end. These pictures are actually from her bedroom because I couldn't get a good shot of it at the party. It was hung over a window and the lighting was terrible for photos!
For the banner, I used mostly Doodlebug products. The mint, lavender and pink cardstock are Doodlebug as well as the patterned paper. I used Tim Holtz Distress Ink in Peacock Feathers to shadow around the edge of the banner pennant. I layered on the purple medallion, the patterned paper rosette and then framed a glittered letter with pink and white cardstocks. I added a few Prima flowers and a butterfly to 3 of the pennants.
For the snowflakes, I used several Tim Holtz Distress Inks to color it much like the Frozen snowflake. In fact, this snowflake is modeled after the Frozen snowflake. The font I used to cut out the letters is also modeled after the font used the the Frozen title. I hung all the pennants on a wireless, iridescent chenille string.
Products Used:
- Doodlebug: cardstock in pistachio, wisteria and cotton candy; patterned paper is from the Frosty Friends collection
- Tim Holtz: Distress Ink in peacock feathers, broken china and dusty concord
- Recollections: Fine Glitter in peacock; cardstock in white; Gems in iridescent
- Prima: Troika flowers in white
- Other: wireless, iridescent chenille ribbon
I also glittered an old wooden hanger and printed out a "Keep Calm and Let it Go" sign from Practically Functional. This photo was also taken later in my cousin's bedroom. I imported the photo into my Silhouette Design Studio and traced the snowflake at the top. I used that traced image to cut out a cardstock snowflake. I glittered it and used a pop dot to adhere it to the sign.
I had the photo printed out at Walgreens and I like the quality of their prints. However, I adjusted the crop on this printable so there was more room at the top for hanging. But when they printed it, the crop was nearly centered. Uhg! The control I give up for not having to waste my own printer ink!
My mom found a cute snow bucket idea on Pinterest and so she bought a little aluminum bucket. I decorated the bucket with gingham ribbon and a glittery blue snowflake. It's filled with styrofoam balls. This picture is on our own mantle (my mom wanted to keep this cute little piece for herself!). In the next photo, it's sitting on the buffet hutch in the background.
There are several things going on in the photo above. On the wall in the back my cousin Bradan made a sign for the DJ booth he set up so he could play the Frozen soundtrack at the party. (Isn't he a wonderful big brother?!) My aunt has a ton of winter decorations so she hung up a white snowflake banner from the ceiling and also hung some clear snowflakes from ribbon. That awesome piece of blue light-up cuteness is a Frozen Chandelier. There is a great tutorial I followed from Busy Mom's Helper blog. I added a few of those paper lantern lights left over from my sister's wedding to make it seem more like an actual lighted chandelier. You also get a preview of my next post--an outfit fit for a princess.
For the tablescape, my aunt bought a Frozen table cloth from Party City along with the matching paper plates. She found some cute plastic mason jar tumblers with Frozen prints as well. In the center is a vase that I put a faux mercury glass finish on and some branches that I spray painted white. Hanging from some of the branches with fishing line are rock candy lollipops in clear and aqua.
We also put out "Kisses to Warm a Frozen Heart" (Hershey's Kisses) and snow caps (which remind my aunt of her mother). To finish off the tablescape we added some iridescent tinsel and a few snowflakes.
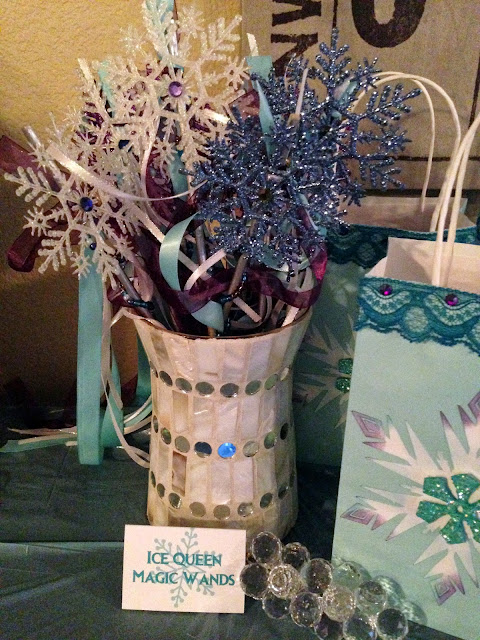
The goodie bags for guests were just plain aqua color gift wrap bags from Party City. I decorated the bags with the same Frozen snowflake die cut I used for the banner and some turquoise lace my aunt had on hand in her crafting stash. I added a few iridescent jewels. Inside the bags are stuffed with a scarf, a pair of gloves, some Frozen gummies and stickers and a few other Frozen-themed odds and ends.
At the end of the party each girl also got to take home an ice queen wand. These wands were my mom's project. I spray painted the dowel rods silver for her and she did the rest. She wired on a snowflake at one end then swirled beads on the wire down the handle. She tied on some pretty ribbons in aqua, deep purple and iridescent white. The she finished off the snowflake (and to cover the wire around the middle of it) with a pretty gem. At the party my aunt placed them all in a pretty mirrored mother of pearl vase.
Don't forget to check out Pinterest for more ideas--it's where I got most of mine!
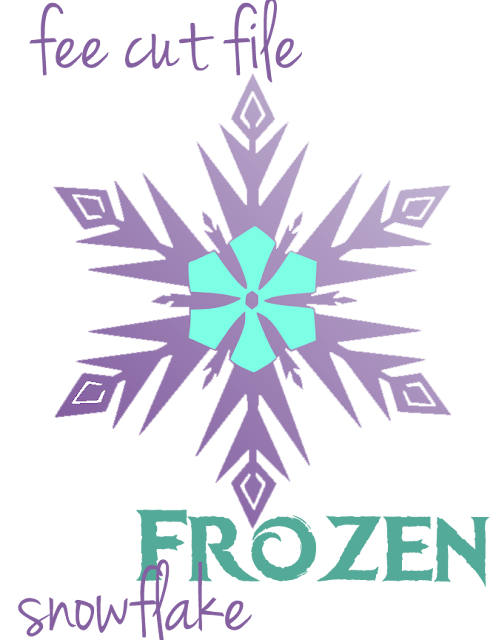
And for those of you who want to cut out your own Frozen snowflake, here is the Silhouette cut file I created and used for the banner and goody bags. Download your free file by clicking on the image below.
Happy Crafting!
Adrienne


0 comments