
(Inter)National Scrapbook Day 2021: Pretty in Pastel Layout
Happy (Inter)National Scrapbook Day! Here's a brand new layout that I created to celebrate this day!

I know I've been clogging your feed with Prima's Watercolor Floral collection lately (and lots of other past Prima-based projects on my Insta too). But I can't help it! This collection is to die for! And, instead of hoarding my supplies, I'm actually using them!

This is most definitely a layout that is probably going to end up in a shadow box rather than an album. Not just because it turned out so nicely, but because it has so much depth to it! You'll learn why later.

I started by matting the photo onto a piece of Tim Holtz smooth cardstock. It was a piece that I had used a portion of for something else and one edge was already spiced up by cutting it with my deckle trimmer.
@alicescrapswonderland Happy (Inter)National ##Scrapbooking Day! Here’s a new layout I created using @primamarketinginc Watercolor Floral collection. ##NSD2021 ##primamarketing
♬ Fear - OneRepublic
Next, I added some larger paper flowers to the background paper, using the photo as a guide for placement, adhering them with heavy body gel. I addd some ephemera under the paper flowers using Distress Collage Medium.

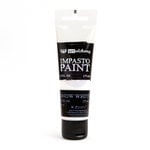
I moved the photo out of the away and began to mix watered down white impasto paint with some Frost metallic ink from the re-inker. I then used a brush to splatter this mixture onto the background, flowers and ephemera strategically. One that was dry, I added the photo on, using layers of 2 inch foam. To float it over the flowers I used, I end up using 5 layers of the foam adhesive!

I then fussy cut out a few elements to add to the layout, including some leaves and an image from a journaling card. I tucked these in using Distress Collage Medium to adhere them. I also die cut some texture mesh from the same Tim Holtz cardstock that the photo was mounted on. I cut it apart using some mini snips and then adhered it to the layout with the collage medium.

I added a large butterfly chipboard sticker to one side of the photo the addd an envelope ephemera piece using 1 inch foam above the photo. I added a small stamp sticker to the envelope and a sentiment one below the photo. I then added a few more paper flowers to 2 corners of the photo using Sticky Squares and then tucked a couple more around the photo.

Next I added a puffy sticker near the envelope ephemera. I then mixed some soft pink Pops of Color with water to create a mixture I could splatter on the layout. I covered the photo with a scrap piece of paper and splattered my layout. To finish it all off, I added a few gems.

I hope you enjoyed this layout tutorial! Don't forget to follow me on Instagram and on TikTok for even more inspiration! Sometimes I post projects on TikTok a little early--just in case you want a little sneak peek before everyone else.

Don't forget that there are still lots of events to come from Scrapbook.com all the way through Tuesday!
Happy Scrapping!
Adrienne
I am an affiliate with Scrapbook.com. When you shop the links below, I receive a small commission from the affiliate, at no additional cost to you. This helps me balance the costs of the time and love I put into my projects and blog so I can continue to share my ideas with you for FREE. If you shop the links, thank you! I greatly appreciate it.
Below are products that I used or similar products.


0 comments
I'd love to hear your thoughts!