Uninvited Guest: A Tim Holtz Halloween Vignette with Tiny Lights Tutorial
Nothing says Halloween quite like a classic deep orange and lots of creepy crawlies!
I had so much fun creating this altered Tim Holtz Etcetera Tag. I especially loved adding the orange Halloween Tiny Lights and using the new Crackling Campfire Distress Ink! Both added that extra oomph of orange to my make.
Before I get into all the goodies on this make, I want to give you a little tutorial on the inner workings of my tiny lights in the Vignette Box.
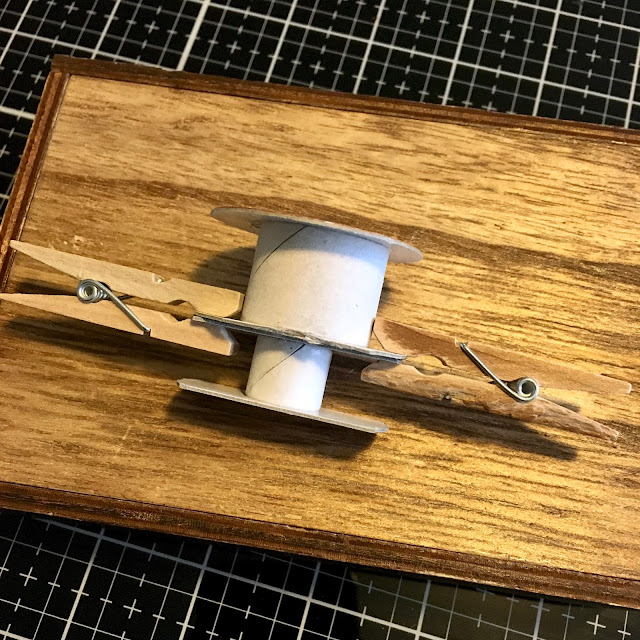
If you know me, then you know I love using packaging in my mixed media projects. I had some tiny ribbon spools that I used to crate a more secure base under the vellum to hold up the moth on top and to wrap some of the tiny lights around. I used Distress Collage Medium to glue the two spools together, cutting off the excess on the middle and top parts of the glued together spools to ensure there weren't any weird shadows created under the moth. In the photos above and below, you can see I used some small clothespins to hold the pieces together until the glue set.
Next, I added in the tiny lights by drilling a small hole in the bottom of the Vignette Box to allow the wiring to be pushed through. I used some electrical tape to hold the Tiny Lights in place around the box and also wrapped a bit of the end around the repurposed ribbon spools.
Using a frame from the Halloween Baseboards pack, I glued a piece of vellum to the back with glue tape runner. Using Distress Collage Medium, I glued the frame with the vellum to the top of the Vignette Box. In the photo below, you can see the shadow created by the ribbon spools. But don't worry, it gets covered up perfectly by the moth later!
Now on to the rest of the make! I started by covering a medium tag with papers from the Abandoned paper stash. I chose a vibrant orange to create a color theme for my project. I also covered the vignette box with some matching papers from the same stash. I used Distress in in Crackling Campfire to the edges of all these papers.
I glued the vignette box on the bottom of the tag and added a base made of layers of chipboard. You can't see in the photos, but I have a hole in the back of the chipboard base that allowed the wire from the tiny lights to come through and up so I could glue the battery pack on the back of the tag. I used Distress Crackle Paste, Distress Paint in Rusty Hinge and Distress Ink in Black Soot to give texture and color to the chipboard base.
Next I layered on pieces from the Field Notes ephemera pack, adding a few Halloween Remnant Rubs to some pieces. I also glued on a set of Transparent Wings to the large bug from the Halloween Ephemera pack. I used distress ink in Crackling Campfire and Black Soot on the edges of most of the ephemera, crinkling some of the corners for added texture. I also layered on a Quote Token for added panache.
I covered the moth from the new Entomology set with Distress Glaze in Rusty Hinge (just paint on a thin layer of Distress Collage Medium to the metal charm then sprinkle on the Distress Glaze and heat). Using a couple dots of Distress Collage Medium, I glued an Optical Lens to a piece of ephemera and then glued down the moth.
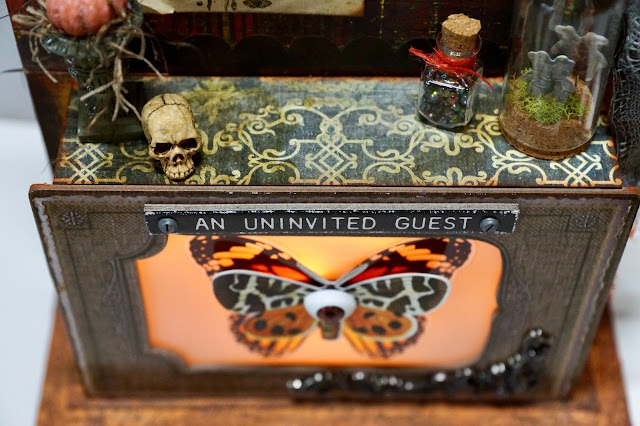
Next I worked on adding the detail to the front of the Vignette Box. First, I glued a moth from the 2019 Halloween Layers and Baseboards pack to a set of transparent wings using Distress Collage Medium. (If you don't have this set, I recommend using Tim's Entomology stamp and die sets and color a moth stamp with Distress Ink.) Once it was dry, I used my fingers to curl the wings of the moth a bit, giving it more dimension. Then I glued on a Creepy Eye to the center of the moth. Once that was dry, I glued it to the top of the vellum. I also added a Word Chip, distressing the edges plus a set of hardware heads.
Using Distress Crayon in Black Soot and Picket Fence, I added more lowlights and highlights to a metal embellishment then glued it on to the frame with a few dabs of Distress Collage Medium.
Now to the fun stuff on top of the Vignette Box!
Using three pins, I glued a few tiny bugs from the Field Notes Snippets pack to the top of the pinheads with Distress Collage Medium. Once it was dry, I used a pair of needle nosed pliers to bend the top of the pin so the bugs would face forward after pushing the bottom of the pin into the cork of a Corked Dome. I added a little moss with and popped on the glass lid. I also filled a Tiny Vial with some Renea Bouquet Beautiful Beads in Fairy Opal. I added a little hemp twine in a deep orange to the neck of the bottle then glued both elements down with Distress Collage Medium.
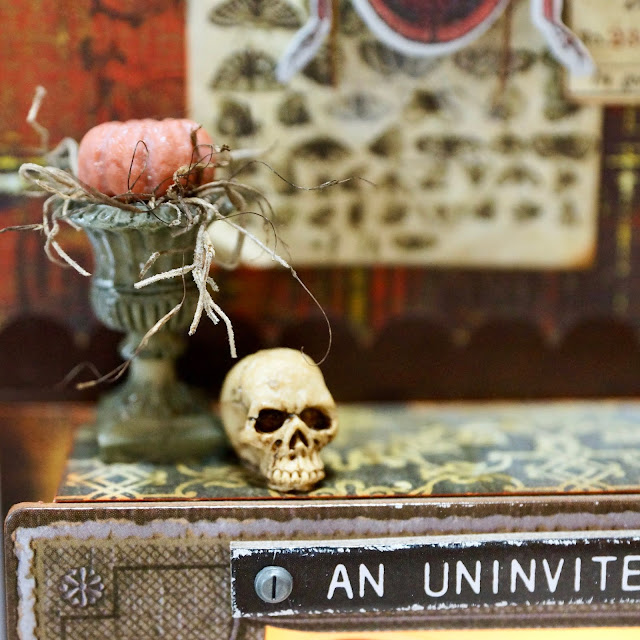
I used one of the new Grave Relics, adding some Spanish Moss and a Pumpkin to the top with Distress Collage Medium. I glued that down along with a skull to the top of the Vignette Box.
I wanted some ribbons and charms that could hang from the top so using hot glue, I glued down a dried old stick to the top of the tag, adding a little moss. I colored some Mummy Cloth with Distress Ink in Black Soot by rubbing it on both sides of the ribbon. I then spritzed it with water and dried it with Ranger's Heat Tool. Along with some baker's twine and a pretty scrap of orange embroidered ribbon from another project, I looped the three ribbons onto one end of the stick.
I then added charms by using some vintage styled loop pins. I added one to the top of the spider charm from last year. (Gotta use up what you already have!) I then added a Halloween Story Stick and an Antiqued Gem to another pin and slid it on to the bottom of the spider. I used the top pin to hang the charms from the ribbon.
I hope you enjoyed my process and mini tutorial!
Happy Crafting
Adrienne
I am an affiliate with Scrapbook.com. When you shop the links below, I receive a small commission from the affiliate, at no additional cost to you. This helps me balance the costs of the time and love I put into my projects and blog so I can continue to share my ideas with you for FREE. If you shop the links, thank you! I greatly appreciate it.
Below are products that I used or similar products.




















0 comments
I'd love to hear your thoughts!