
Don't Forget to Fly: How to Add Fabric to Your Scrapbook Layouts
Oh tree, you open up your generous hand
Jutting out outstretched like holding a wand
Upon your branches nesting birds building
Assured of comfort weary wings living.
Oh tree, you provided them place to dwell
New flock ready to chirp and sing away
Calling with their melodious notes so well
And dreams of places to fly so far away.


And if you have been following this blog for any amount of time, you know I love to draw inspiration from my photos to create my scrapbook layouts. This adorable newborn photo features a photo floor backdrop of whitewashed wood, a grapevine bed and moss green blankets.
Besides drawing from the woodgrain, twisted branches and soft greens by using flowers, nature inspired ephemera and twig die cuts, what I really wanted to do to stretch my wings a bit. I haven't added ribbon or fabric to my scrapbook layouts in and while and so I thought this would be the perfect opportunity to get out of my comfort zone--and to give you my advice on adhesives for fabric and take you through a tutorial!
In this case, I opted for using a "faux" burlap ribbon that I was able to fray the edges of. Plus, the tight weave on this ribbon makes it easy to glue to the page. It may seem intimidating to add fabric or other textiles to your layouts, but in reality it's quite easy. You just have to make sure you use the right adhesive.

The best one out there, I think, is Tim Holtz's Distress Collage Medium in matte. This adhesive dries clear and without a glossy shine, so you don't have to worry about squish out. And if all else fails, layer on other elements and you'll be able to easily hide any "hard spots" caused by the adhesive plus add extra "glue power."

Despite some of the delicateness of this layout, it is relatively simple to create--a few pieces of ephemera, some burlap ribbon, flowers and some die cuts. Follow along with my tutorial below to learn how I created this nature inspired scrapbook layout.

To start, I chose to use the Simple Stories SN@P! Basics paper in aspen/white notebook. It was a pretty close match to the photo backdrop used as the flooring in the photo.

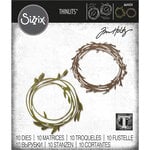
Next, I used a Spellbinders die to cut out some brown Bazzill Cardstock to create a wreath of branches that mirrored the shape of the canopy bed. I cut two of the wreaths, leaving one fully in tact and cutting the other one in half, using pieces from it. To glue it down, I used Tim Holtz Distress Collage Medium in matte.

After that was glued down, I used some foam mounting squares to adhere the photo to the background paper, layering it over the die cut wreath pieces.

Now that the base of the layout is down, it's time to start adding texture and dimension! I used several pieces from a 49&Market flower set, adding them to the upper right corner of the wreath die cut. I used the Collage Medium to glue down the leaves first, just putting a dab on the base of each leaf.

Then I glued down some flowers and sprigs using Finnabair's Heavy Body Gel. To help keep the sprigs in place, I wrapped the wire around into a circle and pressed them into some heavy body gel. To attach the flower, I added more heavy body gel to the back and pressed it over the sprigs where they were glued down.

I also added a cute little toadstool set from Tim Holtz's Field Notes ephemera pack. I add on a few more pieces from this set in a bit, but for this particular piece, I used foam adhesive squares to pop it up off the page and layer it a bit over the photo.

Now on to the burlap. I used a soft "faux" burlap for this. It's not the rough kind you find on the bolt in craft stores, but from a spool of ribbon with a small weave, which makes it perfect for adding little squares of fabric to your layout. For each piece you add, simply cut a little square of fabric. You can use a needle tool or die pick to help you start pulling some of the threads on each end (I did this on the sides that were heat sealed) and then use your fingers to finish fraying the fabric.

To glue down the larger of the burlap squares, I used Collage Medium, directly applying it to the background paper. I then pressed the square into the medium. To help it adhere even better, I added more of the Collage Medium to the back of a piece of ephemera and glued that over the top of the burlap square, layering everything so they were offset. Finally, I added some foam squares to another piece of ephemera and layered it on top to add more dimension. For the smaller piece of burlap stuck under the flower, I used some heavy body gel since it would be hidden under the flower.
I felt like the newborn was nested into that little canopy bed so nicely and I wanted to draw attention to that feeling the photo evokes. I just bought the Tim Holtz Feathered Friends die and new one of those little birdies would be the perfect edition to this layout!

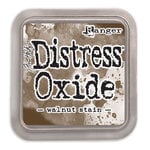
I started by cutting the smaller bird out using a heavy, smooth white cardstock. I then used my blending brushes to apply Distress Oxides in Forest Moss and Walnut Stain. I spritzed them with water to oxidize and distress them and then dried them with my Ranger heat tool. I then used Collage Medium to glue the green layer onto the brown base. I then used a combination of square foam adhesives and Collage Medium to glue the wing to the body and then glue the bird down, nesting him in the wreath and flowers.

The final touch was to add a small little saying using Tim's Small Talk stickers, picking out one about flying. I added a touch of Distress Oxide to match it to the layout's color scheme and then placed it onto the bottom right corner of the photo.
Enjoy this smattering of photos of the finished product!


Products Used
Simple Stories: SN@P! Basics - aspen/white notebook | Bazzill: Cardstock - london fog | Tim Holtz: Distress Oxide - forest moss, walnut stain; Distress - collage medium matte; Idea-ology - field notes, small talk; Alterations - feathered friends; Tonic - shears, snips | 49&Market: Cottage Blooms - linen | Spellbinders: Shapeabilities - wreath | Offray: Ribbon - burlap | Scrapbook.com: Double Sided Adhesive Square Foam - small, large | Recollections: Heavy Weight Cardstock - white
Happy Scrapping,
Adrienne
I am an affiliate with Scrapbook.com. When you shop the links below, I receive a small commission from the affiliate, at no additional cost to you. This helps me balance the costs of the time and love I put into my projects and blog so I can continue to share my ideas with you for FREE. If you shop the links, thank you! I greatly appreciate it.


0 comments
I'd love to hear your thoughts!