
Mixed Media Basics: How to Build Layers on Mixed Media Projects
Beginning your journey into the art of mixed media can be an intimidating one. There are so many products and techniques it can be overwhelming.

When it comes to learning about how to use the different products, my best advice is just to play around. Though I do have a few basic tips. If you haven't seen my previous post on mixed media basics for using different mediums, I encourage you to check it out. But let's move on to layering your mixed media project.
Part of the fun of mixed media projects, besides getting messy, is the ability to create amazing depth that you can't otherwise do on a card or scrapbook layout. You can make simple projects where less is more or you can go all out and have a paper flower extravaganza. There is no right or wrong way to do mixed media, but there are some techniques that can help you make your projects look stunning! One of them, is creating depth by laying on your elements.

I'll be taking you step-by-step on how I assembled and layered my elements for this mixed media project. It uses papers, paints, flowers, chipboard and more, all to create a layered look full of dimension and depth.

But I'm here to make it easy for you, so let's jump right into this tutorial on how to build up layers on a mixed media project!

To start, I'm using a chipboard star base. I traced the shape out on some patterned cardstock and cut it by hand. Then I used a spray on adhesive on the backside of the cardstock and adhered it to the chipboard star. There is no need to wait for any dry time so I jumped right into adding crackle paint to the sides and edges of the star.
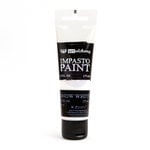
Next, I mixed up some pink and purple impasto paints with water to create a custom color wash. I dry brushed some on to the center of the star. (This helps tone down the patterned paper just a tad so it isn't overwhelming.) I also used white impasto paint to go lightly over the tops of some chipboard pieces I was planning on using and when that layer was dry, I added a thin wash of the custom paint color I had created.

My next step was to create a mold using hot glue. (Be sure to use a large hot glue gun for this so you don't end up with as many imperfections.) Once the hot glue is cool, you can easily pop these shapes out of the silicone moulds. To make the surface of this mould paintable, I applied a layer of gesso to the top and sides. I also added a thin layer to the bottom for good measure.
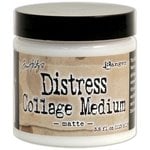
Once the gesso was dry, I added a wash of the custom impasto paint color, wiping off the excess. This allows color to pool in all those nooks and crannies, really drawing attention to the texture of the mould. After that, I added some heavy body gel to the back of my flourish pieces and pressed it down onto the surface of the star.

I like to pull out elements I want to use and do a little pre-planning, just so I have an idea of where I'm going and how I'll need to build up the layers, but I won't show photos of this.
After adhering the flourish, I began arranging down the next layer of elements. I wanted to add a a chipboard frame over the flourish but to ensure that it remains balanced (and safe!) on the piece, I also added some flowers under the opposite side of the frame as well as a small piece of chipboard leaves. I wanted to use flowers here to hold up the frames because I didn't want to have to worry about hiding a not so pretty element later.
I also aded in another flower in the center that will help hold up a resin frame. To glue down all of these elements, I used heavy body gel to give me a long dry time for adjusting my pieces and for staying power after it is fully cured.

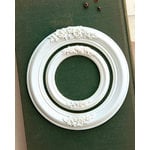
In the photo above you can see that I added in that resin frame.

This next step is a little harder, especially since the medium gluing down the resin frame isn't fully cured. I ended up having to place it back on after this next step, but I wanted to ensure that my twine wasn't going to be in the way of my frame. I took a long length of jute twine. I chose purple, even though on the finished piece the only place you can see it is on the sides of the star. I wrapped it around the star a few times, going around the petals of the flower on the left side and crossing the twine on the front and back.

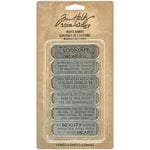
After getting the twine around the star a few times, I then strung on the quote band, using fine needle tweezers to help me string it through several times. Once I was satisfied with the amount of twine, I brought it to the back of the piece and double knotted it and cut off the excess.

I flipped the piece back over, replace the resin frame and then used a pallet knife to add a bit of heavy body gel to the back of the quote band.

In preparation for one of my final steps, I decided to ink the edges of some butterflies that I had fussy cut out of the matching paper set. It also gave my resin frame a chance to rest and "sink in" a bit before I attacked the next piece. I used some Distress Ink and a foam blending tool to just add a bit of ink just to the edges of these butterflies.

I just wanted to show the photo above because I think it really gives you an idea of the depth of the piece I'm creating and just why you really need to build up those layers to support your elements. You'll also notice that in the lower right of the photo some tiny pieces of foam core board. I'll be using these to help build up a layer that you'll see in the step below.

I want a set of transparent wings and a fussy cut butterfly (bottom center of the image above) to sit on top of the resin frame. But I don't want glue showing through the transparent wings so I'll need to glue these layers down in the center. You guessed it! That means building up some layers. Those two pieces of foam core you saw in the previous image, I glued those on top of each other and glued them down to the star with a little Glossy Accents. I used foam core here because I knew you wouldn't really be able to see it once all my elements were added and the piece was hung up.
I love the fine tip of Glossy Accents. It really lets you get into some tight and small places. The drying time is much faster on this medium, especially when added in a thin layer, so only use it when you know you won't be needing to adjust anything later. After this little stack of foam was secure, I added some heavy body gel to the back of a small flower and placed it on top of the foam.

I don't want to have to work around the delicate butterfly wings so I save those for last. Instead, I turn my attention to adding a ton of luscious paper flowers! Under the largest flower, I wanted to add some tulle ribbon from the same collection as the paper. I used a needle and thread and did a running stitch to gather the tulle, knotting it off when I was happy with how it looked.
Several photos back you probably saw that pearl bead trim hanging out off to the side. I want to attach this under the largest flower as well. I wanted to ensure that the bead trim stayed clustered nice so I used some excess thread to tie around the top of the bead trim cluster, ensuring the two pieces stayed together (one longer piece folded in half and one shorter piece to create 3 strands of the tassel).
I used heavy body gel to glue down these elements, first holding the tulle to the back of the large flower and then adding the medium and pressing it in place. I then added some heavy body gel to the top of the bead cluster. Gently lifting up one side of the flower with tulle, I pushed the bead cluster under the flower.

After that, it's adding on flowers, layering them up until I'm happy with the shape of the project. In the two photos above, I give you a close up of just how I've layered up some of these flowers.
You can see in the photo on the left that I added a piece of foam core to help pop up another flower. But also of note is the cream and teal flower. In the photo on the right, you can see I've peeled back the tulle the cream and teal flower was glued to. I realized I needed to build up my layer a bit so I popped a small white flower underneath to help support the cream and teal flower. You can also see the purple-pink flower I added on top of the foam core.

I'm almost done! I added in a few more pieces of chipboard above and below the line of flowers on the right side. I also added another flower to the left side, covering the rest of the jute.

Now I'm ready to glue on the butterflies. First I add a little bit of Glossy Accents to the center of the flower in the middle of the resin frame.

Then on top of the drop of Glossy Accents, I add the transparent butterfly wings. I give that a moment to set up then add a thin line of Glossy Accents to the center back of the fussy cut butterflies and then glue them down to my project. I use tweezers to help press them both in place.

I used some Glossy Accents to adhere 3 quartz stones down to my project then moved on to the final step. There are two things I believe in strongly: one, you can never have to many paper flowers and two, you can never have too much bling. Well, okay...maybe you can!
My final step was to use some soft gloss gel to add on sequin stars from the same collection as the papers and some of the flowers. And then, I attached a crescent moon charm to the tulle with some thread and a needle.

And that's it! I know this was a long post, but I hope that seeing these layers being built up will really help you to better create your own layered mixed media project. I certainly think it is easier than trying to zoom in on several of my finished project photos trying to deconstruct it yourself!

On a side note, you can see in the photos that I'm using a Tim Holtz glass media mat. I just got it for Christmas and this is the first mixed media project I've done on it and I'm in love! It is so easy to clean and the black background really helps me see my work more clearly than the brown color of my non-stick mats.

Products Used
Hobby Lobby: Chip Decor - star | Prima Marketing: Moon Child - phases of the moon, let's get lost, light years, new moon, crescent moon, love comet, constellation, say it in crystals, tulle ribbon, metals, sequins; Isabella - Rosalia; Trim - grape jute; Art Alchemy Impasto - boudoir pink, lavender, Snow White; Art Basics - soft gloss gel, heavy body gel; IOD Mould - large fleurish | Ranger: Glossy Accents; Texture Paste - opaque crackle | Dina Wakley: Media - white gesso | Tim Holtz: Distress Ink - hickory smoke; Idea∙ology: quote bands, transparent wings | Recollections: Flower Shoppe - mini white mulberry; Celebrate It - pearl bead trim | Creative Embellishments: Chipboard - flourish set 10, flourish set 11, doily frame set 1

I hope you found this tutorial helpful on how I build up my mixed media layers. There really is no right or wrong way to do mixed media. Just have fun and experiment!
Happy Crafting!
Adrienne
I am an affiliate with Scrapbook.com. When you shop the links below, I receive a small commission from the affiliate, at no additional cost to you. This helps me balance the costs of the time and love I put into my projects and blog so I can continue to share my ideas with you for FREE. If you shop the links, thank you! I greatly appreciate it.
Below are products that I used or similar products.


0 comments
I'd love to hear your thoughts!