Storytelling by Spellbinders: How to Turn the Dancin' Fairy Die Into a Witch
Let's get a little witchy and create a Halloween scrapbook layout with the Spellbinders Dancin' Fairy Twinkle die.
Hey, crafty friends! Today I want to share a fun idea using the Spellbinders Dancin' Fairy Twinkle Die from their Storytelling collection.
Instead of making this little fairy a fairy, I've turned her into a witch. Let's get into how I did just that. (If you want to shop the supplies used, they are all listed at the bottom of this blog!)
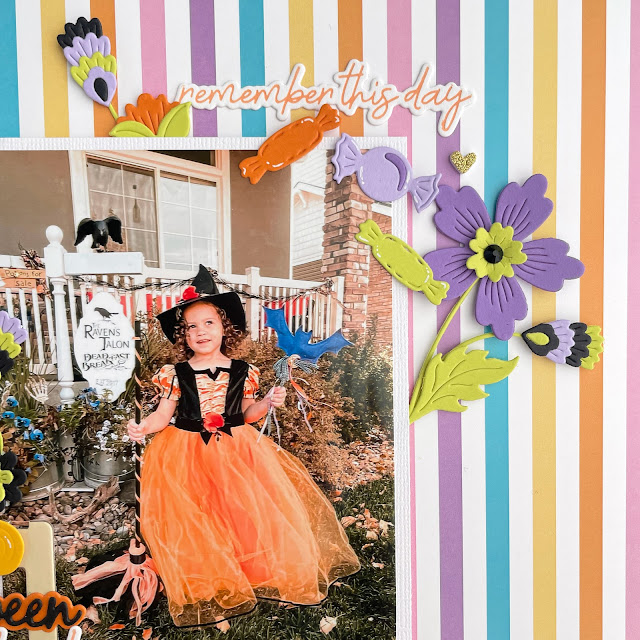
First let's talk about the background of this layout. I used 3 patterns from the Sunshine Prints paper pad, tearing them and using the side that shows the white torn edge. I then attached these to a piece of white 12x12 cardstock. Pro Tip: To save on patterned paper, you don't need to use the full length of the paper for the bottom two layers, just enough to peek out from the patterned paper above.
To make the little witch that matches my niece's witch costume, I die cut the Dancin' Fairy Twinkle die out of various Spellbinders cardstock colors. I cut the body of the dress out twice, then notched the black layer at the top, to make it match my niece's outfit.
But instead of cutting out her wings and the star for her wand, I die cut the witch hat, some bats, the sentiment "Halloween," the pumpkin bucket, and candies from the Halloween Wreath Add-Ons die set. The witch hat is the perfect fit for the top of the fairy's head!
I also die cut a bunch of flowers from the Bayfair Floral Spray die and the letters B and O from the Stitched Alphabet collection as well as the exclamation mark from the Stitched Punctuation and Symbols die set. Then I letterpressed and cut out sentiments from the Friends BetterPress plate.
I stitched my stitching dies with orange embroidery floss. Then adhered all the die cut layers together with liquid adhesive and foam adhesive. I used a foam circle to attach the fairy's legs so that the are allowed to swing back and forth.
I added some white highlights with a gel pen to the pumpkin bucket and candies then assembled everything onto the layout. I popped the hat on the witch, then added some flowers to her hat and dress to match my niece's. I also included a chipboard sticker that holds the "Halloween" die and "fun & laughs" BetterPress sentiment.
The finishing touch was adding on some gems to flower centers and as an accent on the page. And of course I created a cute little card with this die as well, as she was intended to be made!
I hope that you love this fun take on the fairy die and how it can be more versatile. Until next time, happy crafting!
Adrienne
Shop the Supplies:
Scrapbook.com, A Cherry On Top, Spellbinders, Sizzix & Amazon
I am an affiliate with multiple companies. When you shop the links below, I receive a small commission from the affiliate, at no additional cost to you. This helps me balance the costs of the time and love I put into my projects and blog so I can continue to share my ideas with you for FREE. If you shop the links, thank you! I greatly appreciate it.
Below are products that I used for this project.


0 comments
I'd love to hear your thoughts!