
DIY Bookmarks with Ribbon Tassels
Want a super easy and fun craft you can make for a book lover? These Bookmarks are a breeze to put together with only a handful of materials!

Hello, crafty friend! I'm an avid book lover, though I haven't been able to enjoy reading much these days with all of my work and craft obligations...perhaps this little craft will encourage me to get more books back into my hands. But enough about me. Whether it's you who loves reading, or someone else you know, this little craft is easy and fun and makes the perfect companion for a book.

Prima's ephemera, papers, paper stickers and rub-on transfers are perfect for creating a bookmark. Now I'm used to creating super dimensional craft, so this project was actually a challenge for me, but I think they turned out so cute! I've got all the supplies I used listed below, so let's just get right into this tutorial!
Start by cutting out a bookmark from some patterned paper. I went with a little tag shape and used two layers of paper just to make it nice and sturdy for those who turn items into something that I would call "well loved." A paper trimmer, a ruler, pencil and scissors will help you get that tag-like shape, but if you want a tool that makes it super easy to get diagonal cuts, I highly recommend the Sizzix Scoring Board and Trimmer Tool. The mint ruler can rotate so you get perfectly even and symmetrical cuts each time!

Now, your bookmark should be as big or as little as you want--just take into consideration the size of the embellishments you want to add. But for size reference, I used the Buttons & Keepsakes 12x12 paper pad to make mine, and cut them to 8 1/4 inches tall by 3 1/4 inches wide for the base paper layer.

I also distressed the edges of both of the sheets of patterned paper to add to that shabby chic look that this collection has, then glued the two layers together. Once your layers are glued together, punch a hole in the top and set it with an eyelet.

Now you can get to decorating! Remember, you want to give this as little dimension as possible so it sits nicely inside a closed book. So focus on embellishments like paper ephemera, paper stickers, rub-on transfers, or die cut cardstock with minimal layers.

I started out by adding some of the Buttons & Keepsakes A4 Transfers. One bookmark got the ribbon and the other a cluster of flowers. Simply cut these transfers out, peel of the backing and place the transfer onto your paper. Rub across the transfer with the provided wooden stick (or, like me, the Redesign Transfer Tool which is a little more ergonomic), then slowly and carefully peel of the transfer sheet. I like to hold the transfer sheet down with a finger in one place as I peel it back. That way, if I missed a spot, I can lay it back down without having to line it all up. Rub any spots you missed before fully peeling the transfer sheet off.
Next, I arranged some of the ephemera and paper stickers from the Buttons & Keepsakes collection onto the bookmarks. I used both the Quilted Memories and Cherished Companions ephemera packs. I added frames, a doll or bear, some buttons, foiled sentiments and more. I also added some foiled sentiments using my Glimmer and Platinum systems plus the Heirloom Words Press & Foil Plate coordinate from Spellbinders. I used their smooth Classic White cardstock and their Blush Hot Foil.

Now let's talk about the tassel, because I think it's the real star of the show! We'll be adding some beads to the top of this tassel, but I wanted some plain wooden beads to be a bit more sparkly. I applied Finnabair's Celestial Wax to the wooden beads--I used two sizes for both bookmarks. I also got some pearls and crystal beads ready by placing them into a dish with the wooden beads so they would be easy to grab when I was ready to start stringing them on. Make sure you choose some beads with a larger hole as you'll need these beads to be able to be strung onto twine that has been doubled up.

Now gather up all those ribbons and trims you love! I used a bunch from my stash, including lace trim, velvet ribbon, pom pom trim, seam binding (aka crinkle ribbon), chiffon ribbon, and some soft cotton twine. Some of these are from other Prima collections, like The Homemaker Spools of Yarn (twine) and the chiffon ribbon from Lost in Wonderland.

Cut a bunch of these into strips. These will be folded in half, so whatever the finished length of the tassel you want, double that measurement. I cut mine around 14 inches long so my tassel is around 7 inches long. And because mine is shabby chic style, I wasn't exact on all the measurements, and I also didn't bother to clean up the bottom of the tassel by trimming things--I think the uneven lengths adds to the texture of it. But you do whatever makes your heart happy!

Set aside two lengths of twine and one of the ribbons--we'll be tying it all up with these. Then gather the rest of the ribbons and trim into a pile and then bend them into an upside down U. Take 1 of the twine pieces you set aside and carefully place it under the center of the U of ribbon and tie it nice and tight around the stack of ribbons and trim--I gave mine a nice double knot.

Keep this piece of twine in your hand, holding it up and pull the stack of ribbons and trim down to create the tassel shape. Then take the second twine and place it near the top of the tassel, laying it perpendicular to the tassel. Arrange your tassel ribbons and trim however you like, then tie the second twine around the ribbons and trim to create that little "bulb" at the top of a tassel. I also gave this a good double knot.
Then take your ribbon and tie it around this second twine you just tied to give it a more finished look. I tied it into a bow. You can use a little hot glue to secure this bow so that it never comes untied.

Now let's string the beads onto the piece of twine that we pulled up. You might find it helpful to put a tapestry needle onto the end of this twine to help you get the beads on easily. Or, you could add a little washi tape to the ends of the twine to keep the twine from unraveling as you string beads on. Another option is to rub the end of your twine onto some beeswax or canning wax. Just keep in the mind the diameter of the hole in your beads as you need the needle/tape needs to be able to pass through the hole of the bead.

Start by stringing the largest bead on and then finishing with the smallest bead. If your needle and twine is a bit tight for the hole of the bead, you can use some pliers to help you get more leverage and pull the eye of the needle and twine through the bead easier. To keep the beads from falling off while you add the tassel to the bookmark, tie a double knot at the top of the beads to keep them in place.

I sewed on a little metal charm to one of the lace trims on each bookmark. The scissor charms from My Sweet match perfectly and I just used a little white thread to hand sew them on. I also added one of the flowers from Buttons & Keepsakes Tattered Millinery to the tassel. Stemmed flowers are perfect for tucking into a bow. Simply cut off a bit of the excess wire stem using wire cutters or large titanium scissors. Add a dab of hot glue to the base of the flower and pop it onto the tassel--I stuck it right above the center of the bow, pushing the wire stem underneath the bow. Make sure to angle the flower how you want before the glue sets.

Once your beads are on, string the end of the twine through the top hole in your bookmark. I brought the ends of the twine through the back and up, split the two ends apart and wrapped them around the twine coming up from the back, taking them in opposite directions and bringing the ends back around the front. Then I tied the ends into a double knot. I left the ends long and didn't trim off the twine.
And now you have the perfect little handmade bookmark that is ready to be tucked into your current read or for gifting to that book lover in your life! Happy crafting and reading!
Adrienne
Shop the Supplies:
Scrapbook.com, A Cherry On Top, Sizzix, Prima Marketing, Spellbinders, Scrap Diva Designs, Etsy & Amazon
I am an affiliate/associate with multiple companies. When you shop the links below, I receive a small commission from the affiliate on qualifying purchases, at no additional cost to you. This helps me balance the costs of the time and love I put into my projects and blog so I can continue to share my ideas with you for FREE. If you shop the links, thank you! I greatly appreciate it.
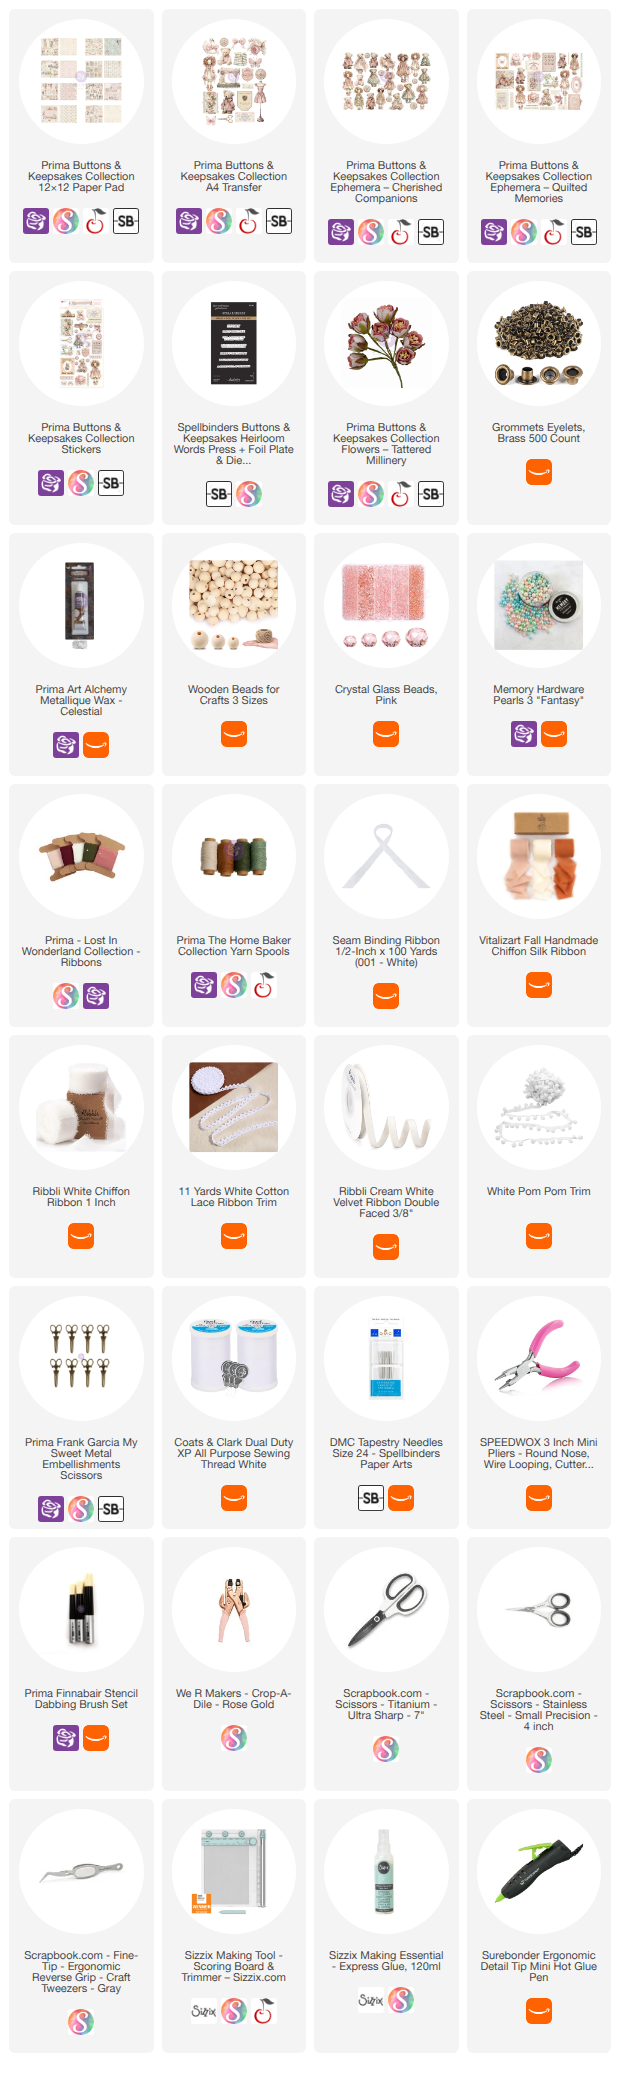
Below are products that I used for this project.


0 comments
I'd love to hear your thoughts!